INTERFACOM, S.A.
Inst TX52_TX40_007_en.doc 3
1. MECHANICAL INSTALLATION
TX52 is fixed to the dashboard with an adhesive bracket. If the surface is rough, so adhesive
is not possible, the bracket base can also be fixed to the dashboard with screws
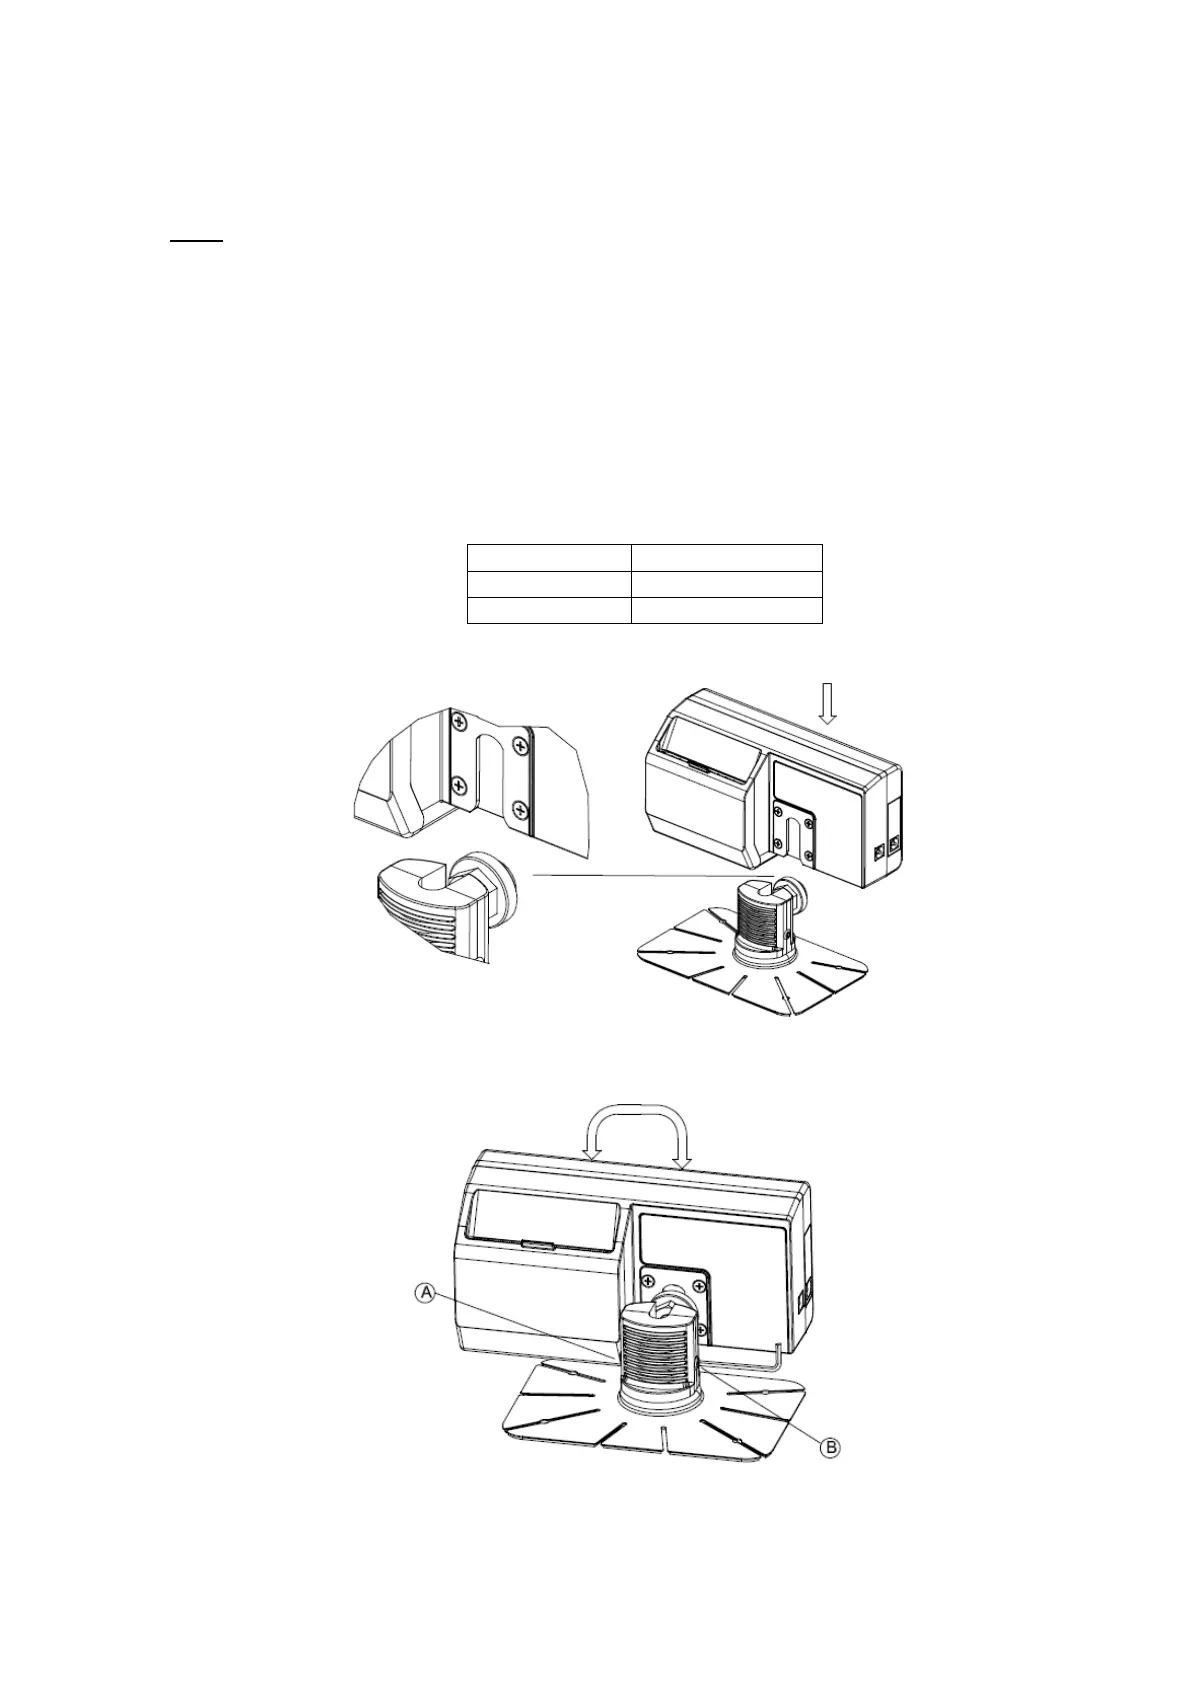
On a taximeter with integrated printer, it is necessary to leave some space on the back side
to allow opening the printer cover, in order to be able to change the paper.
1. The surface must be clean and dry. Clean it with a mix of isopropilic alcohol and water.
2. Take out the adhesive protector, and adhere the bracket with strong and uniform force. If
necessary, bend the flaps to adapt it to the dashboard shape
3. The adhesive resistance increases as it dries..
4. Insert the taximeter onto the bracket, and adjust heighth and orientation
5. Tighten screws A and B to fix the position and orientation.