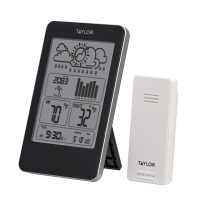
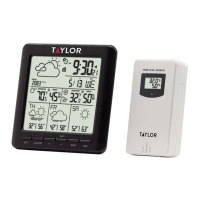
TEMPERATURE READINGS
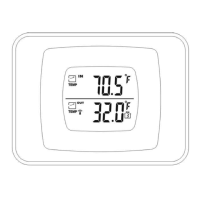
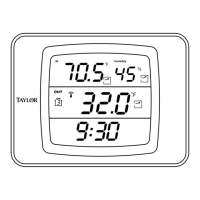
● The base unit displays the indoor temperature (“INDOOR”) from its location.
● The remote sensor transmits outdoor temperature (“OUTDOOR”) from its location back to the base unit.
● To switch between outdoor or auto scroll displays, press the “UP/CH” (up/channel) button.
- A Channel icon (CH1, CH2, or CH3) = indicates which remote sensor’s readings are displayed.
- The “ ” icon = indicates the auto scroll option is on. The base unit will automatically scroll between indoor
readings and remote sensor readings and display each for 5 seconds.
● To switch between Fahrenheit and Celsius temperature displays:
- Base unit - Press the “DOWN/CF” button on the base unit to change the temperature readings on the base
unit. Both indoor and outdoor readings will display in °F or °C.
- Remote sensor - Press the “C/F” button inside the battery compartment of the remote sensor to change the
temperature display on the remote sensor. (Only the remote sensor display will change; the base unit
display will not change.)
CLOCK FEATURES
A) Clock Setting
1. Press and hold the “SET” button for 2 seconds to enter Clock Setting mode. “24 Hr” or “12 Hr” blinks.
2. Press the “UP/CH” or “DOWN/CF” button to toggle between 12 and 24 hour clock mode. Press “SET” to
confirm. The hour digits blink.
2. Press “UP/CH” or “DOWN/CF” to change the hours. Press “SET” to confirm. The minute digits blink.
3. Press “UP/CH” or “DOWN/CF” to change the minutes. Press “SET” to confirm. A language selection blinks
in the “DAY” window below the clock digits.
4. Press “UP/CH” or “DOWN/CF” to toggle between language selections. Press “SET” to confirm the displayed
language. The year digits blink.
(Note: ENG = English, FRE = French, NET = Netherlands, ESP = Spanish, DAN = Danish, GER = German)
5. Press “UP/CH” or “DOWN/CF” to change the year. Press “SET” to confirm. The month digit blinks.
6. Press “UP/CH” or “DOWN/CF” to change the month. Press “SET” to confirm. The date digit blinks.
7. Press the “UP/CH” or “DOWN/CF” button to change the date. Press “SET” to confirm. The hour and minute
digits reappear instead of the year digits. The clock is set.
Notes: If no buttons are pressed within 15 seconds, the unit will automatically exit Clock Setting mode.
Until a time has been set, the clock will count up the time since battery installation.
B) Alarm Setting – this unit features 2 alarm settings. To set an alarm:
1. Press the “SET” button to switch the clock display to Alarm 1 (“A1”).
2. Press and hold “SET” for 2 seconds to enter Alarm Setting mode. The alarm hour digits blink.
3. Press “UP/CH” or “DOWN/CF” to change the hours. Press “SET” to confirm. The minute digits blink.
4. Press “UP/CH” or “DOWN/CF” to change the minutes. Press “SET” to confirm.
5. Press “ALARM”. The Alarm Bell Icon 1 (“ ”) appears above the hour digits, indicating Alarm 1 is active.
6. Press “SET” to switch the display to Alarm 2 (“A2”). Repeat steps to set Alarm 2. The Alarm Bell Icon 2
(“ ”) appears above the minute digits, indicating Alarm 2 is active. Press “SET” to return to the clock display.
OR
If you only wish to set one alarm, press “SET” until the clock display appears.
C) To Silence Alarms:
● To silence an alarm for 5 minutes, press the “SNOOZE” button.
● To stop the alarm for one day, press any button except “SNOOZE”. If the alarm bell icon still appears on
the screen, the alarm will sound again the next day.
● To deactivate an alarm, press the “ALARM” button until the desired Alarm Bell Icon (“ ”) disappears.
(You may do this while viewing either the Clock display or the Alarm display.)
- One Alarm Bell icon = indicates one alarm will ring at the set time (Alarm 1 or Alarm 2).
- Two Alarm Bell icons = indicates both alarms will ring at the set time.
- No Alarm Bell icons = no alarms will ring; both are deactivated.
Note: If no buttons are pressed within 15 seconds, the unit will automatically exit Alarm Setting mode.
D) To View Clock or Alarm Displays
Press the “SET” button to toggle between the Clock, Alarm 1 and Alarm 2 displays.
 Loading...