EasyManua.ls Logo

TCL C815 Series - User Manual

TCL C815 Series
20 pages
Print Icon
To Next Page IconTo Next Page
Loading...
P715/C815/X10 SERIES
Question and Answer IconNeed help?

Do you have a question about the TCL C815 Series and is the answer not in the manual?

Summary

Chapter 1 Safety Information

Precautions

Read all instructions before operating the set for future use.

Warning

Never place TV in an unstable location; many injuries can be avoided by simple precautions.

Use Environment Guidelines

Avoid unstable surfaces, ensure ventilation, avoid damp/cold areas, excessive heat, naked flames, liquids, or dust.

Chapter 2 Connections and Setup

Connections and Setup

TV Sockets Explained

Details various sockets like HDMI, AV IN, ANTENNA IN, LAN, SPDIF, Headphone, USB 2.0.

Network Connection Guide

Explains the need for internet, wired and wireless connection methods.

Switching On the TV

Instructions for installing batteries, connecting power cable, aerial, and turning on the TV.

Chapter 3 Basic TV Operations

Basic TV Operations

Using System Settings Menu

How to access and navigate the system settings menu for various adjustments.

Chapter 4 Using more of your TV

Using more of your TV

Reset Shop to Factory Defaults

How to reset the TV to factory default settings.

Chapter 5 Other Information

Problems & Solutions Guide

Lists common problems and their solutions for network functions.

Other Information

General Troubleshooting

General troubleshooting list for common TV problems like no picture, no sound, no colour.

Overview

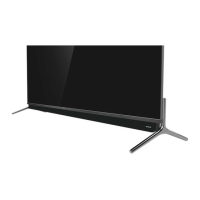
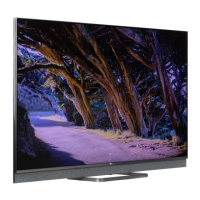
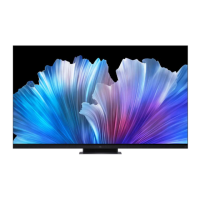
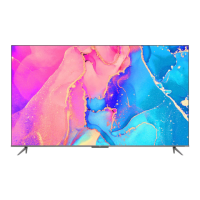
This document is an operation manual for a TCL Android TV, specifically for the P715, C815, and X10 series. It provides comprehensive instructions on how to set up, operate, and maintain the television, covering various features from basic TV functions to advanced smart TV capabilities.

Safety Information

The manual begins with crucial safety information to ensure the safe operation and longevity of the TV. It warns against placing the TV in unstable locations to prevent falls and potential injury, especially to children. Users are advised to use manufacturer-recommended cabinets or stands that can safely support the TV and to avoid placing it on tall furniture without proper anchoring. It also emphasizes the importance of educating children about the dangers of climbing on furniture to reach the TV.

Regarding the product itself, the manual instructs users not to block ventilation openings, push objects into cabinet slots, or attempt to open the cabinet, as these actions could lead to fire, electric shock, or damage. It also advises against touching or impacting the screen surface with hard pressure to prevent scratches or severe damage. The appliance is not intended for use by young children or infirm persons without supervision.

For power and plug safety, users are instructed to unplug the TV if it will not be used for a long time, if the power cord or outlet is damaged, or if the set has been impacted or dropped. It highlights that the mains plug or appliance coupler should remain readily operable as a disconnect device. The power cord and signal cable should be protected from being rested on, rolled over, or trampled, and should not be overloaded or exposed to moisture.

The use environment section advises against placing the TV on unstable surfaces, near damp or cold areas, or exposing it to excessive heat, direct sunlight, fire, or naked flame sources. It also warns against exposing the set to dripping or splashing liquids. The operating temperature range is 5°C to 35°C, with humidity between 20% and 80% (non-condensing).

Cleaning instructions recommend using a soft, clean cloth or special liquid cleaner for the screen and cabinet, warning against excessive force or using water or other chemical cleaners that could damage the screen surface.

For wall mounting, the manual states that this operation requires two people and provides safety notes such as checking wall support, following mounting instructions, installing on a vertical wall, using suitable screws, and ensuring cables are placed to avoid tripping hazards. It also notes that wall mount brackets are not included and that some TV models are not designed for wall mounting.

Connections and Setup

This section details the physical connections and initial setup process for the TV.

TV Buttons: The TV has a multi-function button that acts as a power on/standby button and a controller for a multi-function menu. When the TV is on, pressing this button displays a menu with options like Poweroff, CH+, CH-, Volume+, Volume-, and Source. Users can navigate this menu by pressing the button to move the highlight and pressing and holding for more than 2 seconds to confirm a selection. There's also a MIC switch located next to the power button for hands-free TV voice control (not available on all models).

Initial Setup: The first time the TV is switched on, a "Welcome" wizard guides the user through initial setup steps, including language selection and network connection. Users can either make a choice or skip steps, with the option to complete skipped steps later from the settings menu.

Sockets: The manual illustrates and describes various sockets:

  • HDMI, HDMI(ARC) or HDMI(SERVICE) socket (input): For connecting Blu-ray players, PCs, DVD players, or digital satellite decoders, providing uncompressed video and audio data.
  • AV IN adapter socket: For connecting video recorders, camcorders, decoders, satellite receivers, DVD players, or game consoles via composite video connection.
  • ANTENNA IN socket (input): For connecting an outside aerial or coaxial cable from a cable box.
  • LAN: RJ45 plug for connecting to an external modem or network access equipment.
  • DIGITAL AUDIO OUT (OPTICAL) socket: For connecting a compatible digital audio receiver.
  • Headphone socket (output): For connecting headphones or stereo earphones, with a warning about potential hearing loss from excessive sound pressure.
  • USB2.0 socket (input): For connecting USB 2.0 devices. The number of USB sockets may vary by model.

Remote Control Functions: The manual details the functions of two remote control models, RC802N and RC602S.

  • Common functions: Power on/standby, mute, numeric buttons for channel selection, LIST for channel list, volume control, programme information, Settings menu, channel change, Smart TV homepage, Option menu, navigation buttons, OK to confirm, return/quit app, input source, exit Settings, audio language, EPG, Teletext, subtitle language, and colour buttons for HbbTV functions.
  • Playback controls: Fast reverse, pause, fast forward, record, and playback.
  • Netflix button: Direct access to the Netflix application (not available for some models).
  • RC602S specific: Includes a virtual remote control keyboard button and a Google Assistant button for voice control (requires network connection).

Installing Batteries: Instructions are provided for both remote controls: push to open the back cover, insert two AAA batteries according to polarity, and replace the back cover. Precautions for battery use include using specified types, correct polarity, not mixing new and used batteries, avoiding rechargeable batteries, protecting from excessive heat, and removing batteries if not used for long periods.

Network Connection: The TV requires an internet connection for all functions, and data usage charges may apply. Users need a high-speed broadband internet service. The TV can connect via wired (RJ45 LAN) or wireless (internal wireless or external USB adapter). Instructions are provided for both:

  • Wired: Requires an Ethernet cable, a router/modem with an available Ethernet port, and a high-speed internet connection. Users connect the Ethernet cable to the router and the TV's Ethernet port, then configure the TV using the "Network & Internet" menu.
  • Wireless: Requires a router broadcasting a high-speed wireless signal and a high-speed internet connection. Users configure the TV using the "Network & Internet" menu. To access the "Network & Internet" menu, users press the homepage button, navigate to "Settings," and select "Network & Internet."

Switching On/Off:

  • Switching On: Insert batteries into the remote, connect the power cable to the TV and then to a mains socket. Connect an outside aerial to the ANTENNA IN socket. The TV will either turn on directly or go into standby mode. Press the power button on the remote or TV to turn it on.
  • Switching Off: Press the power button on the remote to put the TV into standby mode (low energy consumption). To fully switch off, unplug the mains socket.

Basic TV Operations

This section covers fundamental TV functions and how to access them.

Accessing Channels:

  • RC802N Remote: Use numeric buttons for direct access, P∧/V buttons to scroll, or the LIST button to display the channel list and navigate with ▲/∇//► and OK.
  • RC602S Remote: Use / buttons to scroll, OK button to display the channel list and navigate with ////</>, or P∧// buttons to scroll. The button displays a virtual remote control keyboard for numeric input.

Watching Connected Devices: Press the source button on the remote to display the source list, then use ▲/∇ to select TV or other input sources and press OK. Alternatively, from the homepage, navigate to the (Inputs) area, press OK, then select the desired input source.

Adjusting Volume: Use the ┼— buttons on the remote or TV to increase/decrease volume. Press the mute button to temporarily mute/unmute sound (RC802N only).

Accessing Smart TV Homepage: This feature allows access to Internet Applications (Apps) and adapted Internet websites, and system settings. Users press the homepage button, then navigate with ▲/▼/◄/► and OK to enter desired apps, functions, or settings. The back button returns to the homepage, and navigating to the (Inputs) area and selecting an input source exits the homepage. It's recommended to wait a few minutes after TV activation from standby for Smart TV features to fully load.

Accessing Google Play: Google Play offers a wide range of entertainment, including music, movies, TV, books, magazines, apps, and games.

Accessing T-Channel: This allows users to enjoy Internet Applications (Apps). Users press the T-Channel button, navigate with ▲///► and OK to enter desired apps. First-time use will automatically download apps. The back button returns to the recommend page.

Using System Settings Menu: This menu allows adjustment of device settings like Network & Internet, Accounts & Sign-In, Apps, Device Preferences, and other preferences. Users press the Settings button, navigate with ▲/▼ and OK/‣ to select items and submenus. The back button returns to the previous menu, and EXIT or Settings closes the menu. Some options may not be available for certain signal sources. The "LED Motion clear" setting can improve fast-moving images but may make the picture darker and more flickering.

Using Instant Power On: This feature enables faster TV startup from standby but increases standby power consumption. Users can toggle it On or Off via Settings > Device Preferences > Power > Instant power on.

Using TV Options Menu: This menu allows adjustment of TV settings such as picture and sound. Users press the Settings button, navigate with ▲/▼ and OK/‣ to select items and submenus.

Using More of Your TV

This section delves into advanced features and functionalities.

Installing Channels: Instructions for automatically searching and storing channels are provided. This is useful when there are no channels in TV mode or when users want to update channels.

  1. In TV mode, press the Settings button, select Channel > Channel scan, and press OK/‣.
  2. Select Country/Region, enter the password (default 1234), and confirm.
  3. Select Automatic search and press OK/‣.
  4. Select Channel type (Digital, Analogue, or Digital&Analogue).
  5. Select Search and press OK to start scanning.
  6. After scanning, channels are arranged. Users can hide or move channels via Channel > Channel organizer. The manual notes that if only analogue channels are retrieved, it might be due to poor broadcasting.

Using Subtitles: Subtitles can be enabled for each TV channel, broadcast via Teletext or DVB-T digital broadcasts.

  • Turning On/Off Subtitles: Via Settings > Channel > Subtitle, select On or Off.
  • Enabling Subtitle Languages on Digital TV Channels: Via Settings > Channel > Subtitle > Digital subtitle language 1st/2nd, select preferred languages.
  • Selecting a Subtitle Type on Digital TV Channels: Via Settings > Channel > Subtitle > Subtitle type, select a type, including "Hearing impaired." A shortcut for RC802N remote users is the SUBT. button.

Using Teletext:

  • Selecting Decoding Page Language: Via Settings > Channel > Teletext > Decoding page language, select the desired language.
  • Digital Teletext Language: For digital TV channels, select a primary language via Settings > Channel > Teletext > Digital teletext language to access different initial Teletext pages.

Network Wake Up: This function allows turning on the TV from standby via a network. Requirements include an effective home network, the controller (e.g., smartphone) being on the same network, and an app supporting network waking up (e.g., YouTube) installed on the controller. Networked standby must be enabled in the TV's "Network & Internet" settings.

T-Link (CEC): This function searches for CEC devices connected to HDMI sockets and enables auto power on/standby between the TV and CEC devices. Users can enable or disable T-Link via Settings > System > T-Link. "Auto Power On" allows the TV to power on automatically when a CEC device is powered on. "Auto Standby" allows all CEC devices to go into standby when the TV is turned off. The manual notes that CEC functions depend on connected devices and may not always interoperate correctly.

T-Cast: T-Cast offers videos, applications, and content sharing on the large screen. It also allows a smart device to function as a sophisticated remote control. Users scan a QR code on the TV screen to download the T-Cast app. It requires the smart device and TV to be on the same home LAN or network segment.

Using EPG (Electronic Programme Guide): EPG displays scheduled digital TV programmes.

  1. Access EPG via Settings > Channel > EPG or by pressing the GUIDE button (if available).
  2. Navigate programmes using ▲/// buttons.
  3. Use on-screen buttons for programme filters (to display type list), custom schedules (to set reminders or recordings), and selecting dates. RC602S remote users need to press the virtual keyboard button to access colour buttons. The back button exits EPG.

Bluetooth Function: (Not available for some models) Bluetooth allows wireless data exchange between Bluetooth devices. Users can connect Bluetooth audio devices, mice, or keyboards.

  1. Press the Settings button, navigate to Remotes & Accessories, select Add accessory, and press OK.
  2. The TV searches for nearby Bluetooth devices.
  3. Select an available device and follow on-screen guides to connect. The manual notes that 2.4GHz frequency used by Bluetooth can interfere with Wi-Fi access points, routers, or microwave ovens, advising users to restart devices or move closer to the TV to reduce interference.

Time Shift: (Not available for some models) This feature allows pausing, fast-forwarding, and rewinding live TV. A USB drive must be connected and set up first.

  1. Access Time shift via Settings > Channel > Time Shift and set to On.
  2. Follow on-screen directions for disk setup.
  3. After setup, time shift starts, and the menu displays.
  4. Pressing the stop button exits time shift. Notes: Back up USB drive data before connecting. A USB drive with at least 1GB free space and a speed faster than 5.0MB/sec is recommended. Larger free space allows longer recordings. For RC802N, pressing PAUSE(II) directly accesses time shift.

PVR (Personal Video Recorder): (Not available for some models) This feature allows recording TV programmes. A USB drive must be connected first.

  1. Access PVR via Settings > PVR.
  2. Select Record to start recording automatically.
  3. Press the blue button to access Settings and adjust recording duration.
  4. Press OK or the stop button to stop recording manually.
  5. The PVR mini pane shows recording progress.
  6. To watch recordings, exit PVR mode, then select PVR > PVR list, and play the desired file. Notes: This feature is for digital non-encrypted channels only. Back up USB drive data. Larger free space allows longer recordings. Changing channels or signal sources during recording will stop the current recording. The TV may not play files if parameters exceed system limitations, format is not supported, or the file is damaged.

Freeview Plus: This aggregated TV service offers a 7+ day EPG, Catch Up TV content, featured recommendations, genre browsing, and reminders. It requires a high-speed broadband internet connection and an aerial. To launch, users press the corresponding colour key when prompted on screen. Freeview Plus uses HbbTV technology.

HbbTV: (Hybrid broadcast broadband TV) This service offers interactive television over broadband Internet, including digital teletext, EPG, games, voting, interactive advertising, and Catch Up TV.

  • HbbTV Access: Via Settings > System > HbbTV settings, set HbbTV to On. When tuning to a digital TV channel offering HbbTV, an on-screen indication (usually a red button) will appear. Press the indicated colour button to open interactive pages.
  • HbbTV Deactivation: Via Settings > System > HbbTV settings, set HbbTV to Off to avoid disturbances.

Works with Alexa: This function allows control of the TV using an Amazon Echo or Echo Dot device (sold separately). Users set up their Amazon device, then go to TV Settings > System > "Works with Alexa" and follow prompts. The TCL Assistant Skill must be enabled in the Alexa app.

Netflix Settings: Netflix provides on-demand movies and TV shows via the Internet, requiring an unlimited membership. It can be accessed directly via the Netflix button on the remote control.

Reset Shop: This function resets the TV to factory default settings.

  1. Access Settings > Device Preferences > Reset and press OK/‣.
  2. Select Factory data reset, then Erase everything, and confirm.
  3. Enter the password (default 1234).
  4. Confirm to start the Initial setup wizard.

Password in Parental Control: The default password is 1234. The super password is 0423, which can override existing codes if the user forgets their password.

Using the Hands-free TV Voice Control: (Not available for some models)

  1. Turn on the built-in MIC switch (next to the power button).
  2. Access the Android TV homepage.
  3. Select Settings > Quick Settings > 'Ok Google' detection and turn it on, or via Settings > Device Preferences > Google Assistant > 'Ok Google' detection.
  4. Say "OK Google" to activate. Notes: Availability depends on region/country/language/model. A quiet environment and a recommended distance of within 2 meters are ideal. Turn off the MIC switch or 'Ok Google' detection if not in use, as enabling it increases standby power consumption.

Other Information

This section provides troubleshooting tips and legal statements.

Problems & Solutions: A comprehensive list of common TV problems and their solutions.

  1. Fail to link to the network: Check network connection, reboot TV, consult ISP, ensure router is powered on and connected to the internet, test connection with a computer.
  2. Video could not be played smoothly: For USB videos, it might be due to data transmission or unsupported code flow. For internet/online videos, it could be low network bandwidth, peak internet usage, or other devices on the network consuming bandwidth.
  3. Two mobile hard disks connected simultaneously not recognized: Mobile hard disks consume a lot of power; use only one or a low-power disk.
  4. Video from mobile hard disk (USB) playing with no sound: The audio format might not be supported by the TV player.
  5. Some videos fail to play: Video formats might not be supported, especially those from certain cameras with private protocols.
  6. Video stops playing midway: Mistakes during copying or compressing videos can cause this.
  7. SW updating considerations: No power cuts during update, avoid remote control operations, updating time depends on internet speed.
  8. No distinct changes after SW updating: Updates may improve performance without changing the user interface.
  9. SW updating stops due to power-off: If updating via USB, do not pluck the USB; restart TV to continue. If via Network, restart TV and check functionality.
  10. USB devices not detected after accessing Media: Mobile hard disk issues (damaged, low voltage); try increasing power supply by inserting both USB plugs into TV's USB ports simultaneously.
  11. External device cannot be recognized: Some external devices (webcam, smartphone, tablet, game handle, wireless adapter) may not be compatible with the TV or supported for certain functions. Try a similar device or contact the dealer.
  12. Voice search does not work: Check if remote control is paired, language setting is correct, and Google server is available.

Troubleshooting: More general troubleshooting for common issues.

  • No picture, no sound: Check fuse, power outlet, power plug contact, signal source.
  • No colour: Change colour system, adjust saturation, try another channel.
  • Remote control does not work: Change batteries, check battery installation, ensure main power is connected.
  • No picture, normal sound: Adjust brightness and contrast, check for broadcasting failure.
  • Normal picture, no sound: Increase volume, unmute sound, change sound system, check for broadcasting failure.
  • Unorderly ripples on the picture: Caused by local interference (cars, daylight lamps, hair driers); adjust antenna.
  • Snowy dots and interference: Weak signal in fringe areas; adjust antenna position/orientation, check connection, fine tune channel, try another channel, or install a special antenna.
  • Ignition: Black spots/horizontal streaks/fluttering caused by interference from car ignition, neon lamps, electric drills, or other electrical appliances.
  • Ghost: Caused by reflected TV signals; adjust antenna direction/position.
  • Radio frequency interference: Produces moving ripples/diagonal streaks/loss of contrast; find and remove the source. The manual also advises removing all labels from the TV front panel and screen for better visual experience.

Legal Statement: This section outlines the legal terms regarding TCL SmartTV products.

  • Content and Services: Features, applications, and services may vary by device and territory. Some may require additional peripheral devices or membership fees. Content availability is subject to change without notice.
  • Third-Party Content: All content and services are from third parties and protected by intellectual property laws. They are provided for personal noncommercial use only. Users cannot modify, copy, republish, upload, post, transmit, translate, sell, create derivative works, exploit, or distribute any content without authorization.
  • Disclaimer: Use of the device is at the user's sole risk. TCL disclaims all warranties regarding satisfactory quality, performance, accuracy, fitness for purpose, quiet enjoyment, and non-infringement. TCL does not guarantee accuracy, validity, timeliness, legality, or completeness of content or services, nor that they will meet requirements or be uninterrupted/error-free.
  • Liability: TCL is not liable for direct, indirect, incidental, special, or consequential damages, attorney fees, or expenses arising from the use of the device or any content/service.
  • Service Changes: Third-party services may be changed, suspended, removed, terminated, or interrupted without notice. TCL makes no representation that any content/service will remain available for any period. TCL disclaims responsibility for any changes, interruptions, or suspensions. TCL may impose limits on use or access without notice or liability. Customer service for content/services should be directed to the respective providers.

The manual concludes with information about HDMI, HEVC, Dolby Vision Atmos, Bluetooth, Freeview Plus, and DTS-HD trademarks and licensing. It also provides contact information for TCL Electronics Australia Pty Ltd.

TCL C815 Series Specifications

General IconGeneral
Display TypeQLED
Resolution4K UHD (3840 x 2160)
HDRHDR10+, Dolby Vision
Operating SystemAndroid TV
Sound TechnologyDolby Atmos
Refresh Rate60 Hz
Voice ControlGoogle Assistant
HDMI Ports3
USB Ports2
BluetoothYes
ProcessorQuad-core
RAM2GB
Storage16GB
Wi-Fi802.11ac
Screen SizeAvailable in 55, 65, 75 inches
Speaker Output20W

Related product manuals