Let’s Get Started!
Installation & Assembly Instructions
Note: Your unit must be placed on a solid, flat, and level foundation. Only role on smooth,
flat surfaces. Use caution when rolling on carpet and take measures to protect rolling on
wooden floors. Do not try to roll over objects.
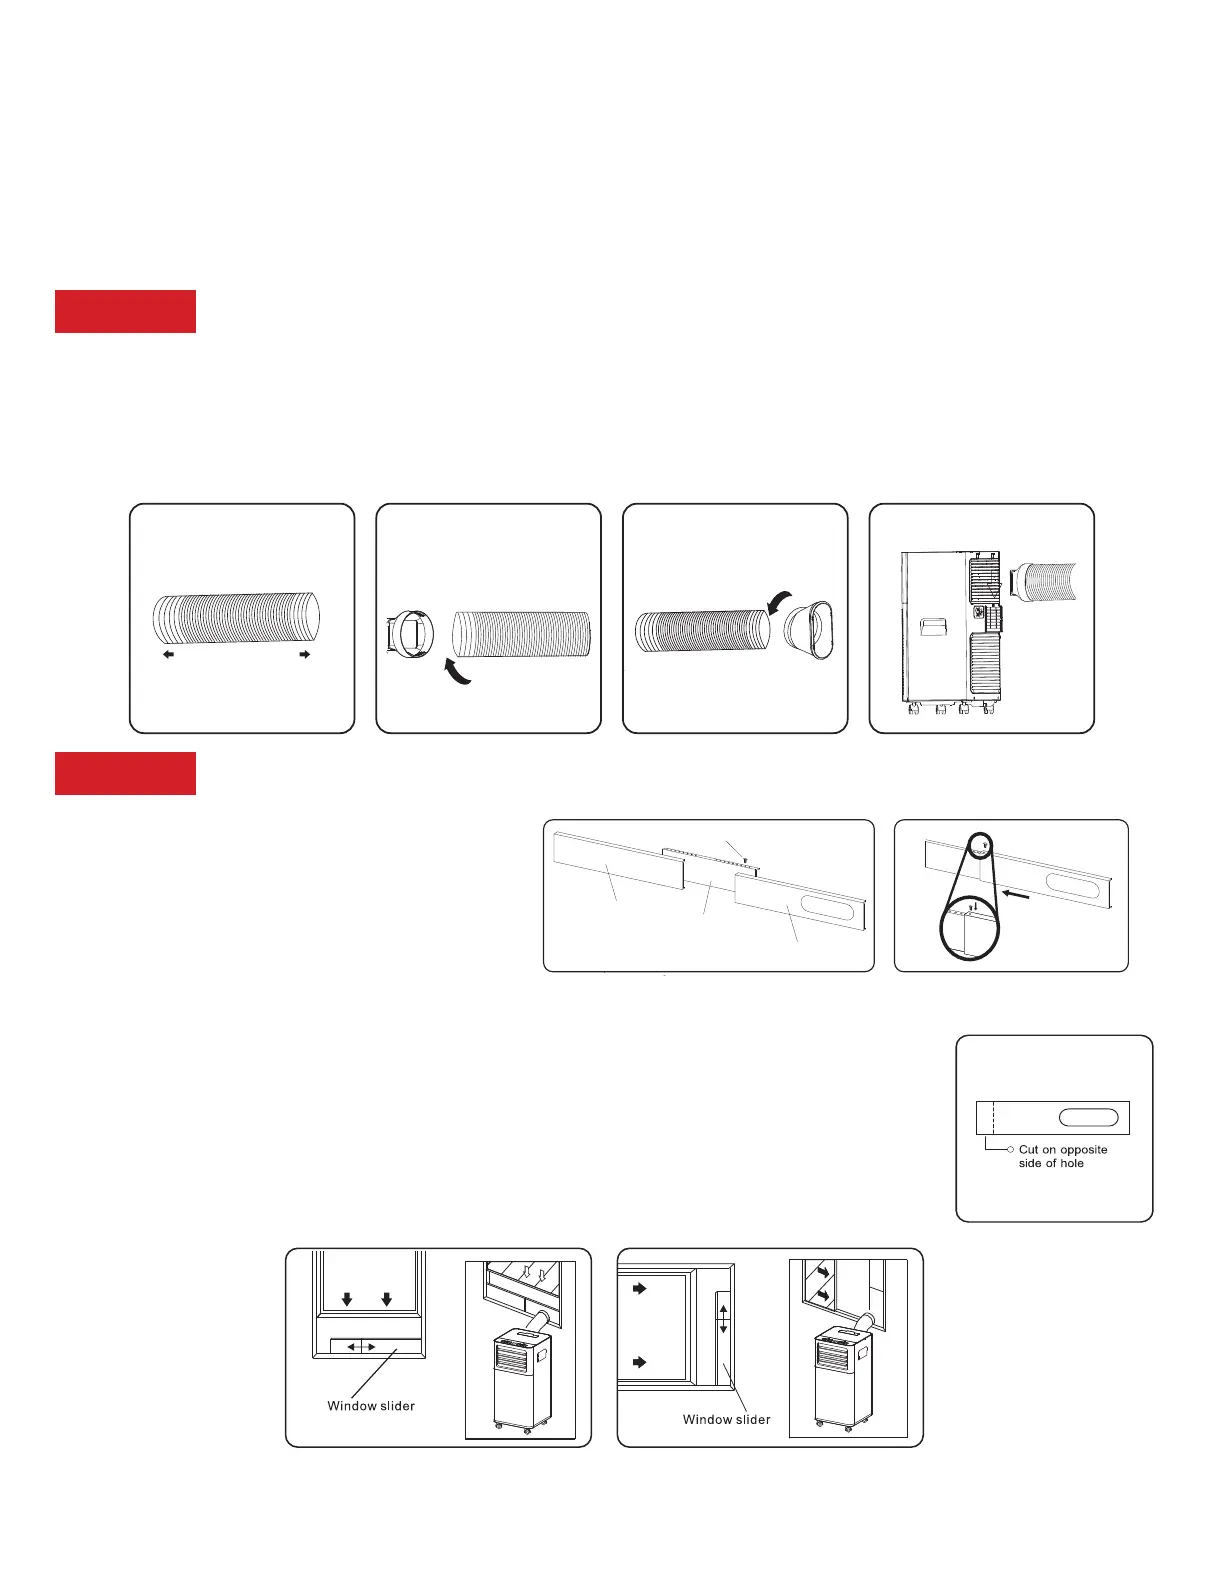
Step 1: Assemble and Attach the Exhaust Hose
• Extend both sides of the hose. (Fig. 1a)
• Screw on the hose inlet (Fig. 1b)
• Screw on the hose outlet (Fig. 1c)
• Attach the exhaust hose by sliding the hose inlet from the top down into the air
outlet grille. (Fig. 1d)
1a. 1b. 1c. 1d.
Step 2: Window Slider Kit Installation
Parts Needed:
A. Panel (x2)
B. Panel with one hole
C. Screw or plastic pin
Assembly
1. Slide Panel A into Panel B and and adjust to window width (use second
Panel A if necessary). When sizing the window width, be sure that the
window kit assembly is free from gaps when taking measurements. If
necessary, cut Panel B down to size. Cut on the side opposite the hole.
2. Lock the screws into the holes that correspond with the width that your
window requires to ensure that there are no gaps.
3. Use the provided foam seal to fill in any gaps.
A
A
B
B
C
C
1a. 1b. 1c. 1d.
Vertical
window
Horizontal
window
4. Attach the hose outlet to the window slider kit.
A
A
B
B
C
C
1a. 1b. 1c. 1d.
Vertical
window
Horizontal
window
A
A
B
A
B
C
C
1a. 1b. 1c. 1d.
Vertical
window
Horizontal
window
 Loading...