Do you have a question about the Teac NP-H750 and is the answer not in the manual?
Details on preventing electric shock by avoiding opening the unit and ensuring qualified service personnel handle repairs.
Instructions to minimize electric shock risk by not removing covers and referring servicing to qualified personnel.
Warning against exposing the appliance to rain or moisture to prevent fire or electric shock hazards.
General safety advice including no user-serviceable parts, service referrals, and avoiding hazardous procedures.
Compliance statements for North American models regarding FCC and IC regulations for digital devices.
Information for users on FCC compliance for Class B digital devices and managing radio interference.
Statement on compliance with FCC/IC radiation exposure limits and guidelines for uncontrolled environments.
Essential safety guidelines for handling batteries to prevent rupture, fire, or leakage, including proper insertion and disposal.
General safety advice for operating the unit, including avoiding liquids, confined spaces, and ensuring adequate ventilation.
Specific warnings for Class I and Class II apparatus concerning grounding and double insulation requirements.
Guidelines for the proper disposal of electrical and electronic equipment in Europe, referencing the WEEE symbol.
Guidelines for the proper disposal of batteries and accumulators in Europe, referencing WEEE and chemical symbols.
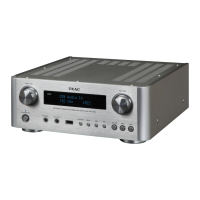
Highlights of the NP-H750's main features including USB, Internet Radio, AirPlay, and DLNA compatibility.
List of all accessories supplied with the unit, such as power cord, remote control, and manual.
Precautions for safe operation, including placement, ventilation, heat dissipation, and handling power cords.
Instructions for safely cleaning the unit's surfaces and components.
Details on audio file formats (WAV, FLAC, MP3, OGG, WMA, AAC) playable via different sources.
Information on the unit's display limitations for file names, supporting only single-byte alphanumeric characters.
Precautions for creating audio files, emphasizing the need for correct file extensions and consulting software manuals.
Lists file types or conditions that may cause playback issues, such as missing extensions or large file counts.
General precautions to follow before making speaker connections, including power plugs and cable management.
Guide to connecting speakers to the unit's terminals, covering polarity and impedance requirements.
Step-by-step instructions for preparing and connecting speaker cables to the unit's terminals.
Instructions for connecting speakers using banana plugs, including regional considerations.
Information on connecting a subwoofer to the unit's subwoofer output jack.
Lists compatible iPod, iPhone, and iPad models that can be used with the unit.
Recommendation to update Apple device software for optimal performance and problem resolution.
Reiteration of precautions before making any connections, focusing on power and cable management.
Illustrates the connection of a personal computer via USB, highlighting the necessity of driver installation.
Details on connecting a computer via USB for digital audio input, including driver requirements.
Instructions for connecting the unit to a wired network using an Ethernet cable.
Information on connecting to a wireless LAN network using the unit's antenna.
Instructions for connecting the power cord and important safety precautions.
How to connect digital audio sources using coaxial and optical cables.
How to connect analog audio devices using the AUX 1 input and output jacks.
Instructions for connecting a turntable to the unit's PHONO input jacks.
Guidance on connecting the turntable's grounding wire to reduce potential hum noise.
Explains the MULTI JOG knob's functions for setting time, scrolling menus, and adjusting audio.
Identifies the location of the remote sensor for receiving signals from the remote control.
Provides information about the unit's display screen for showing various details.
Instructions on how to use the VOLUME knob to adjust the sound level.
Details on how to turn the unit on or place it into standby mode.
Instructions for connecting headphones and associated safety warnings.
How to connect portable audio players to the AUX 2 input jack.
Explains the functions of the USB port for connecting Apple devices and USB flash drives.
Describes how to use the SOURCE button to select different audio input sources.
Explains the function of the MENU button for navigation and accessing setup menus.
Details on how to use the skip buttons for track navigation and balance adjustment.
Explains how to confirm selections within menus and select stations or tracks.
How to use the INFO button to change displayed information for Internet radio and media player.
Instructions on how to stop playback for USB/iPod or Media Player modes.
Explains how to switch between Internet radio and media player modes using the NET button.
Describes how to start or pause playback for USB/iPod or network modes.
How to use the remote's STANDBY/ON button to control the unit's power state.
Details on using remote buttons to select various input sources like NET, USB/iPod, and AUX.
How to operate the remote's TIMER button for setting various timer functions.
Instructions for setting the sleep timer using the remote control.
How to use the remote's TIME SET button to adjust the clock and wake-up timer.
How to use the TONE button with scroll buttons for bass, treble, and balance adjustments.
How to set repeat playback modes (repeat one, repeat all) using the remote's REPEAT button.
How to activate shuffle playback mode using the remote's SHUFFLE button.
How to stop playback using the remote's Stop button.
How to start or pause playback using the remote's Play/Pause button.
How to navigate back to previous menus or access setup menus using the remote's MENU button.
How to confirm selections and choose stations or tracks using the remote's ENTER button.
Details on using the remote's skip buttons for track navigation and balance adjustment.
How to use the remote's DIMMER button to adjust the display brightness.
How to use the remote's INFO button to change displayed information.
How to use the remote's DISPLAY button to change displayed information.
How to temporarily mute the sound using the remote's MUTE button.
How to adjust the volume level using the remote's Volume Up/Down buttons.
How to use the remote's scroll buttons for selection and tone adjustments.
Safety precautions for using the remote control, including battery handling and operational guidelines.
Instructions for installing AAA batteries into the remote control unit.
Guidance on when and how to replace the remote control's batteries.
Instructions for downloading and installing the necessary driver for playing music from a computer.
Explanation of M1 (high-speed) and M2 (asynchronous) transmission modes for USB audio playback.
Details on using the M1 high-speed transmission mode for computer audio playback.
Details on using the M2 high-speed asynchronous mode for improved audio quality.
Steps to initiate music playback from a computer, including volume adjustment and important precautions.
Explains why setting the current time is necessary and what happens upon power disconnection.
Procedure for turning the unit on and observing the indicator light status.
How to access the time setting menus using the TIME SET button.
Instructions on setting the current hour using the remote control's scroll and ENTER buttons.
Instructions on setting the current minute using the remote control's scroll and ENTER buttons.
How to display the current time on the unit for a brief period.
Fundamental step to power on the unit before performing other operations.
How to cycle through and select the desired audio input source using the SOURCE button.
Instructions for decreasing the audio volume using the unit's VOLUME knob.
Guidance on adjusting playback volume to the optimal level and precautions for sudden loud noises.
How to temporarily mute the audio output using the MUTE button.
How to switch between bright and dim display settings using the DIMMER button.
How to select BASS, TREBLE, or BALANCE modes for adjustment.
Instructions for adjusting audio tone and balance using the unit's controls.
Explanation of the European ErP Standby Power Regulation and the unit's automatic standby function.
How to select the USB/iPod source for playing files from USB drives or Apple devices.
Instructions for connecting a USB flash drive to the unit's USB port.
How to navigate and select files on the USB drive for playback.
Steps to initiate playback of selected files from a USB flash drive.
How to stop playback of files from a USB flash drive using the stop button.
How to pause and resume playback of files from a USB flash drive.
How to skip to the next or previous tracks/files on a USB flash drive.
How to select a folder on a USB drive to search for tracks within.
How to confirm the selected folder using the ENTER button.
How to select a specific track within a folder for playback.
How to start playback of the selected track from a USB drive.
How to use the DISPLAY button to change information shown during USB playback.
How to activate shuffle playback mode for random track order on USB drives.
How to set repeat playback for all tracks within a selected folder.
How to set repeat playback for a single track or file.
How to select the USB/iPod source to connect and play Apple devices.
Instructions for connecting an iPod, iPhone, or iPad to the unit using a USB cable.
How to pause and resume playback of connected Apple devices.
How to skip to the next or previous tracks/files from connected Apple devices.
How to find a specific part of a song on an iPod using skip buttons.
How to navigate back to previous menus on an iPod using the MENU button.
How to select menu items on an iPod using scroll and ENTER buttons.
How to set repeat playback modes (repeat one, repeat all) for an iPod.
How to activate different shuffle playback modes (Songs, Album) for an iPod.
How to select the Internet Radio source to begin the network setup process.
How to access the Setup Menu and navigate to the Network settings.
How to select between Wired or Wireless network connection types.
Steps for setting up a wireless network connection, including searching for access points and entering passwords.
Instructions for entering characters for network passwords or names.
Steps to search for and connect to available Wi-Fi access points.
How to configure the network standby setting for automatic playback detection.
How to check and modify detailed settings for the Internet connection.
Details on configuring wireless LAN settings like DHCP, SSID, and Security.
Function to share Wi-Fi settings from an iPod/iPhone/iPad to the unit.
Steps to connect an iPod to the unit's USB port for Wi-Fi sharing setup.
How to initiate the Wi-Fi sharing process by holding the MENU button.
How to confirm Wi-Fi sharing by selecting 'Allow' on the iPod.
Final steps after successful Wi-Fi sharing setup, including standby and AirPlay mode selection.
How to select the Internet Radio source to begin listening.
How to select search options for Internet radio stations based on location or genre.
How to select specific stations or podcasts based on search criteria.
How to select and play a desired Internet radio station.
How to use the INFO button to change displayed information during Internet radio playback.
How to create a list of favorite stations or podcasts via the internet portal.
How to add stations or podcasts not found in the channel list to your favorites.
Instructions for accessing the internet radio portal website and registering as a user.
Overview of the media player function and connection methods: media sharing and folder sharing.
Steps for setting up media sharing to access shared libraries and browse by tag items.
Steps for setting up folder sharing to access music files on your computer.
Instructions for configuring Windows Media Player 12 for media sharing.
Instructions for configuring Windows Media Player 11 for media sharing.
Steps to configure detailed media sharing settings within Windows Media Player.
Instructions for setting up shared folders on a Windows XP computer.
Instructions for setting up shared folders on a Windows Vista computer.
How to enable password protected sharing for media files.
Instructions for setting up shared folders on a Windows 7 computer.
Connecting the unit and computer/NAS server to the network via LAN or Wi-Fi.
How to select the Media Player source by pressing the NET button.
How to select the desired computer or server for media playback.
How to select and play a media file or track from the connected server.
How to use the INFO button to change displayed information during media player playback.
Instructions for using AirPlay from iPod touch, iPhone, or iPad devices.
Basic step to power on the unit before using AirPlay.
Action required to turn on the connected Apple device.
How to connect the Apple device to the same network as the unit.
How to navigate to music selection on the Apple device.
How to activate AirPlay by tapping the AirPlay icon on the Apple device.
How to select the NP-H750 unit from the list of available AirPlay devices.
How to start playback of a file from an Apple device via AirPlay.
Step to power on the computer or mobile device for DLNA playback.
Step to connect a NAS server to the network for DLNA functionality.
Step to connect devices using DLNA application software.
How to start playback of files from a computer or mobile device via DLNA.
How to set the sleep timer to automatically put the unit into standby after a specified duration.
Instructions on how to set the time for the wake-up timer.
Procedure to set the 'On Time' for the wake-up timer.
Instructions on setting the wake-up hour using the remote control.
Instructions on setting the wake-up minute using the remote control.
Procedure to set the 'Off Time' for the wake-up timer.
How to select the playback source for the wake-up timer.
How to cycle through timer modes: Timer Off, Timer Daily, Timer Once.
References previous steps for setting the timer's on and off times.
How to select the timer mode (daily or once) using the TIMER button.
Final step to confirm the set wake-up timer parameters.
Selecting and adjusting the playback source before setting the wake-up timer.
Final step to activate the wake-up timer by putting the unit into standby.
How to disable the timer function by setting it to 'Timer Off'.
Introduction to updating the unit's firmware for new features and improved stability.
Important warnings and precautions to be observed during the firmware update process.
Instructions on how to download the latest firmware file from the TEAC website.
Step-by-step guide for updating the unit's firmware using a wired or wireless LAN connection.
How to browse and select the correct firmware file (.fw) for the update.
How to initiate the firmware update process by clicking OK.
Steps to follow after the firmware update is completed, including power cycling.
How to navigate the unit's menus to access the Software Update option.
How to select the 'Internet' option for firmware updates via the network.
How to download the firmware file to a USB flash drive.
Instructions to follow previous steps for updating firmware via USB.
How to select the 'USB' option for firmware updates using a USB drive.
Steps to follow after the USB firmware update is completed.
Troubleshooting steps for issues related to displaying non-alphanumeric characters on the unit.
Steps to resolve issues where the unit does not power on.
Steps to resolve issues related to lack of sound output from the unit.
Troubleshooting steps for a non-functional remote control unit.
Steps to resolve issues causing noisy audio output.
Troubleshooting steps when there is no sound during audio file playback.
Troubleshooting issues related to the display of missing ID3 tag information for music files.
Troubleshooting steps for playback failures with connected Apple devices.
Troubleshooting issues related to operating Apple devices via the unit.
Troubleshooting steps when a computer does not recognize the unit via USB connection.
Troubleshooting noise issues, including interference from other applications or USB hubs.
Troubleshooting steps for errors encountered during audio file playback.
Troubleshooting steps for problems connecting to the Internet, including network settings and firewalls.
Troubleshooting issues related to listening to Internet radio stations or podcasts.
Troubleshooting steps for issues related to finding stations or podcasts in the list.
Troubleshooting steps for failures encountered during AirPlay playback.
Troubleshooting steps for failures encountered during Media Player playback.
Troubleshooting steps for problems connecting to the Local Area Network (LAN).
Troubleshooting steps for issues related to finding tracks within shared media libraries.
Procedure to initiate the factory reset process while the unit is in standby mode.
Steps to complete the factory reset process, including power cycling the unit.
Troubleshooting steps for issues related to accessing shared folders on a network.
Technical specifications for the unit's amplifier section, including output power and frequency response.
Specifications for the front panel USB port, including compliance and playable formats.
Specifications for the rear USB audio input connector, including sampling frequency and bit rates.
Specifications related to the unit's Internet radio functionality, including formats and connection types.
Specifications for the unit's LAN and Wireless LAN internet connection capabilities.
Specifications for the unit's digital audio input connectors, including type and signal levels.
General specifications including power requirements, dimensions, and weight.
List of standard accessories included with the unit, such as power cord and remote control.
Legal information regarding the open source software components used in the product.