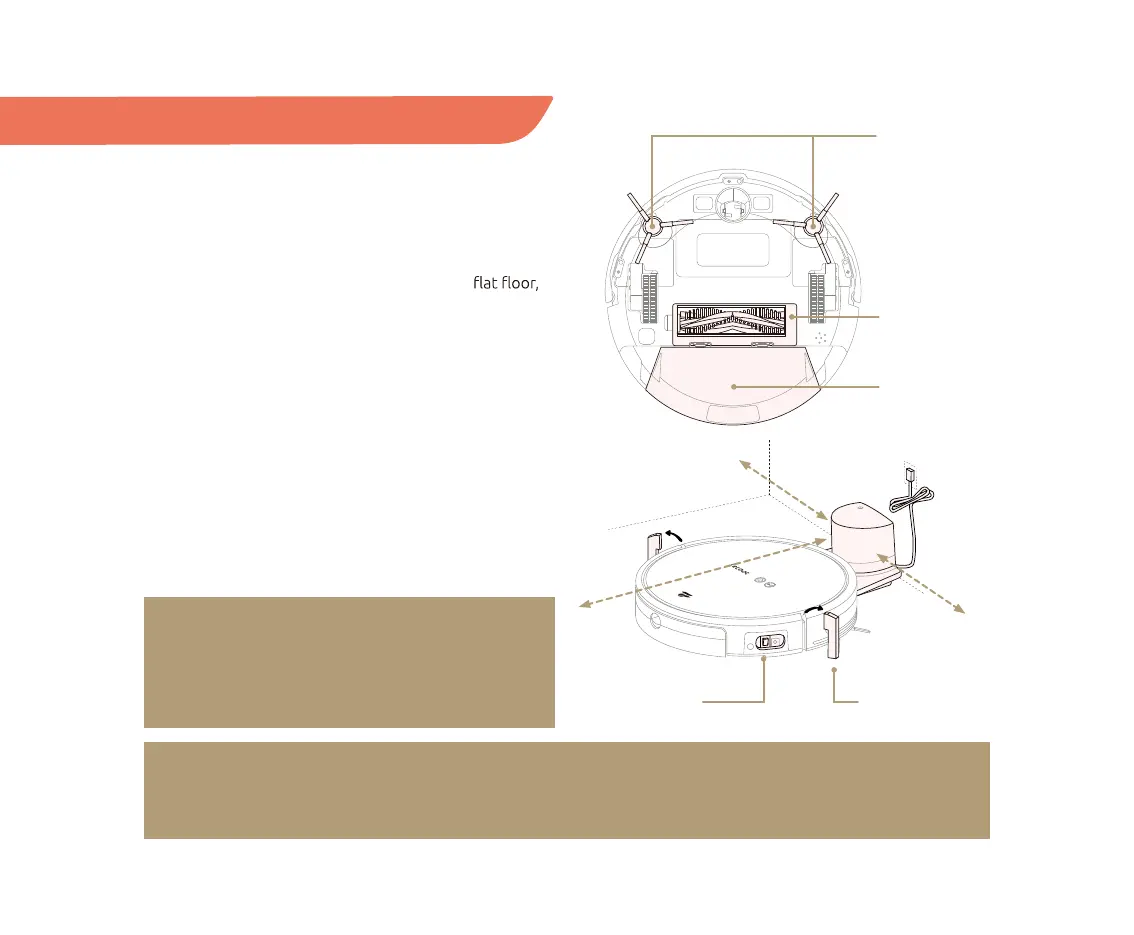
ON/OFF switch protective foams
Dust box
V-shaped
main brush
Edge-cleaning
brushes
1.5 ft / 0.5 m
1.5 ft / 0.5 m
3 ft / 1 m
9
NOTE:
The ON/OFF switch is on the right side of your TECBOT S1 Series. (“I” position for ON and “O” for OFF,
see page 4.) Your TECBOT S1 Series will self-check for about 10 seconds before turning on.
Installation
01 After taking your TECBOT S1 Series out of the box,
remove the protective foam on both sides.
02 Check whether all components are in place: dust box,
V-shaped main brush, and edge-cleaning brushes.
03 Place the charging dock against a wall on a
and connect it to the power source. Please make sure
there are more than 1.5 feet / 0.5 meter of free space
at the front and 3 feet / 1 meter to the sides of the
charging dock.
04 Turn on your TECBOT S1 Series.
05 Place your TECBOT S1 Series at the charging dock.
Ensure the contact points on the TECBOT S1 Series
and the charging dock are in complete contact.
Your TECBOT S1 Series will make a “beep” to start
charging. The charging time is about 4 hours.
06 Your TECBOT S1 Series is ready for Wi-Fi pairing.
NOTE:
Only use clean water or foamless floor cleaner in
the water tank. Foam or bubbles will decrease the
performance of the mopping function.