MOUNTING:
WARNING: The alarm should be positioned close to the door high enough to be out of the reach of children. As each
mounting application varies, Techko suggests testing the unit’s installation location and effectiveness before
permanently mounting the S187D.
MOUNTING INDOORS Using the provided mounting template printed in this manual, mark the position of the screw
holes on the desired mounting surface.
The Additional delay button may be mounted on the other side of the entrance. When pressed, it will delay the
alarm 8-12 seconds before alarm is triggered, allowing time to secure the door/gate.
The Additional magnetic sensors allow the unit to be used on sliding door with screens.
Alarm will sound only when BOTH sets of magnetic sensors are apart, there for allowing the slider to be open
while still providing protection at the screen door.
MOUNTING INDOORS USING DOUBLE-SIDED TAPE
Make sure that the mounting surfaces for the double-sided tapes are completely clean. Attach the double-sided tapes
onto the rear of the unit, and then secure the unit onto the desired mounting surface.
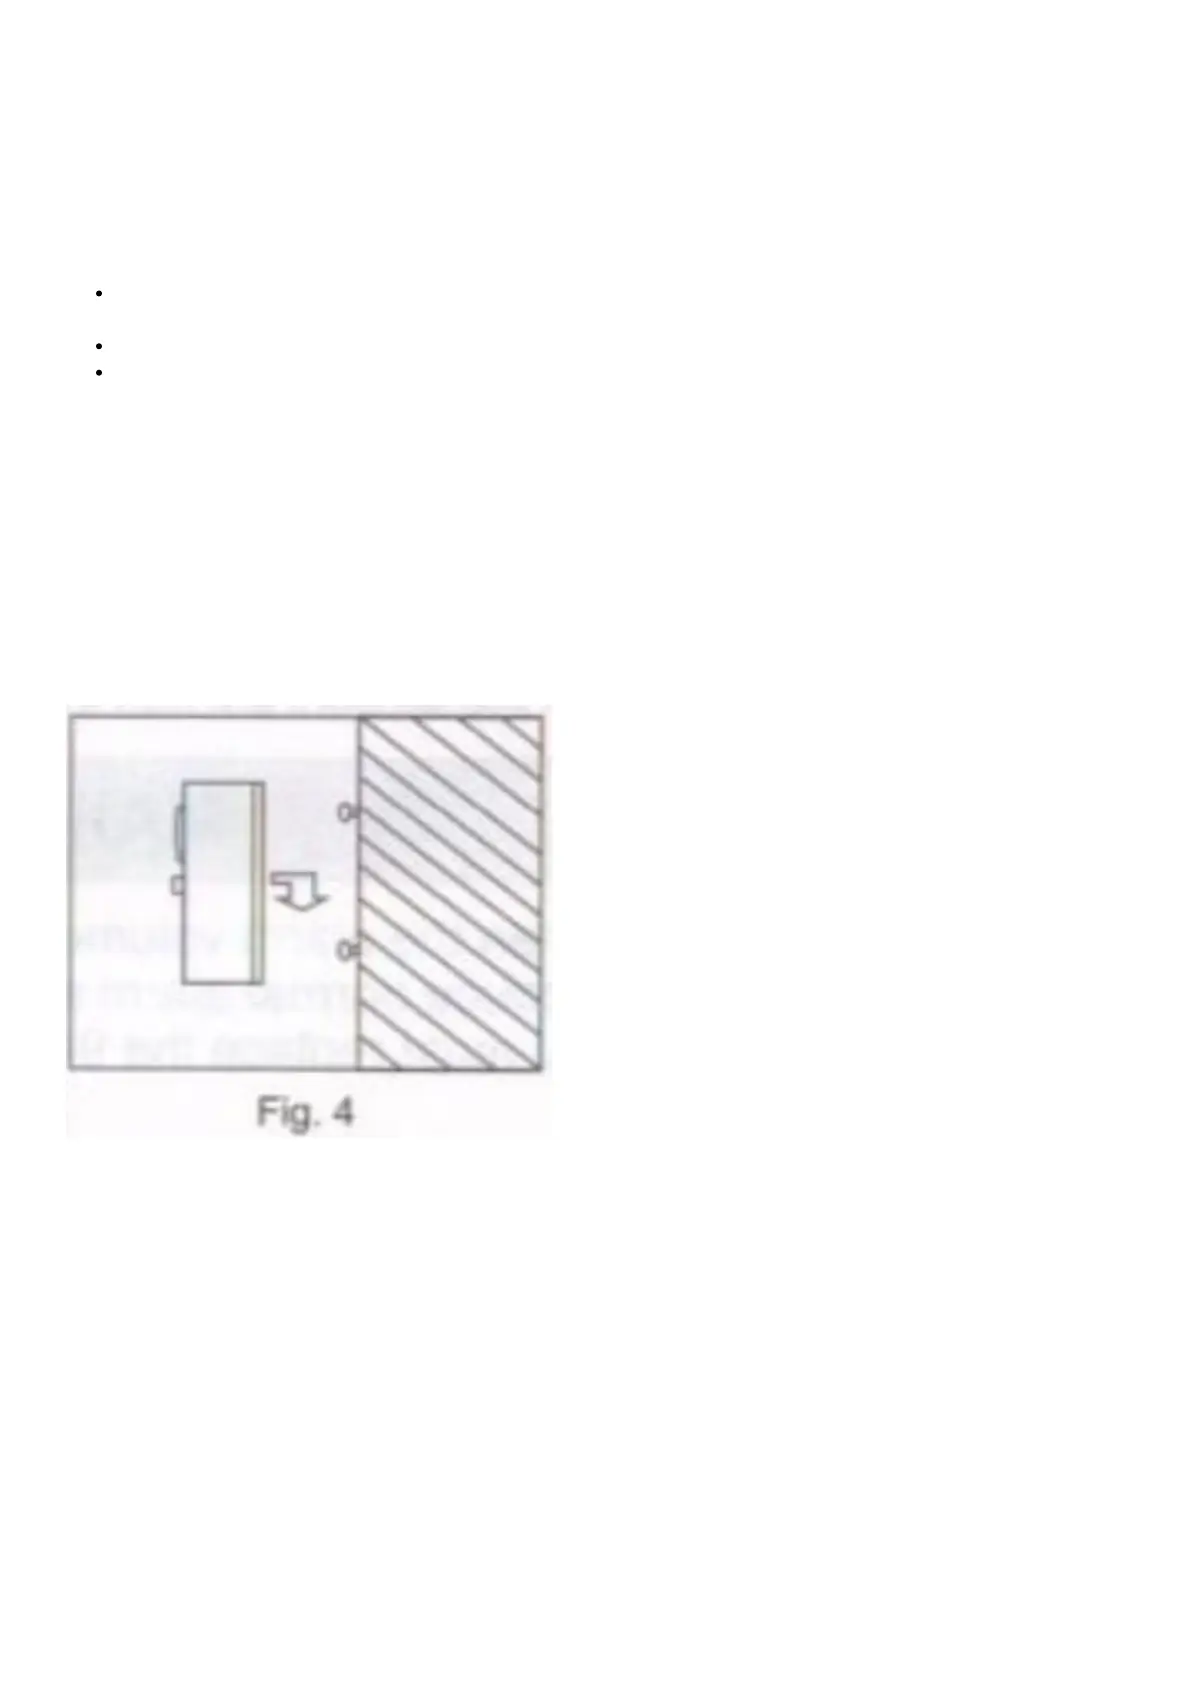
MOUNTING INDOORS USING SCREWS Using the provided mounting
template printed in this manual, mark the position of the screw holes on the desired mounting surface. Drill the
screws in to the mounting surface with approximately 1/8 inch of thread remaining. Slide the unit over the screws and
secure the unit by pushing it downward, as shown in Fig. 4. You may need to adjust the screws towards or away
from the mounting surface to provide a more secure fit.
MOUNTING THE SENSORS
Make sure that the arrows of each sensor are pointed towards each other. Using either the double-sided tape or the
screws provided, mount the sensors so that they are less than 12 inch away from each other. Sensors must be
mounted flush in height and depth, so with some doors or windows, special custom fitting may be necessary. Please
make sure that the wired portion of the magnetic sensor is mounted on the non-moving portion of the mounting
surface and the standalone sensor is mounted on the door/gate. (See Fig. 5/Fig. 6)
MOUNTING OUTDOORS ON WOODEN GATES
Using the provided mounting template printed in this manual, mark the position of the screw holes on the desired
mounting surface. Drill the screws onto the mounting surface with approximately 1/8 inch of thread remaining. Slide
the unit over the screws and
Fig. 5 secure the unit by pushing it downward as shown in Fig. 5. You may need to adjust the screws towards or
away from the mounting surface to provide a more secure fit. Make sure that the arrows of each sensor are pointed