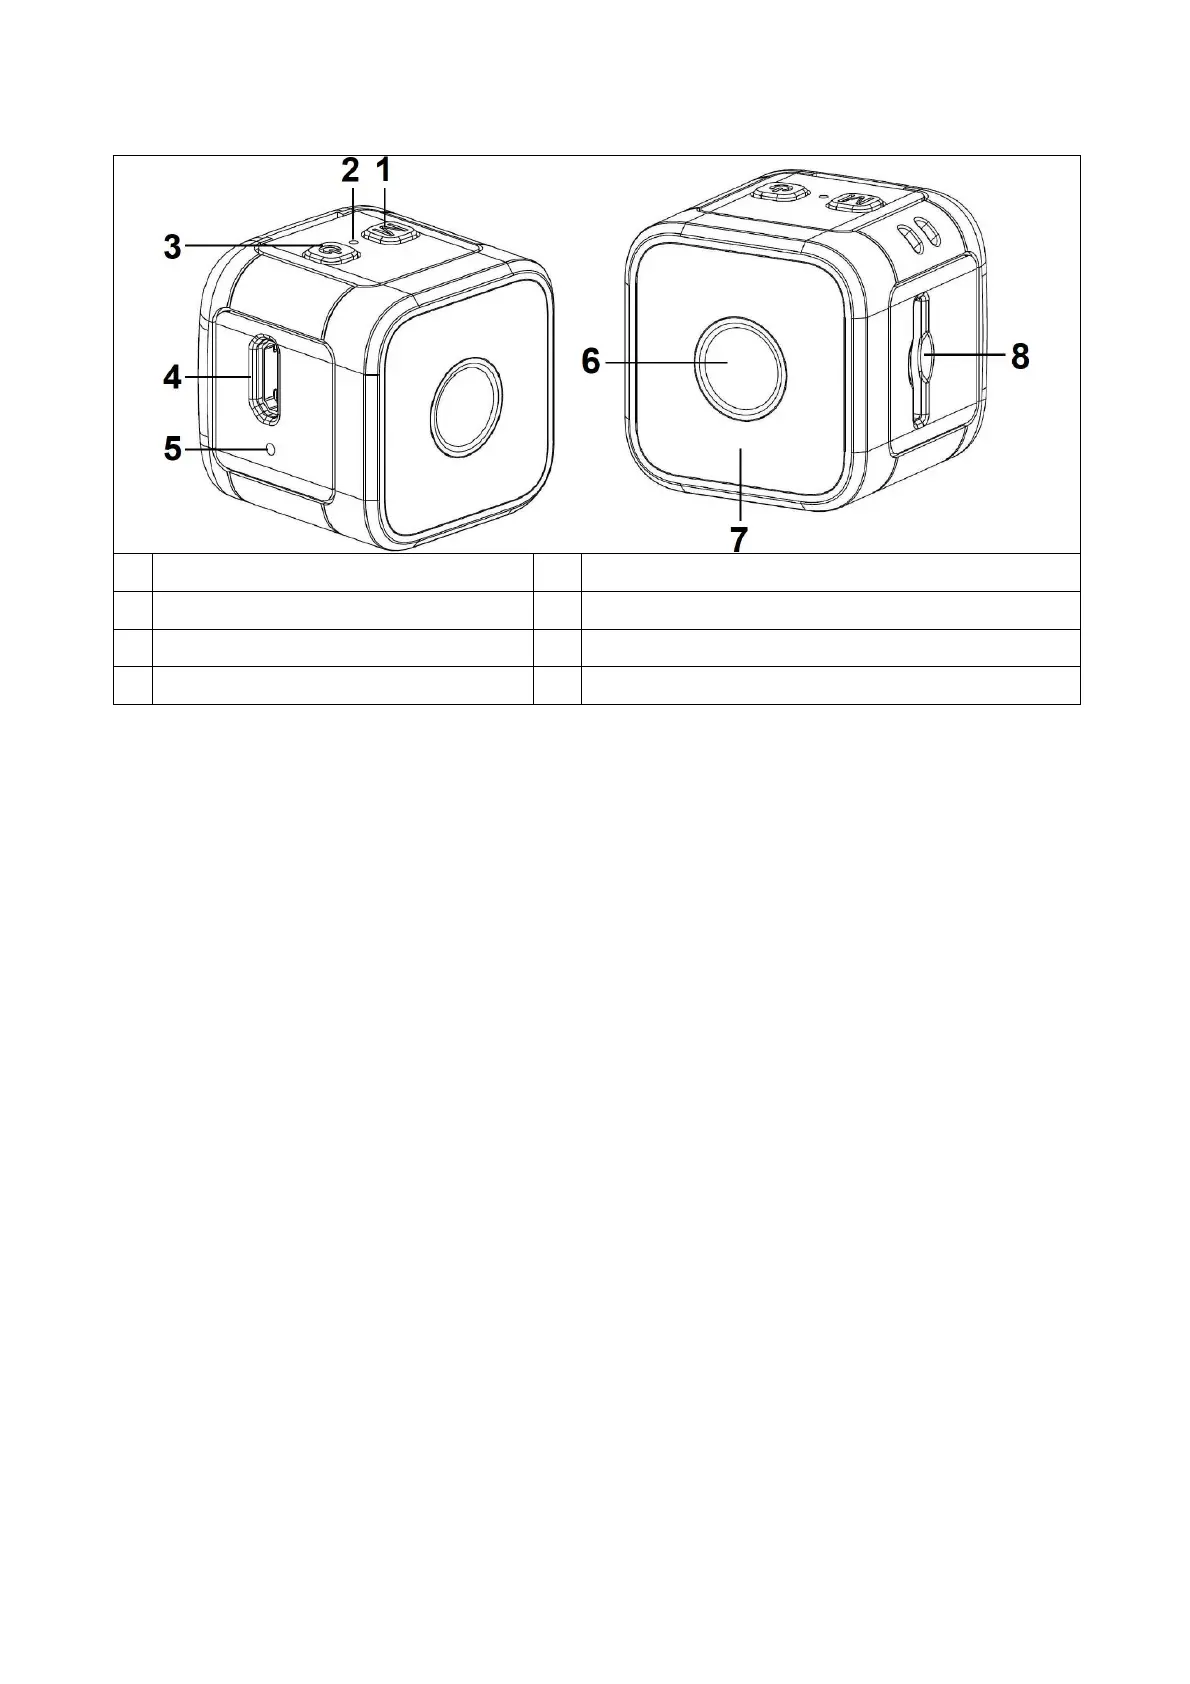
Product view
1
Mode (M button) 5 Microphone
2
Indicator light (LED) 6 Camera lens
3
ON / OFF 7 Infrared LEDs (6x)
4
Micro USB 8 MicroSD card slot
NOTE: TX-136 is not waterproof! The ON/OFF button up is the
right direction for recording!
Getting started
Connect the camera with the included Micro USB cable to the
PC or to an USB adapter* (DC 5V/1A *not included) or a mobile
device like a power bank. The charging indicator flashes RED when
camera is OFF. This indicates that the camera is charging. RED
light is always on when fully charged. The battery can be fully
charged within 2–3 hours. Note: It is also possible to record while
charging cable is connected. Make sure the power supply delivers
1A or more. Connect a power source (not a PC) and long press the
ON/OFF button. Then the BLUE & RED LED will light up. Wait until
the blue LED is steady on. Then you can choose the mode by
pressing M button. It may not work although the device is
connected to the power supply. Just try again.
Insert the MicroSD card correctly into the card holder.
To remove the MicroSD card: Press gently on the end of the
memory card, the card will be ejected.