2.1 Check that all existing toilet plumbing components are functioning properly. It is recommended to wear protective gloves
when working inside the toilet tank.
2.2 Shut off water to toilet (usually found on the wall directly under the tank on the same side as the flush handle).
2.3 Flush toilet and hold handle down to remove as much water from the tank as possible. Listen to hear if the tank is refilling.
If so, make sure the water is completely turned off.
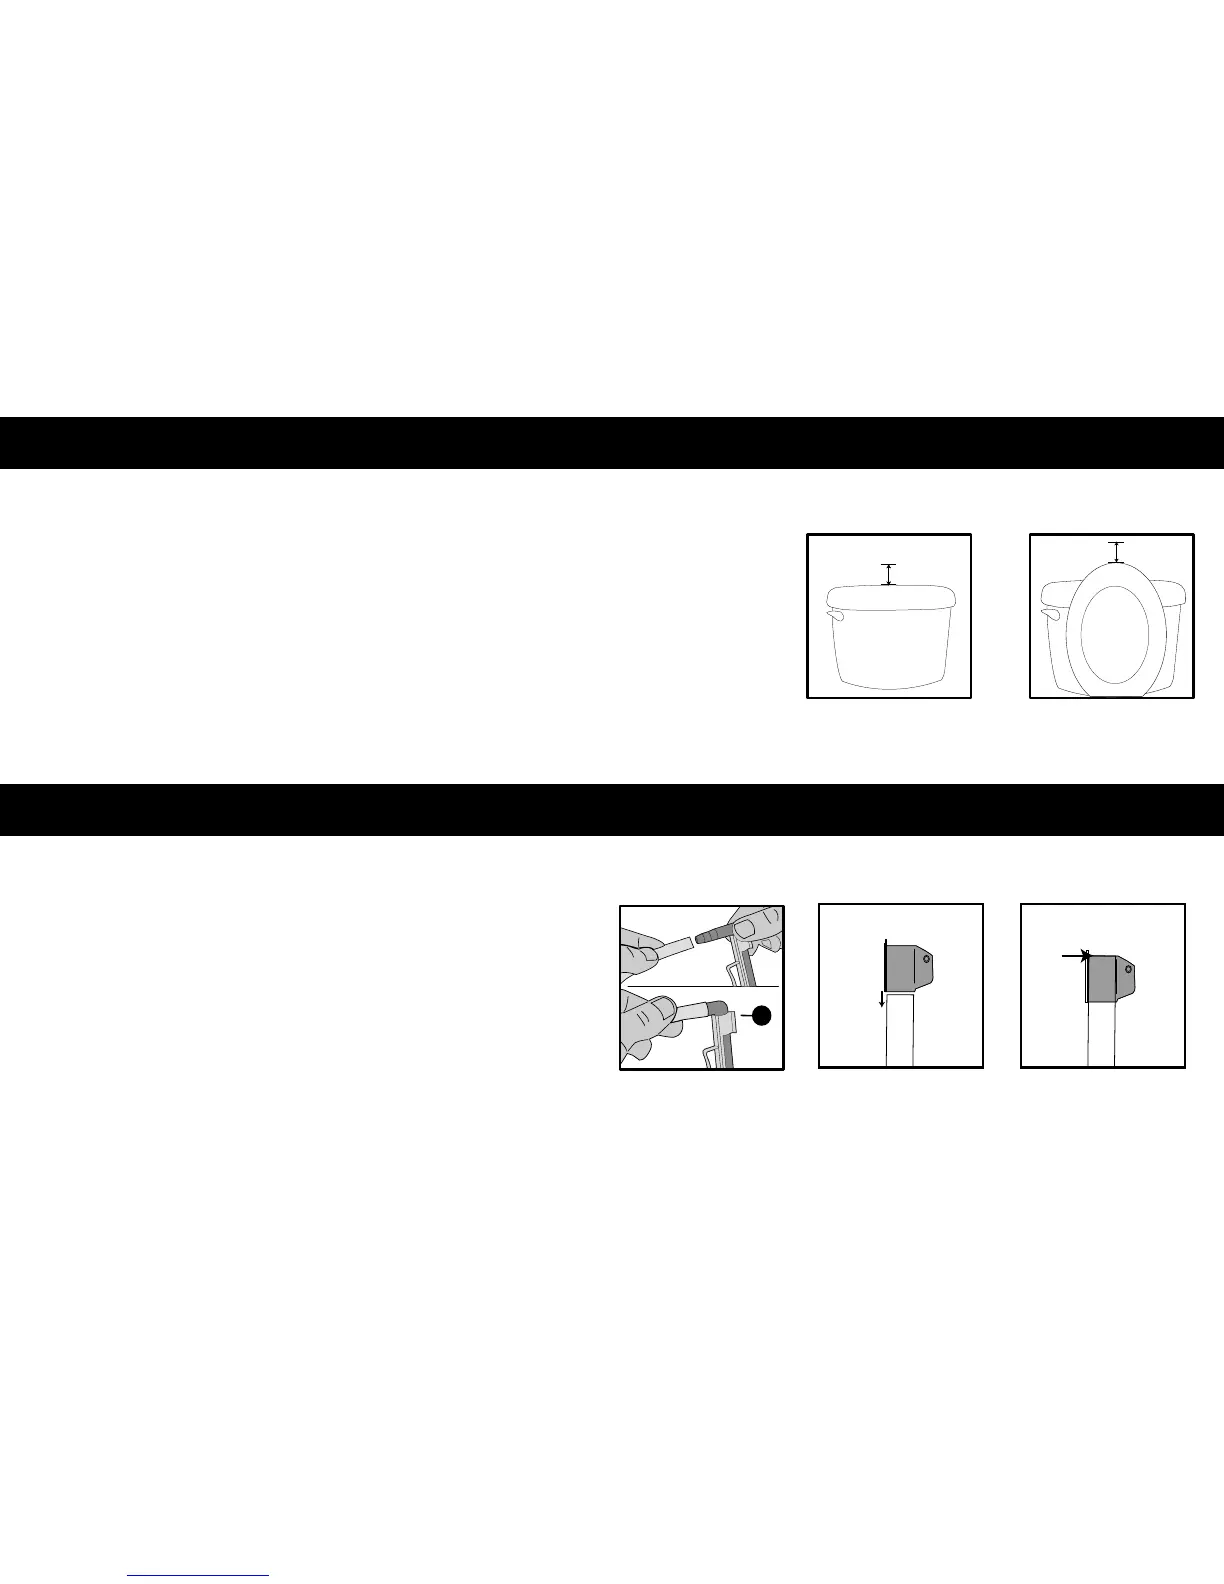
2.4 Mark wall for sensor installation. Before removing the tank cover lift up the toilet seat cover, if the cover comes above the
tank make a small pencil mark on the wall directly back from the top of the toilet seat cover. If the toilet seat does not come
above the top of the toilet tank, then use the center and top of the toilet tank as a guide and make a small mark on the wall.
Then mark 2 1/2" directly above the mark you just made. The mark will be used later in the installation as a guideline.
2.5REMOVE the toilet tank cover and place it out of the way.
2.6CLOSE toilet seat cover to avoid dropping components in toilet!
3.1 Detach the water fill tube from the overflow pipe and insert the overflow pipe clip (G).
This clip will attach to the side of the overflow pipe after the motor installation is complete.
3.2 Loosen hex bolt (C) in the motor mount (B).
3.3 Slide motor mount (B) onto the overflow pipe (make sure the hex bolt is at the top).
The motor mount may require the plastic spacer (E) for a tight fit. The plastic spacer
should be placed first on the overflow pipe and then slide the motor mount (B) over
the spacer (E).
3.4 Align the top of the motor mount (B) to the top of the overflow pipe. Tighten hex bolt (C)
by hand.
3.3 3.4
Prior to Installation
2
Motor Mount Installation
3
2 1/2"
2.4 2.4
Top Alignment
Slide Motor Mount (B)
2 1/2"
or
3.1
G
 Loading...