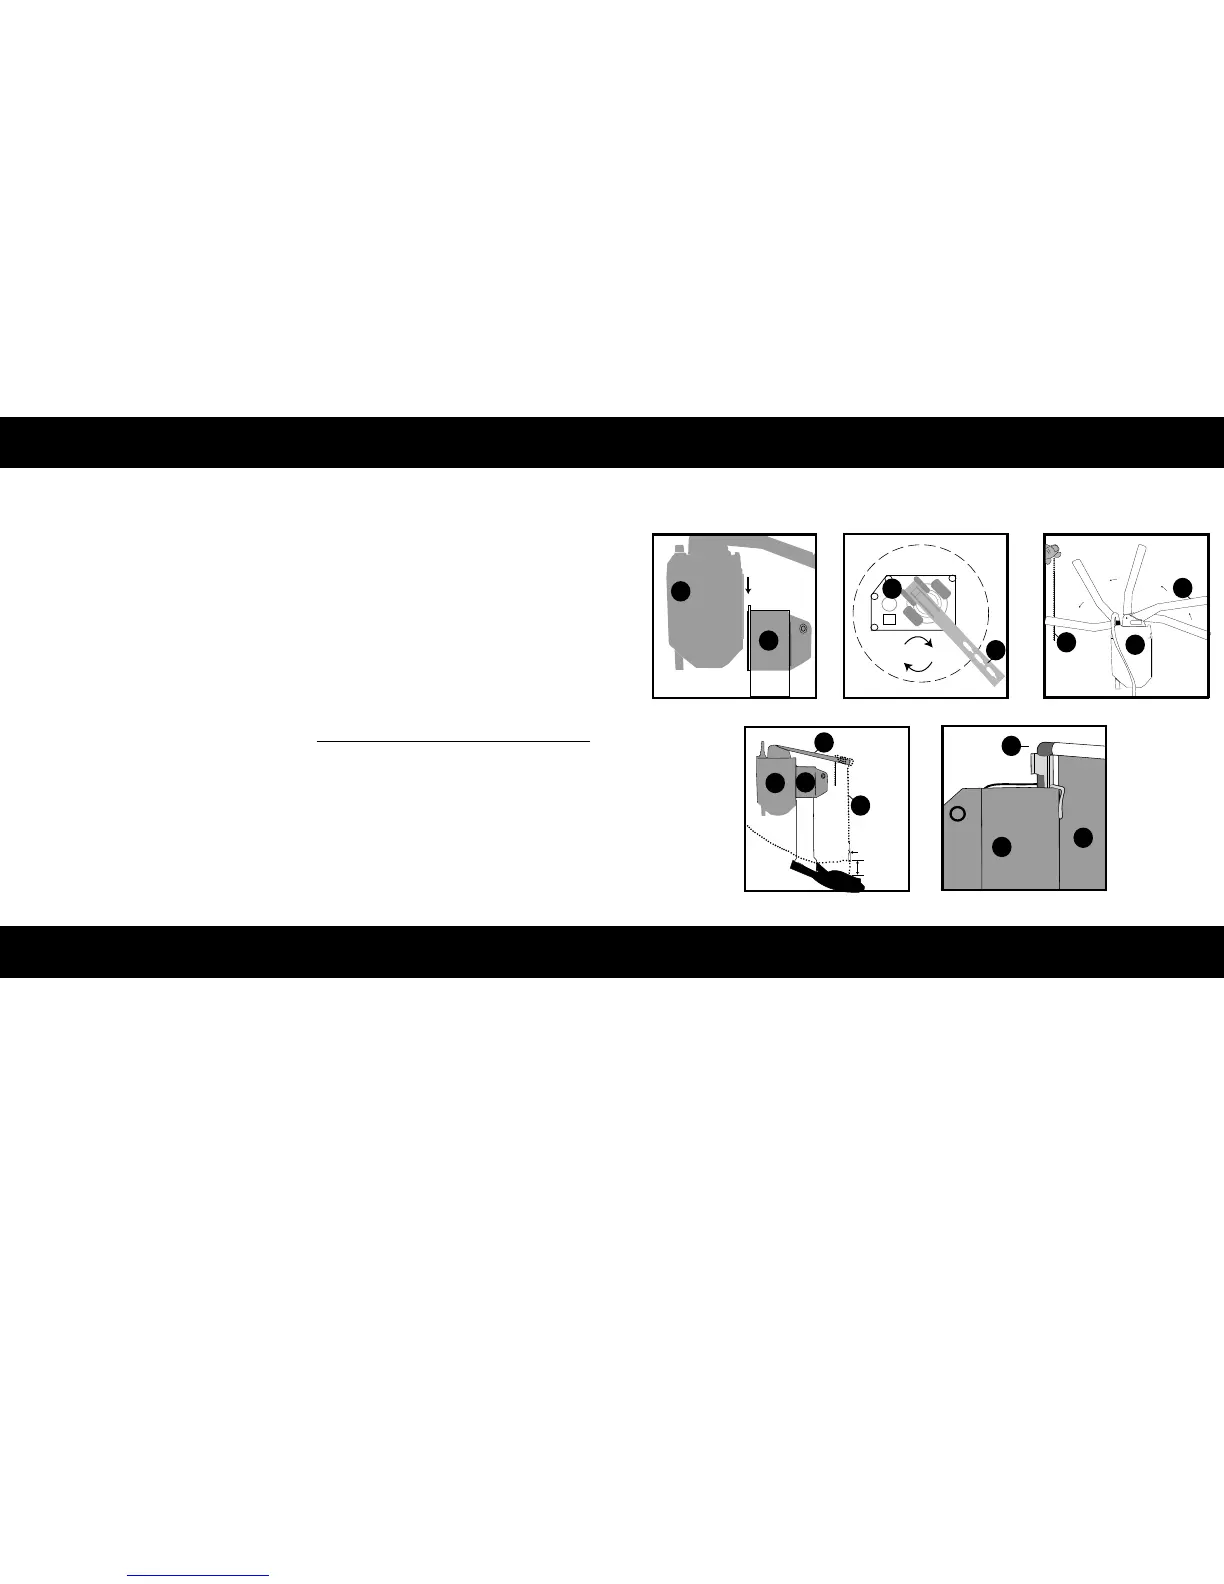
4.1 Slide motor (A) on to the motor mount (B). Rotate the two components together
to fit in the tank and avoid interfering with existing valve components. Ensure the
top of the motor mount (B) is still aligned with the top of the overflow pipe. Keep the
electrical sensor cord on the outside of the tank when installing the motor(A).
4.2 Rotate the actuator arm (D) on the motor (A) and align above the rubber flapper.
Once the arm is aligned, and the motor (A) is not interfering with any of the internal
plumbing components, then tighten the hex bolt (C) using the provided Allen wrench (F).
Do not over torque.
4.3 Determine which of the three holes on the motor arm (D), is most directly aligned above the
flapper chain connection. Flip the motor arm (D) up so you can insert the bead chain in the selected
hole and lock the chain in the hole slot. Return the arm to the previously aligned position.
4.4 Attach chain clip (H) on flapper chain 2" above flapper. Unlock bead chain (H) from
motor arm (D) and pull up to take out most of the slack. Lock bead chain in hole slot.
Excess chain can be wrapped around motor arm (D) and secured in available hole slot.
4.5Install overflow pipe clip (G) with attached water flow tube into overflow pipe.
NOTE: Leave chain attached to handle, so flush handle can be used for "courtesy flush".
5.1 Align the sensor so the top of the sensor assembly covers the mark previously made on the wall (Step and Diagram 2.4).
5.2 Peel off adhesive backing from sensor assembly and adhere to wall. If you have wallpaper or drywall you may want to use the
small screws (N) provided (found in the battery compartment) to mount the remote sensor (I), instead of using the adhesive.
5.3 Remove the remote sensor cover (I) by taking the sensor cover key (J) and inserting it into the two small holes at the bottom. Push in
and rotate upward.
5.4 Install four (4) "AA" cell alkaline batteries (Q). Noting the battery position marks on the inside of the compartment.
Replace cover on remote sensor.
Remote Sensor Installation
5
Motor Installation
4
4.3
A
H
D
4.4
D
A
B
H
2"
Chain Clip
4.2
Arm Rotates 360˚
TOP VIEW
A
D
4.1
A
B
 Loading...