• Repeat
play---------------
Set the speed select
knob
and record size select
knob
in
the
same
manner
as in
automatic
play.
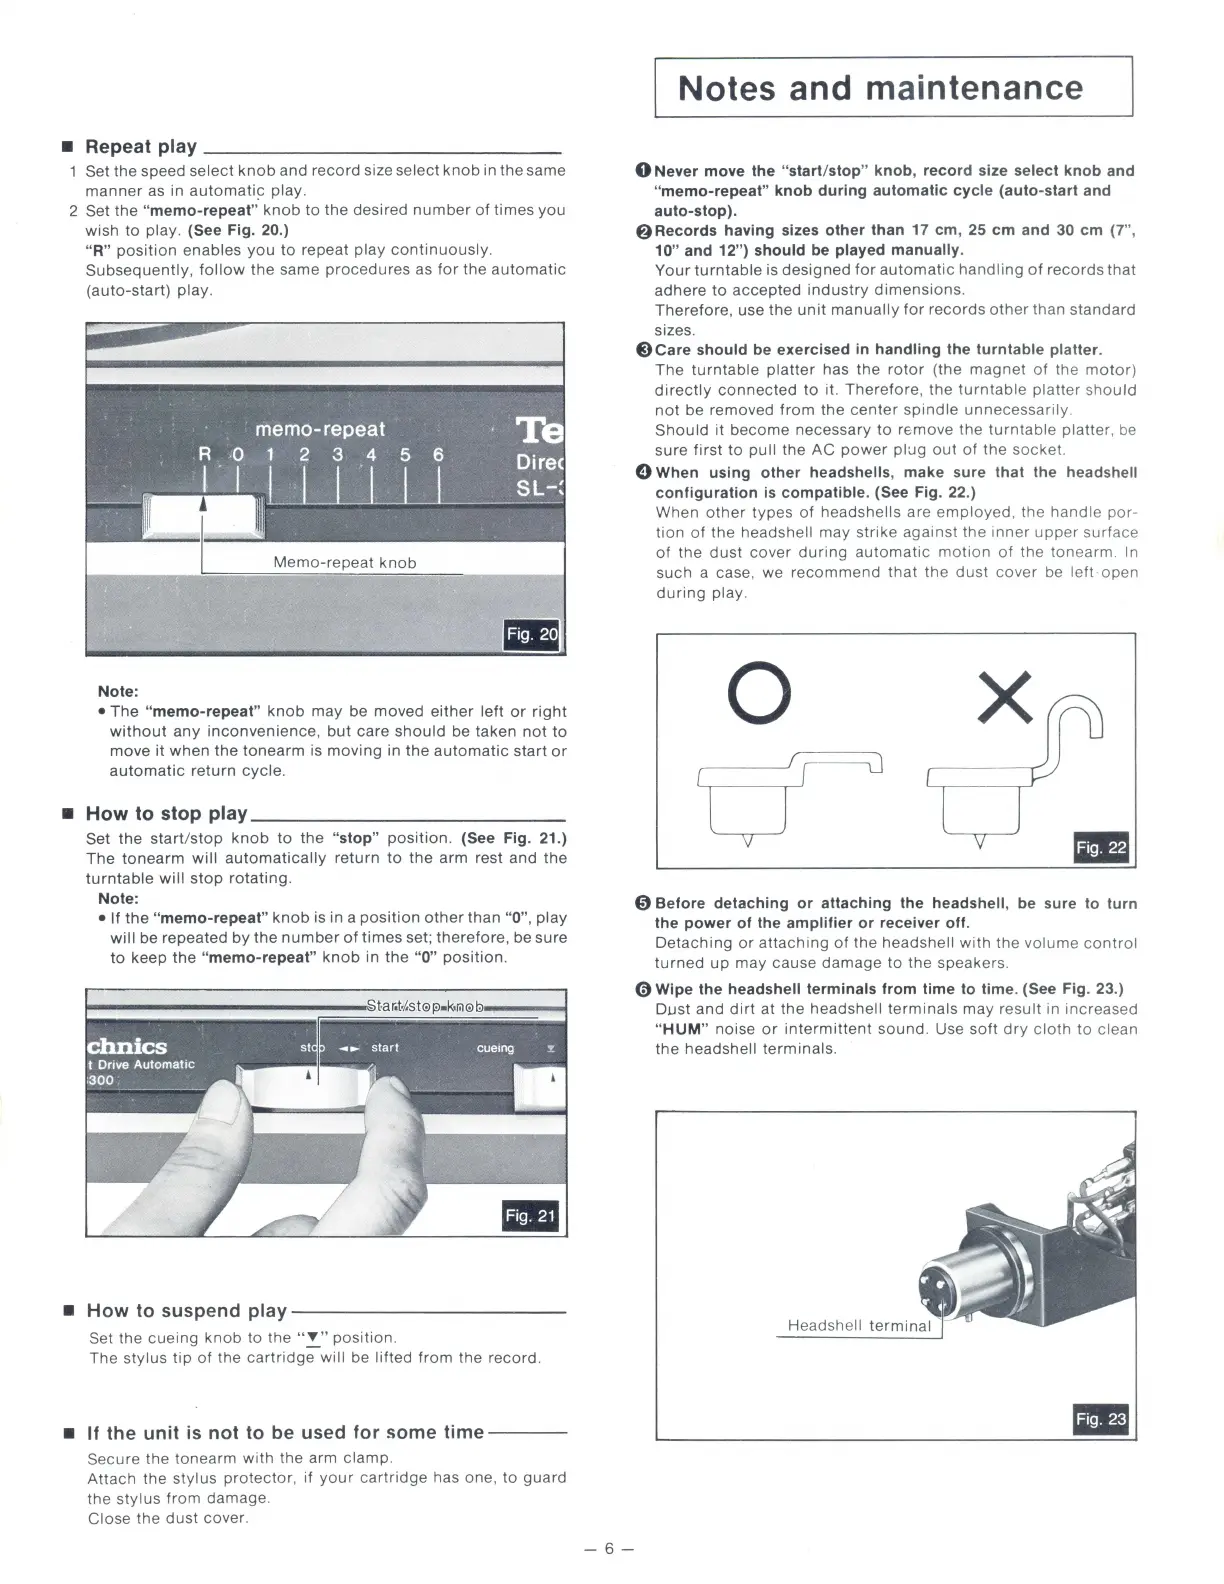
2 Set
the
"memo-repeat"
knob
to
the
desired
number
of
times
you
wish
to
play. (See Fig. 20.)
"R"
position
enables
you
to
repeat
play
continuously.
Subsequently,
follow
the
same
procedures
as
for
the
automatic
(auto-start) play.
Note:
• The "memo-repeat"
knob
may
be moved
either
left
or
right
without
any
inconvenience
,
but
care
should
be taken
not
to
move it
when
the
tonearm
is
moving
in
the
automatic
start
or
automatic
return cycle.
• How to stop play
____________
_
Set
the
start/stop
knob
to
the
"stop"
position.
(See Fig. 21.)
The
tonearm
will
automatically
return
to
the
arm
rest and
the
turntable
will
stop
rotating.
Note:
• If
the
"memo-repeat"
knob
is in a
position
other
than "0",
play
will
be repeated by
the
number
of
times
set; therefore, be sure
to
keep
the
"memo-repeat"
knob
in
the
"0"
position.
-
• How to suspend
play------------
Set
the
cueing
knob
to
the
"
!.
"position.
The stylus
tip
of
the
cartridge
will be lifted
from
the record .
•
If
the unit is not to be used for
some
time----
Secure
the
tonearm
with
the arm clamp.
Attach
the
stylus
protector
, if
your
cartridge
has one,
to
guard
the
stylus
from
damage.
Close
the
dust
cover.
-6-
Notes and maintenance
0Never
move the "start/stop" knob, record size select knob and
"memo-repeat" knob during automatic cycle (auto-start and
auto-stop).
@Records
having sizes other than 17 em, 25 em and
30
em (7",
10"
and 12") should be played manually.
Your
turntable
is
designed
for
automatic
handling
of
records
that
adhere
to
accepted
industry
dimensions.
Therefore, use
the
unit
manually
for
records
other
than
standard
sizes.
@)Care should be exercised
in
handling the turntable platter.
The
turntable
platter
has
the
rotor
(the
magnet
of
the
motor)
directly
connected
to
it.
Therefore
,
the
turntable
platter
shou
ld
not
be removed
from
the
center
spindle
unnecessarily.
Should
it
become
necessary
to
re;move
the
turntable
platter
,
be
sure
first
to
pull the
AC
power
plug
out
of
the
socket.
0 When using other headshells, make sure that the headshell
configuration
is
compatible. (See Fig. 22.)
When
other
types
of
headshells are
employed
, the
handle
por-
tion
of
the
headshell may
strike
against
the
inner
upper
surface
of
the
dust
cover
during
automatic
motion
of
the
tonearm
.
In
such a case, we
recommend
that
the
dust
cover
be
left
·open
during
play.
0
-
0 Before detaching or attaching the headshell, be sure
to
turn
the power of the
amplifier or receiver off.
Detaching
or
attaching
of
the headshell
with
the
volume
control
turned
up
may
cause
damage
to
the
speakers.
0 Wipe the headshell terminals from time
to
time. (See Fig. 23.)
Dust
and
dirt
at
the
headshell
terminals
may
result in increased
"
HUM"
noise
or
intermittent
sound
. Use
soft
dry
cloth
to
clean
the
headshell terminals.
Headshell
termina
-