EasyManuals Logo
Home>Technics>CD Player>SL-PG200A

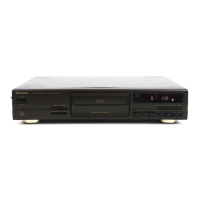
Technics SL-PG200A Service Manual

Technics SL-PG200A
34 pages
To Next Page IconTo Next Page
To Previous Page IconTo Previous Page
Page #8 background imageLoading...
Page #8 background image
SL-PG200A
1.
Pull
out
the
holder
in
the
direction
of
the
arrow
(@).
2.
Remove
the
ring
in
the
direction
of
the
arrow
(®).
ee
|
Removal
of
the
holder
and
ring
ane
|
Removal
of
the
disc
holder
Procedure
Procedure
1-7-8
1-2-7-9
Bracket
of
tray
SW(SIOO1)
Ring
i
o=—-—
Small
Ball
©
Bee
tay
be
al
del
MD
Ls
|
1.
Pull
the
disc
holder
slowly
in
the
direction
of
the
Holder
arrow
until
the
disc
tray
comes
up.
2.
Pull
the
disc
holder
until
it
stops.
3.
Push
the
bracket
of
tray
SW
(S1001)
in
the
direction
of
the
arrow.
1.
Remove
the
3
screws
(9~®).
2.
Remove
the
3
connectors
(CN12,
CN401,
CN431).
Caution:
Be
sure
to
handle
the
small
ball
carefully.
4.
Pull
out
the
disc
holder
further
to
remove
it.
ea
Removal
of
the
loading
unit
oe
Removal
of
the
servo
P.C.B.
Procedure
Procedure
@-
1-2-7
1-2—7—
Oe
9-10
9-10-11
:
1.
Remove
the
4
screws
(@~@O).
2.
Remove
the
FPC
board
(CN101)
from
the
optical
pickup.
3.
Remove
the
1
connector
(CN102)
of
the
turntable
motor.
Caution:
To
prevent
the
breakdown
of
the
laser
diode,
antistatic
shorting
pin
is
inserted
into
the
FPC
board.
Ref.
No.
12
Removal
of
the
loading
motor
Procedure
1-2-7
9-12
1.
Remove
the
drive
belt.
Loading
Motor
2.
Release
the
clamping
spring.
3.
Unsolder
the
2
terminals
of
the
lead
wire
of
the
loading
motor.
—-s-

Questions and Answers:

Question and Answer IconNeed help?

Do you have a question about the Technics SL-PG200A and is the answer not in the manual?

Technics SL-PG200A Specifications

General IconGeneral
BrandTechnics
ModelSL-PG200A
CategoryCD Player
LanguageEnglish

Related product manuals