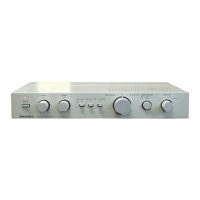
Do you have a question about the Technics SU-C01 and is the answer not in the manual?
| Type | Stereo Integrated Amplifier |
|---|---|
| Power Output | 30 watts per channel into 8Ω (stereo) |
| Frequency Response | 20Hz to 20kHz |
| Total Harmonic Distortion | 0.03% |
| Input sensitivity | 2.5mV (MM), 150mV (line) |
| Channel separation | 55dB (line) |
| Dimensions | 297 x 49.6 x 210.5mm |
| Weight | 3.2kg |
| Input Impedance | 50kΩ |
| Speaker load impedance | 4Ω to 16Ω |
Adjust the voltage selector on the rear panel to the correct setting for your area to prevent damage.
Instructions for connecting the mains lead wires (blue to neutral, brown to live) according to UK standards.
Ensures safe operation by using a properly earthed three-pin plug and extension cords.
Use standard household AC power sources; avoid high voltage sources or DC sources.
Handle power cord plugs with dry hands, grasp the plug, not the cord, to avoid electric shock.
Use rear AC outlets only for audio equipment with specified power consumption; avoid high-power appliances.
Do not attempt to repair or reconstruct the unit yourself to avoid electric shock or damage.
Prevent children from inserting objects into the unit to avoid electric shock or malfunction.
Turn off the unit when not in use to prolong its life and prevent unexpected trouble.
Immediately disconnect power if water spills on the unit; consult dealer due to fire/shock risk.
Ensure adequate ventilation and keep the unit away from direct sunlight to prevent overheating.
Keep the unit away from stoves and other heat sources to prevent damage to surfaces and components.
Avoid spray insecticides as they can cause damage or ignitable gas buildup on the unit.
Never use alcohol or paint thinner for cleaning as they can damage the unit's finish.
Disconnect power immediately if sound is interrupted, indicator fails, or abnormal odor/smoke is detected.
Clean with a soft, dry cloth or a detergent-dampened cloth; avoid chemicals that damage the finish.
The front of the unit can be raised for easier operation using the feet at the front left and right.
Controls the secondary circuit; primary circuit remains live when plugged in.
Adjusts bass and treble frequencies; 'defeat' position provides flat frequency response.
Eliminates high-frequency noises like scratch or hiss from discs and tapes.
Eliminates ultra-low-frequency noises such as rumble from warped discs or motor noise.
Compensates for reduced low-frequency hearing at low volume levels for dynamic sound.
Selects sound sources like disc, radio broadcasts, or auxiliary equipment.
Listens to source or playback from tape deck; used for recording monitoring with 3-head decks.
Adjusts the overall listening volume for the unit.
Adjusts the sound balance between left and right speakers, or for monaural broadcasts.
Connect recording-output terminals to tape deck; recording level is unaffected by other controls.
Begin performance playback and adjust recording level on the tape deck to start recording.
Addresses issues like unusual sounds, scratching noises, or lack of clarity during disc playback.
Covers problems with FM stereo reception, hissing, distortion, and indicator flickering.
Addresses issues like ignition noise, hissing, or humming during AM broadcasts.
Covers persistent issues like power amplifier status, no sound, reversed stereo, hum, or no sound from one speaker.
Details harmonic distortion, input sensitivity, impedance, S/N ratio, and frequency response.
Includes power consumption, power supply voltage, dimensions, and weight of the unit.
Details the included stereo pin-type connection cord.