EN 2
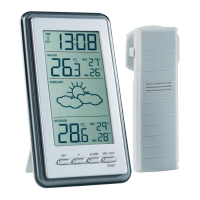
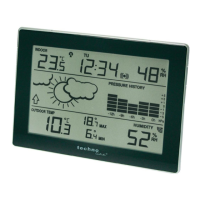
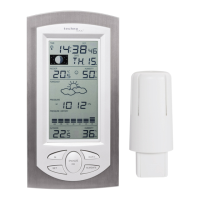
Part A – Display
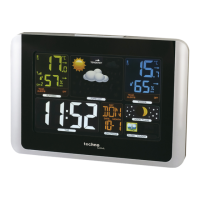
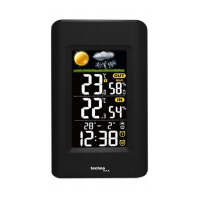
A1 - Weather forecast A2 - Outdoor temperature /
humidity
A3 - Indoor temperature / humidity A4 - Month and date
A5 - PM icon A6 - Time
A7 - RF icon A8 - Outdoor sensor channel
A9 - Auto dimmer A10 - ALARM 1/2
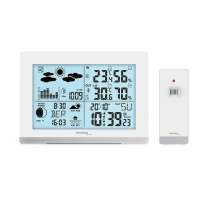
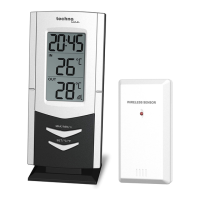
Part B – Case
B1 - SNOOZE/AUTO DIMMER button B2 - DOWN / °C /°F button
B3 - MEM button B4 - SET button
B5 - SENSOR / UP button B6 - ALARM SET / ON-OFF
button
B7 - Battery compartment cover - insert 3x AAA batteries (not included)
B8 - Insert DC jack to power up your unit
B9 - AC/DC adapter B10 - AC wall socket
B11 - Stand / holder
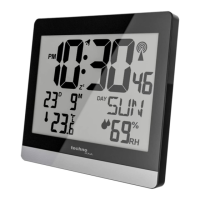
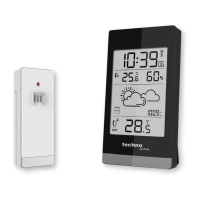
Part C – Outdoor sensor
C1 - Stand / holder C2 - Fix at Channel 1
C3 - Channel 1 C4 - Channel 2
C5 - Channel 3 C6 - Insert 2 x AAA batteries
(not included)
QUICK SETUP
STEP 1
Insert the AC/DC adaptor to any 230V AC household outlet. Then insert the DC jack to the left side of
your unit. Your weather station will be powered on and backlight will be on permanently.
STEP 2
Keep your weather station and wireless outdoor transmitter next to each other. Slide open the battery
cover at the back of your wireless outdoor transmitter, then insert 2 x AAA new alkaline batteries to
the battery compartment. Make sure the Channel selector switch is at 1 position. Replace the battery
cover.
Make sure (Channel 1) is displayed under the outdoor temperature. You can press /
CHANNEL to select Channel 1.
Your weather station will receive data signal from the outdoor transmitter in few seconds. Then place
your outdoor transmitter in a dry and shaded area.
STEP 3
The weather station computes weather forecasts based on changes in air pressure. However,
when using the weather station for the first time, it may take up to a few days of collecting
sufficient information for more accurate forecasts. Manual setting of the weather forecast can slightly
accelerate this process.
Please refer to the point “TO SET THE WEATHER STATION“.
INSTALLING BACKUP BATTERIES TO YOUR UNIT
Your weather station requires 3 x “AAA” alkaline batteries to provide backup power to it in the event
of a temporary power interruption.
1. Place your unit face down on a flat surface.
2. Slide and remove the battery cover at the bottom of your unit.
3. Insert 3 “AAA” alkaline batteries into the battery compartment by observing the “+” and “-“ polarity
as indicated.
4. Replace the battery cover.
5. Insert the holder to the bottom of your weather station for desktop.