EN2
Part A-Positive LCD
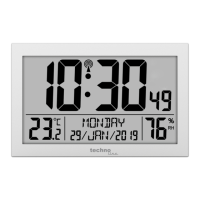
A1: RCC icon A2: Time
A3: Alarm1 icon A4: Alarm2 icon
A5: Weekday A6: Temperature
A7: Date A8: Humidity
A9: Year A10: Month
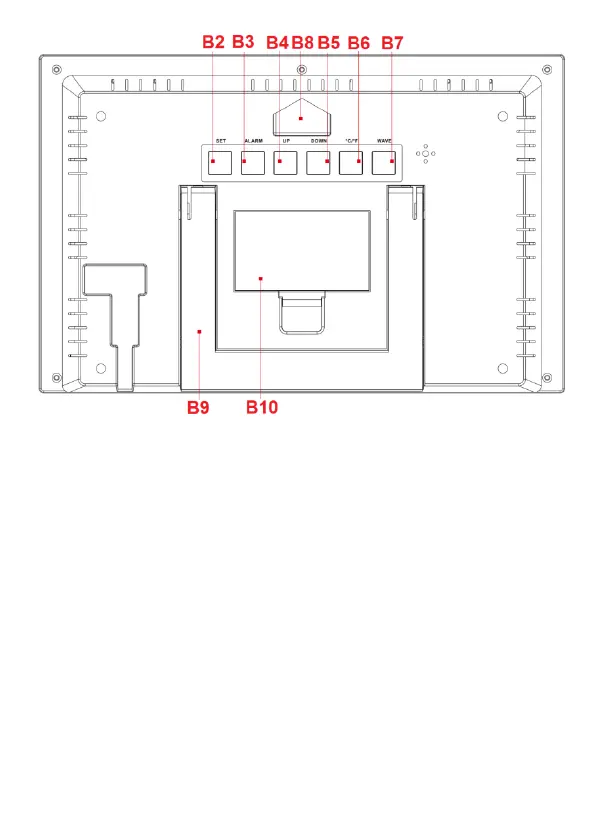
Part B – Buttons and Framework
B1: “SNOOZE” touch sensor B2: “SET” button
B3: “Alarm” button B4: “UP” button
B5: “DOWN” button B6: “°C/°F” button
B7: “WAVE” button B8: Hanging hole
B9: Support frame B10: Battery compartment
Initial operation:
Open the clock battery compartment cover
Insert 2 x AA batteries observing correct polarity [ “+” and “-” marks]
When you insert the batteries, all the icon on the LCD display will briefly light up for 3 seconds,
you will hear a beep tone and the clock begins the search for the radio signal.
Reception of the radio signal:
The clock automatically starts the DCF signal search after 7 minutes of any restart or changing
of new fresh batteries. The radio mast icon starts to flash.
At 1:00 /2:00 / 3:00 am, the clock automatically carries out the synchronization procedure with
the DCF signal to correct any deviations to the exact time. If this synchronization attempt is
unsuccessful (the radio mast icon disappears from the display), the system will automatically