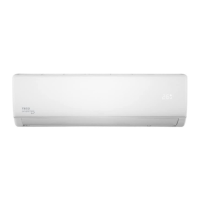
INDOOR UNIT INSTALLATION
The mounting plate is the part which you
will mount the indoor unit. (See Mounting
Plate Dimensions below for detailed
information).
ATTACH MOUNTING PLATE TO WALL
1. Place the mounting plate against the
wall in a location that meets the
standards in the select installation
location step.
2. Adjust the mounting plate to a horizontal
state with a spirit level.
3. Mark, then drill holes for mounting
screws in places that:
- have studs and can support the weight
of the unit.
- correspond to screw holes on the
mounting plate.
4. Secure the mounting plate to the wall
with the screws.
5. Make sure the mounting plate is flat
against the wall.
If the wall in made of brick, concrete, or
similar material, drill holes in the wall and
insert the sleeve anchors before secure
the mounting plate to the wall by
tightening the screws directly into the clip
anchors.
NOTE FOR CONCRETE OR BRICK WALLS
Different models may have different
mounting plates. In order to ensure that
you have ample room to mount the
indoor unit , the diagram below show the
following dimensions:
MOUNTING PLATE DIMENSIONS
• Width of common mounting positions
• Width of indoor unit relative to plate
• Height of indoor unit relative to plate
• Recommended position of wall hole
Ød
H
W
A B C
D
E
Indoor Unit
Outline
Indoor Model
H W
A
B C D E Ød
TWS26H3DVJT
292
811 188 188 215 145.8 44.4 65
TWS35H3DVJT
292
811 188 188 215 145.8 44.4 65
22
TWS52H3DVJT
315
1010 264 266 275 234.4 35.6 65
TWS72H3DVJT
315
1010
264
266
275 234.4
35.6 65
360 1191 344 311 305 265 45 70
TWS88H3DVJT

 Loading...