6
Teel Operating Instructions and Parts Manual
3P740A, 4P037, 4P038, 4P039 and 4RJ96A
Teel One, Two, and Three Stage
Vertical Jet Pumps
®
E
N
G
L
I
S
H
Installation
REPLACING AN EXISTING PUMP
NOTE: For proper performance, pump
MUST be matched to ejector and to
well depth. See Tables I through IV,
Pages 3, 4, and 5, for information
about correct ejector packages and
nozzle/venturi combinations to use at
your well depth.
1. Long runs and many fittings
increase friction and reduce flow.
Locate pump as close to well as
possible: use as few elbows and
fittings as possible.
2. Be sure well is clear of sand. Sand
will plug the pump and void the
warranty.
3. Protect pump and all piping from
freezing. Freezing will split pipe,
damage pump, and void the
warranty. Check locally for frost
protection requirements (usually
pipe must by 12” below frost line
and pump must be insulated).
4. Be sure all pipes and foot valve are
clean and in good shape.
5. Be sure there are no air pockets in
suction pipe.
6. Be sure there are no leaks in suction
pipe. Use Teflon tape or Plasto-Joint
Stik
1
to seal pipe joints.
7. Match pump to well.
IMPORTANT: Flow into well must at
least equal flow out through pump!
8. Unions installed near pump and
well will aid in servicing. Leave
room to use wrenches.
1
Lake Chemical Co., Chicago, Illinois
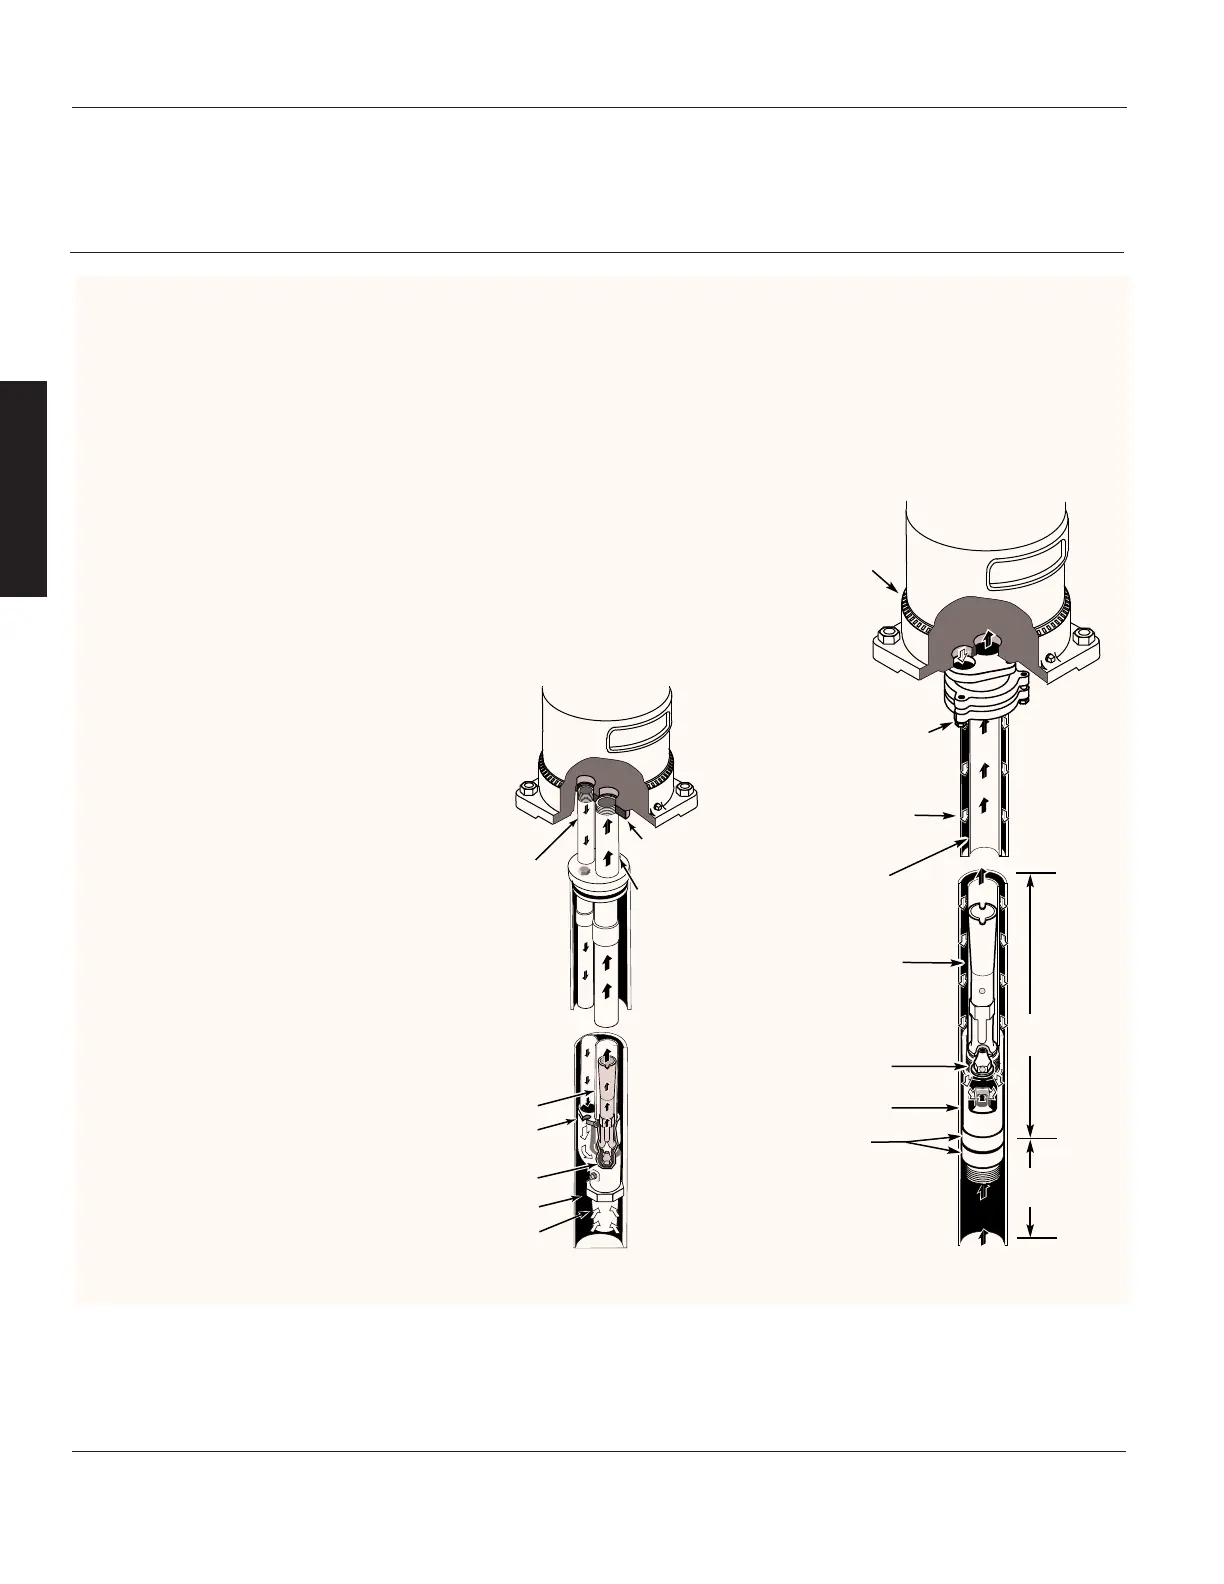
PIPING IN THE DEEP WELL
See Figures 1 and 2.
NOTE: Deep well installations are
either single pipe (2” wells) or double
pipe (4” and larger wells). In a double
pipe installation, with pipes of unequal
size, the larger pipe is the suction pipe
and the smaller pipe is the drive pipe
(1 and 1
1
⁄2 HP pumps on very deep wells
may use suction and drive pipes of the
same diameter).
Plastic pipe is ideal for double pipe
installations. Due to its light weight, it
is easy to handle and does not usually
require a block and tackle for
installation and removal.
PLASTIC PIPE INSTALLATION –
DOUBLE PIPE (SEE FIGURE 1)
NOTE: Use Teflon tape on all male
threads on plastic pipe and fittings to
prevent air leaks in suction piping.
1. Inspect ejector to make sure that
nozzle and venturi openings are
clean and clear.
JET NO.
 Loading...