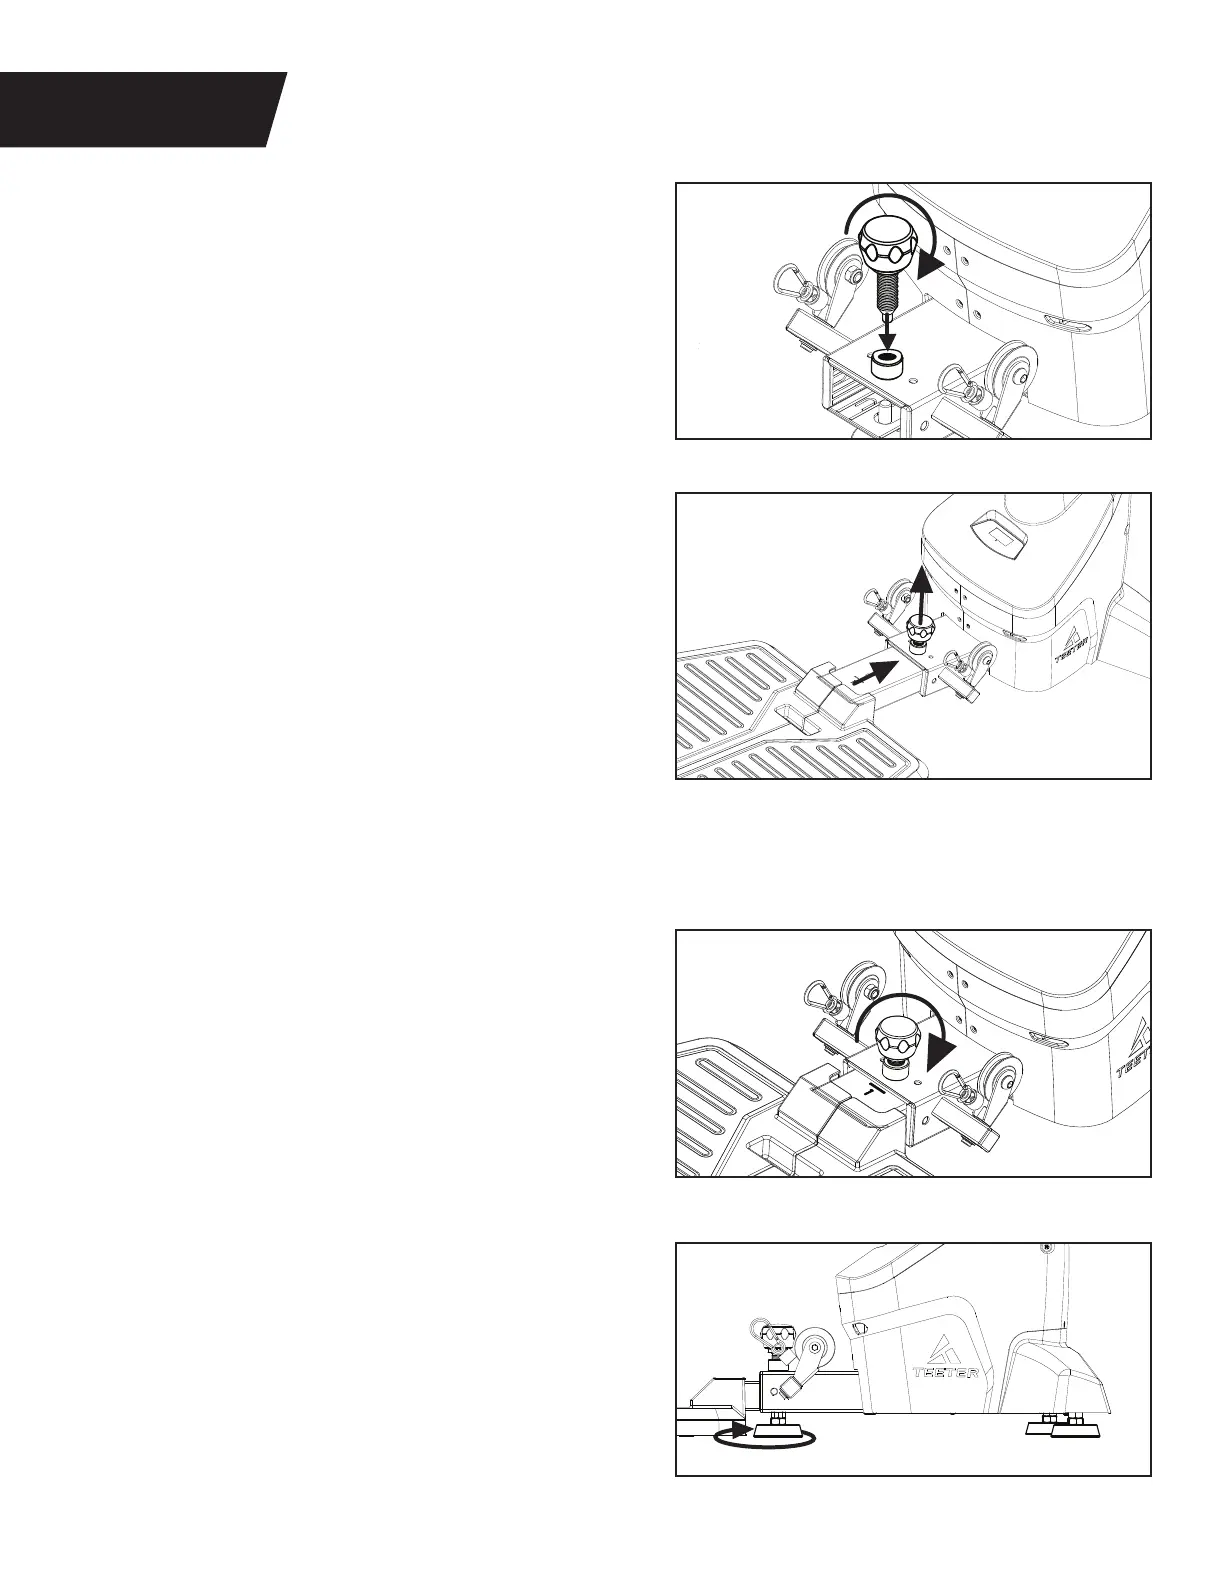
FIGURE 4
ATTACH PLATFORM ASSEMBLY
STEP 4
Figure 10: Insert the Platform Adjustment Knob into
the hole in the Main Body, and partially tighten it by
turning it clockwise.
Figure 11: Pull up on the Platform Adjustment Knob
and continue to hold it with one hand while sliding
the Platform Adjustment Bar into the Main Body.
Release the Platform Adjustment Knob into Setting
1 and ensure that it is engaged into the hole setting.
Refer to page 10 for more Platform Length setting
information in the User Guide.
ALTERNATIVE ASSEMBLY METHOD:
Avoid floor friction – follow the method above but
first lay the Main Body on its front so the Support
Handle/Media Rack are resting on the ground,
then lower the Platform Adjustment Bar into
the Main Body.
Figure 12: Tighten the Platform Adjustment Knob
by turning it clockwise.
NOTE: This knob features a spring‑loaded pin lock to
engage in the hole setting AND threads to tighten the
connection, reducing any movement between parts.
To adjust, loosen by turning the knob first, then pull
and release the pin on your setting, then tighten again.
Figure 10
Figure 11
Figure 12
8
Figure 13: Make sure your FitForm is on a flat,
stable surface. Locate the 3 × Leveling Feet.
If any of the feet are not resting flat on the
ground, rotate them counter‑clockwise to lower
them until they reach the ground.
Figure 13