39
Screw
FIGURE 4
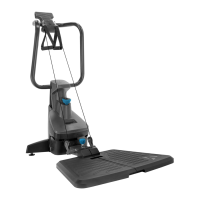
SUPPORT HANDLE & MEDIA RACK ASSEMBLY
STEP 3
Figure 7: Turn the Support Handle
Adjustment Knob counter‑clockwise to
loosen the Support Handle.
Figure 8: Raise the Support Handle until it
reaches the upright position at a slight angle
as shown (in proper position, the Support
Handle is not fully perpendicular to the
FitForm Platform).
To secure the Support Handle, turn the
Support Handle Adjustment Knob clockwise
until the knob feels tight. Attempt to rock the
Support Handle back and forth while turning
the Support Handle Knob clockwise until the
knob is fully tightened into a hole setting and
the Support Handle no longer can be moved.
IMPORTANT: Always ensure the Support
Handle is fully secured with the Handle
Support Knob before you begin each
exercise. The Handle Support should not
move when the Handle Support Knob is
properly secured into a hole setting.
Figure 9: Position the Media Rack so that
the Teeter logo is facing up and the screw
holes in the Media Rack align with the
holes in the Support Handle.
Use the Step 3 Hardware Kit to secure
the Media Rack with 2 × Screws and fully
tighten with the screwdriver provided.
Figure 7
Figure 8
Figure 9
Step 3 Hardware Kit
7