Do you have a question about the Teeter X Series and is the answer not in the manual?
Close T-Pin to last hole setting, place system-side down at an angle next to table bed.
Open EZ-Reach System to second notch, place system-side down at an angle next to table bed.
Close Deluxe EZ-Reach Ratchet to smallest setting, place Main Shaft with Ankle Lock into Large Bag.
This manual provides detailed instructions for disassembling and repacking a Teeter X Series Inversion Table for return. The primary function of this guide is to ensure that all components are correctly prepared and placed within the original packaging, which is crucial for a complete refund. The guide emphasizes the importance of using the original box and bags, and provides contact information for Teeter Customer Service if the original packaging is unavailable. Unauthorized packing containers may result in ineligibility for a refund.
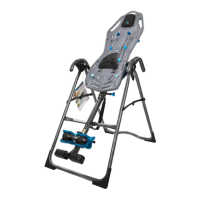
The disassembly process begins by breaking down the inversion table into its main components: the Table Bed, A-Frame, Main Shaft with Ankle System, Accessories, Hardware, Handles, and Roller Hinges. Users are explicitly warned not to disassemble the product into more components than these listed parts to avoid unnecessary complications.
For the Table Bed disassembly, users are instructed to remove all accessories and place the Table Bed face-down on the floor. Two bolts from the Support Beam need to be removed using a 6mm Allen Wrench to steady the bolts, and then the nuts loosened with a 10/13mm Open-Ended Wrench. This step ensures the Table Bed is ready for repacking.
Repacking the Table Bed involves placing it face-down into the box, off to one side, as illustrated in the manual. This specific placement is designed to optimize space and protect components during transit.
The A-Frame repacking requires a specific technique: the A-Frame should be positioned in the box by first pulling up on the Support Beam of the Table Bed with one hand. This allows the A-Frame to overlap over the Crossbar of the A-Frame while sliding it into the box. This method ensures a snug fit and prevents movement during shipping.
The Ankle Lock System has different repacking instructions depending on its type. For the T-Pin Ankle Lock, the T-Pin must be closed to the last hole setting. It is then placed Ankle System-side down at an angle next to the Table Bed, on top of a plastic bag. This protects the components and ensures proper positioning.
For the EZ-Reach Ankle Lock, the system must be open to the second notch. It is then placed Ankle System-side down at an angle next to the Table Bed, on top of a plastic bag, with the EZ-Reach Handle tucked under the Crossbar of the A-Frame. This specific arrangement prevents damage to the handle and other parts.
For the Deluxe EZ-Reach Ankle Lock, the ratchet needs to be closed to the smallest setting. The Main Shaft with Ankle Lock is then placed into a Large Bag to prevent scratching. Finally, the Ankle Lock is placed face-down next to the Table Bed. This detailed process ensures that all components of the ankle lock system are securely packed and protected.
Repacking small parts involves organizing various accessories. Handles and Roller Hinges are to be slid into a Medium Bag. Smaller accessories, hardware, and product support materials are placed into a Small Bag. Larger accessories, such as the Lumbar Bridge and Head Pillow, can remain loose in the box, indicating they are less prone to damage or can fill empty spaces.
The final step in the repacking process is sealing the box and attaching the return label. The large box must be securely sealed with packing tape. The return label should be affixed, and the Return Authorization Number (RA #) clearly marked on the outside panel of the box. This is a critical step, as Teeter Inversion Tables cannot be returned without a valid Return Authorization Number.
The manual also provides important contact information for Teeter Customer Service for any assistance with returns or if the original packaging is missing. This includes a toll-free number and an email address, emphasizing the company's support for its customers throughout the return process.
The guide is designed to be user-friendly, with clear, step-by-step instructions accompanied by figures that illustrate each stage of disassembly and repacking. The figures are noted to not show all bags used in repacking, simplifying the visual representation of box assembly. This focus on visual aids helps users understand complex steps more easily.
Overall, the manual serves as a comprehensive guide for customers returning their Teeter X Series Inversion Table, ensuring that the product is disassembled, packed, and labeled correctly to facilitate a smooth and successful return process and a complete refund. It highlights the importance of careful handling and adherence to instructions to maintain the integrity of the product during transit.
| Product Line | X Series |
|---|---|
| Category | Inversion Table |
| Foldable Design | Yes |
| Frame Construction | Steel |
| Weight Capacity | 300 lb (136 kg) |
| Height Capacity | 4'10" - 6'6" |