Do you have a question about the Teka DW6 and is the answer not in the manual?
Check packaging for transport damage and dispose of materials properly.
Site, connect, and earth the dishwasher according to instructions. Ensure plug accessibility.
For adult use only, not outdoors. Do not stand on door, avoid solvents, open door carefully.
Keep detergents away from children; supervise young children.
If appliance malfunctions, turn off water, disconnect plug, consult fault finding or service center.
Make inoperable by cutting cord/removing lock and take to disposal center.
Site the dishwasher with the back against the wall and sides along cabinets/wall.
Adjust feet to ensure the dishwasher is level, not inclined more than 2°.
Connect water supply hose to 3/4" connector. Use new hose-sets.
System stops water supply if hose or unit leaks. Connect box A to tap as shown.
Insert drain hose into pipe (min 4cm diameter) or sink, height 40-100 cm.
Connect to earthed socket matching rating plate. Replace cable if incompatible.
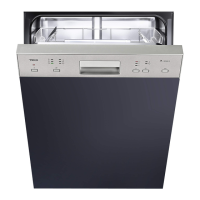
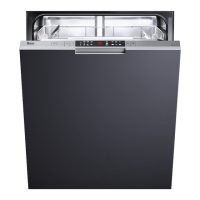
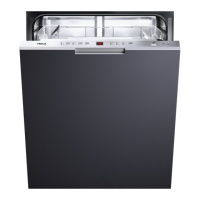
Identifies control panel buttons and indicators like Programme, Delayed Start, ON-OFF.
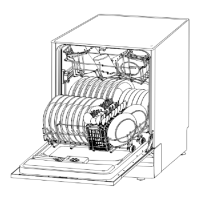
Shows racks, spray arms, filter, and detergent dispenser components.
Remove lower rack, unscrew cap, fill with salt and water if first time, screw cap back.
Unscrew cap, rotate ring to adjust salt usage based on water hardness using the provided table.
Turn cap counter-clockwise, pour rinse aid, adjust dosage with screwdriver.
Press cover button, pour detergent into compartments 5 (wash) and 6 (pre-wash).
Avoid wood, delicate glass, plastic not hot-water resistant, copper, pewter, items with decorative patterns.
Purchase dishwasher-proof table and kitchenware in the future.
Discusses causes like glass type, detergent, temperature, and offers remedies.
Place difficult items, lids/dishes on sides, slant deep pots, use fold-down tines.
Select the most appropriate programme by comparing crockery type and food remains.
Use lower temperature programmes for small loads to save water and energy.
Stated data based on standard conditions; values can vary.
Dissolve food residues, lift off remains, clean for spotless finish. Use with Rinse Aid and Special Salt.
Powerful grease cutting, soften/break down stains, integrated salt function, rinse aid ball.
Extra cleaning power, penetrate tough stains, rinse aid function, salt action, protector action.
Tips for after each wash and when going on holiday to maintain the appliance.
Instructions on removing the plug before maintenance and avoiding abrasive cleaning products.
Periodic cleaning of seals with a damp sponge to prevent odors.
Check for grease or scale accumulation. Clean interior with detergent solution if deposits found.
Check LOW SALT indicator "E" and LOW RINSE AID indicator "D". Top up as required.
Check and clean filters "7", "8", "9" for food particles to prevent pump blockage.
Inspect and clean spray arms "9", "10" for blocked nozzles due to lime or food remnants.
Experience helps resolve common issues to save costs and downtime. Use the list of occurrences and remedies.
Check fuse, plug, door closure, programme button, water tap, and intake hose strainer.
When "E" or "E3" blink, check door closure or drain hose height.
Check if the drain hose is crimped, bent, or too high.
Check water supply, hose condition, and water supply hose filter for clogs.
Spray arm blocked by small items or food remains.
Detergent compartment overfilled or mechanism clogged with detergent.
Check drainage hose blockage, pump jamming, or blocked filters.
Normal washing up liquid used in rinse-aid container or spilled rinse aid.
Check for electricity cut-off or interrupted water supply.
Spray arm hitting dishes or crockery not stacked properly.
Problems like food remnants, discolouration, white stains, poor drying, dullness, tea stains, rust, clouding, smears.
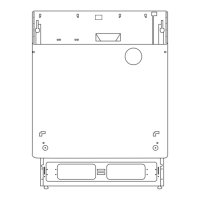
Provides details on width, depth, height, capacity, water pressure, power voltage, current, and absorbed power.
Environment-friendly disposal methods, unplugging, cutting cable, destroying lock mechanism.
Measures to prevent toppling of built-under/built-in units when re-sited.
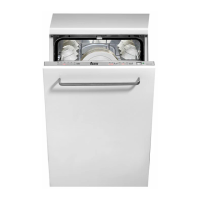
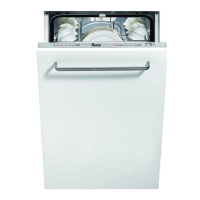
This document is a Use and Maintenance Manual for the DW6 58 FI dishwasher, manufactured by Teka. It provides comprehensive information on the appliance's function, technical specifications, usage, and maintenance.
The DW6 58 FI is a household dishwasher designed for washing dishes and cooking utensils. It features a special softener that uses salt to eliminate lime and minerals from water, preventing deposits on dishes. The appliance includes a detergent dispenser for both main wash and pre-wash cycles, and a rinse aid dispenser to ensure spotless and streak-free drying.
The dishwasher offers various wash programs tailored to different soiling levels and types of dishes, including Intensive Wash (70°C), Normal+ECO Wash (55°C), Light Wash (50°C), Glassware (45°C), Rapid Wash (40°C), Heat Wash (65°C), and Soak. It also incorporates a "3 in 1" function for combination detergent products, though specific programs like Heat Wash, Rapid Wash, and Soak are not compatible with these tablets.
Key operational features include:
The manual provides detailed instructions for optimal use:
Regular inspection and maintenance are crucial for the dishwasher's longevity and performance:
Troubleshooting: The manual includes a "Fault finding" section to help users resolve minor issues themselves, such as the appliance not starting, error displays (E1, E3, E4, E5), difficulties with spray arm rotation, detergent dispenser issues, and problems with wash results (e.g., food remnants, white stains, discolored plastic, dull glasses, rust). It advises contacting an authorized service center if problems persist after performing basic checks.
| Brand | Teka |
|---|---|
| Model | DW6 |
| Category | Dishwasher |
| Language | English |