3
• Power to P3 but display is in power saving mode
(no motion or activity for at least fifteen minutes).
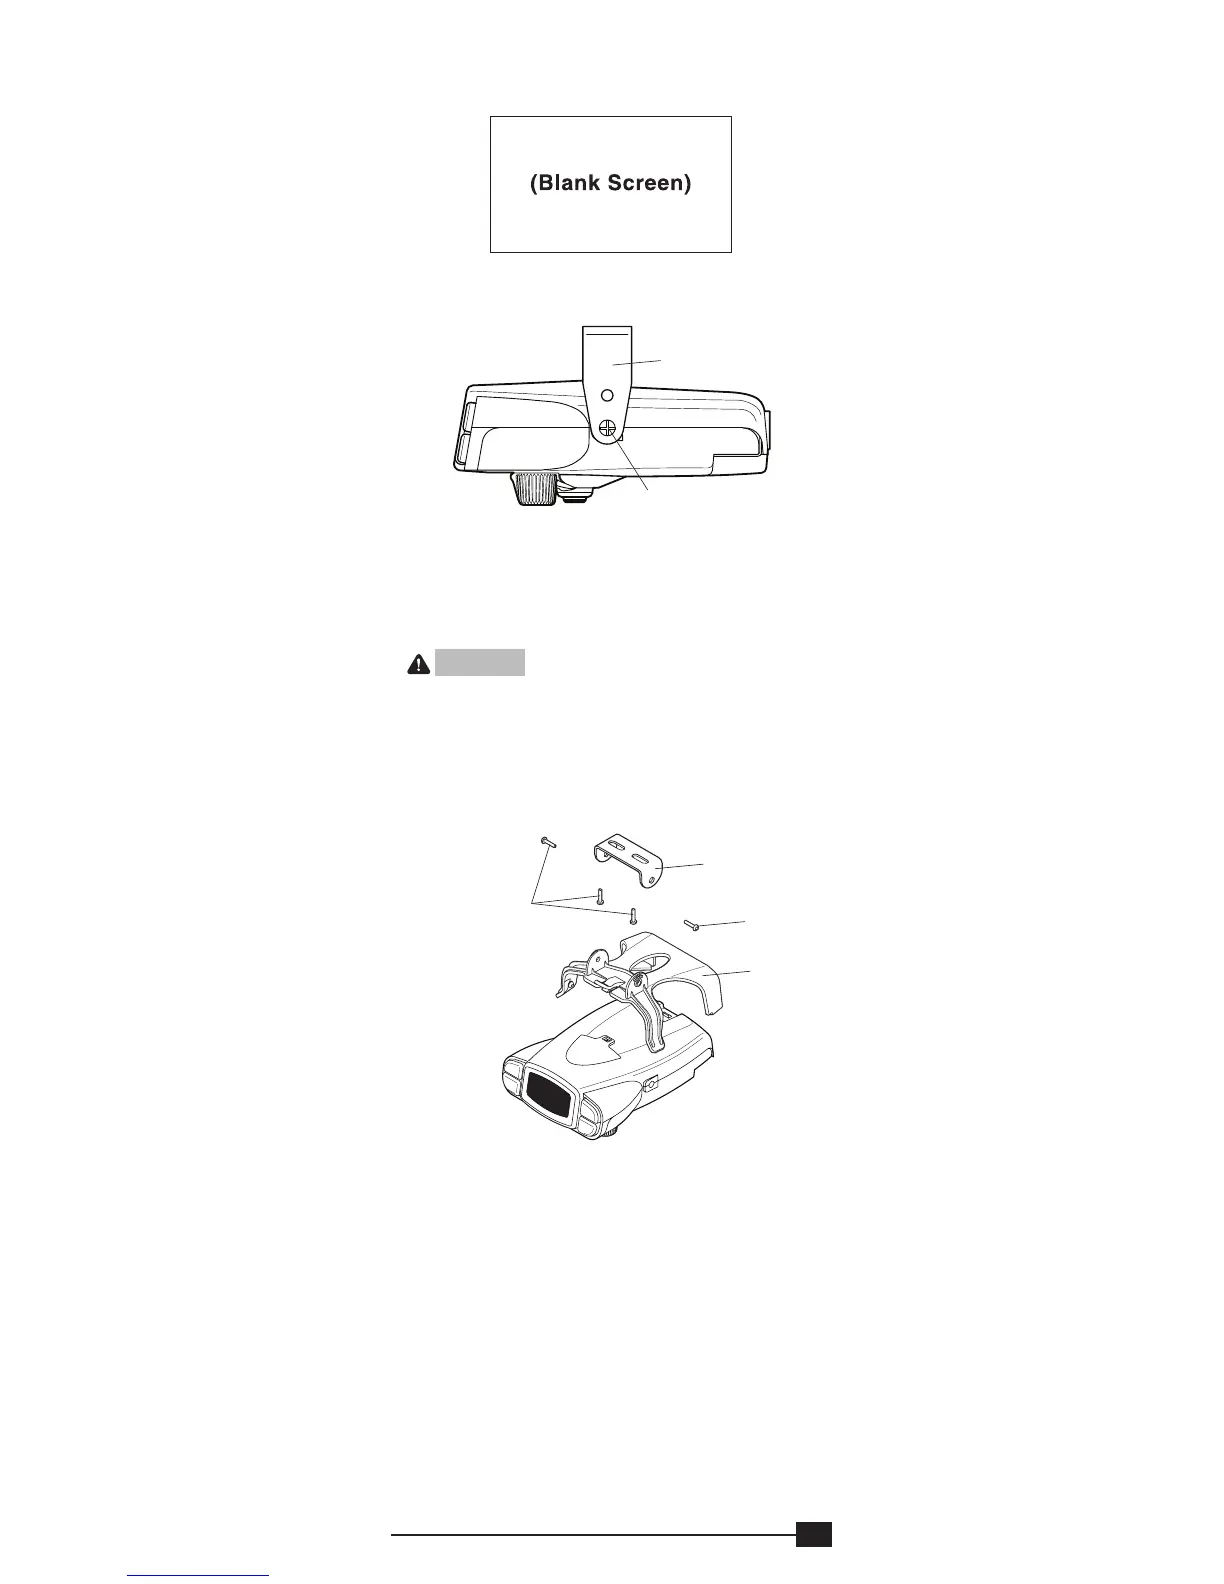
Mounting the P3
Traditional Bracket Mount
A. Mounting Bracket
B. #8 X 3/8" Machine Screw with Internal Tooth
Washer
1. CAUTION Drilling or use of longer screws may
damage unit.
2. Securely mount bracket to a solid surface.
3. Insert supplied #8 x 3/8" machine screws on each
side into the mounting holes.
4. Adjust control to desired position and tighten
screws until snug.
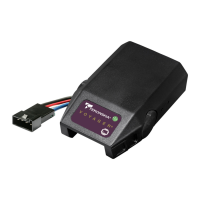
Under Dash Pocket Mount
A. T Slot Mount
B. Small Metal Bracket
C. #8 X 3/8" Self Tapping Screws
1. Securely mount Small Metal Bracket to a solid
surface using supplied #8 X 3/8" Self Tapping
Screws.
2. Securely mount T Slot Mount to Small Metal
Bracket using supplied #8 X 3/8" Self Tapping
Screws.
3. Plug in connector.
4. Insert P3 Brake control.
A
B
A
C
C
B