Table of Contents
TDS 200 Series Digital Oscilloscope Service Manual
iii
List of Figures
Figure 2–1: Routing the power cord and security cable 2–3. . . . . . . . . . .
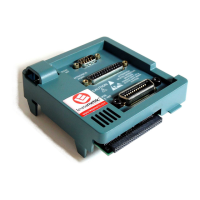
Figure 2–2: Installing an extension module 2–4. . . . . . . . . . . . . . . . . . . . .
Figure 3–1: Module-level block diagram (two channel) 3–3. . . . . . . . . . .
Figure 3–2: Module-level block diagram (four channel) 3–4. . . . . . . . . . .
Figure 5–1: Service menu enable button 5–2. . . . . . . . . . . . . . . . . . . . . . . .
Figure 5–2: Adjustment setups 5–3. . . . . . . . . . . . . . . . . . . . . . . . . . . . . . . .
Figure 6–1: Removing the rear feet 6–8. . . . . . . . . . . . . . . . . . . . . . . . . . . .
Figure 6–2: Installing the rear feet 6–9. . . . . . . . . . . . . . . . . . . . . . . . . . . .
Figure 6–3: Installing a front-case label 6–10. . . . . . . . . . . . . . . . . . . . . . . .
Figure 6–4: Installing a new rear-case label 6–11. . . . . . . . . . . . . . . . . . . . .
Figure 6–5: Removing the handle 6–12. . . . . . . . . . . . . . . . . . . . . . . . . . . . .
Figure 6–6: Installing the handle 6–13. . . . . . . . . . . . . . . . . . . . . . . . . . . . . .
Figure 6–7: Removing and installing the rear cover 6–15. . . . . . . . . . . . . .
Figure 6–8: Removing and installing the front feet 6–16. . . . . . . . . . . . . . .
Figure 6–9: Removing and installing the EMI clips 6–17. . . . . . . . . . . . . . .
Figure 6–10: Removing the flip stand 6–18. . . . . . . . . . . . . . . . . . . . . . . . . .
Figure 6–11: Installing the flip stand 6–19. . . . . . . . . . . . . . . . . . . . . . . . . . .
Figure 6–12: Line fuse location 6–20. . . . . . . . . . . . . . . . . . . . . . . . . . . . . . .
Figure 6–13: Removing the power supply module 6–21. . . . . . . . . . . . . . . .
Figure 6–14: Installing the power supply module 6–22. . . . . . . . . . . . . . . .
Figure 6–15: Removing and installing the internal assembly 6–24. . . . . . .
Figure 6–16: Installing the copper mesh grounding tube 6–25. . . . . . . . . .
Figure 6–17: Main board removal 6–26. . . . . . . . . . . . . . . . . . . . . . . . . . . . .
Figure 6–18: Main board installation 6–27. . . . . . . . . . . . . . . . . . . . . . . . . .
Figure 6–19: Removing the display module 6–28. . . . . . . . . . . . . . . . . . . . .
Figure 6–20: Installing the display module 6–30. . . . . . . . . . . . . . . . . . . . . .
Figure 6–21: Removing the front panel module 6–31. . . . . . . . . . . . . . . . . .
Figure 6–22: Installing the front panel module 6–32. . . . . . . . . . . . . . . . . .
Figure 6–23: Removing and installing the keypad 6–33. . . . . . . . . . . . . . . .
Figure 6–24: Removing the display shield 6–35. . . . . . . . . . . . . . . . . . . . . .
Figure 6–25: Installing the display shield 6–36. . . . . . . . . . . . . . . . . . . . . . .
Figure 6–26: Measuring the backlight voltage 6–41. . . . . . . . . . . . . . . . . . .
Figure 10–1: Exploded diagram 10–7. . . . . . . . . . . . . . . . . . . . . . . . . . . . . . .

 Loading...


