Installation Instructions
WVR6UP, WVR70UP, and WVR7UP Upgrades
13
5. Move the old Audio board toward the front of the instrument until the
connectors clear the rear panel, and then lift the board out of the chassis.
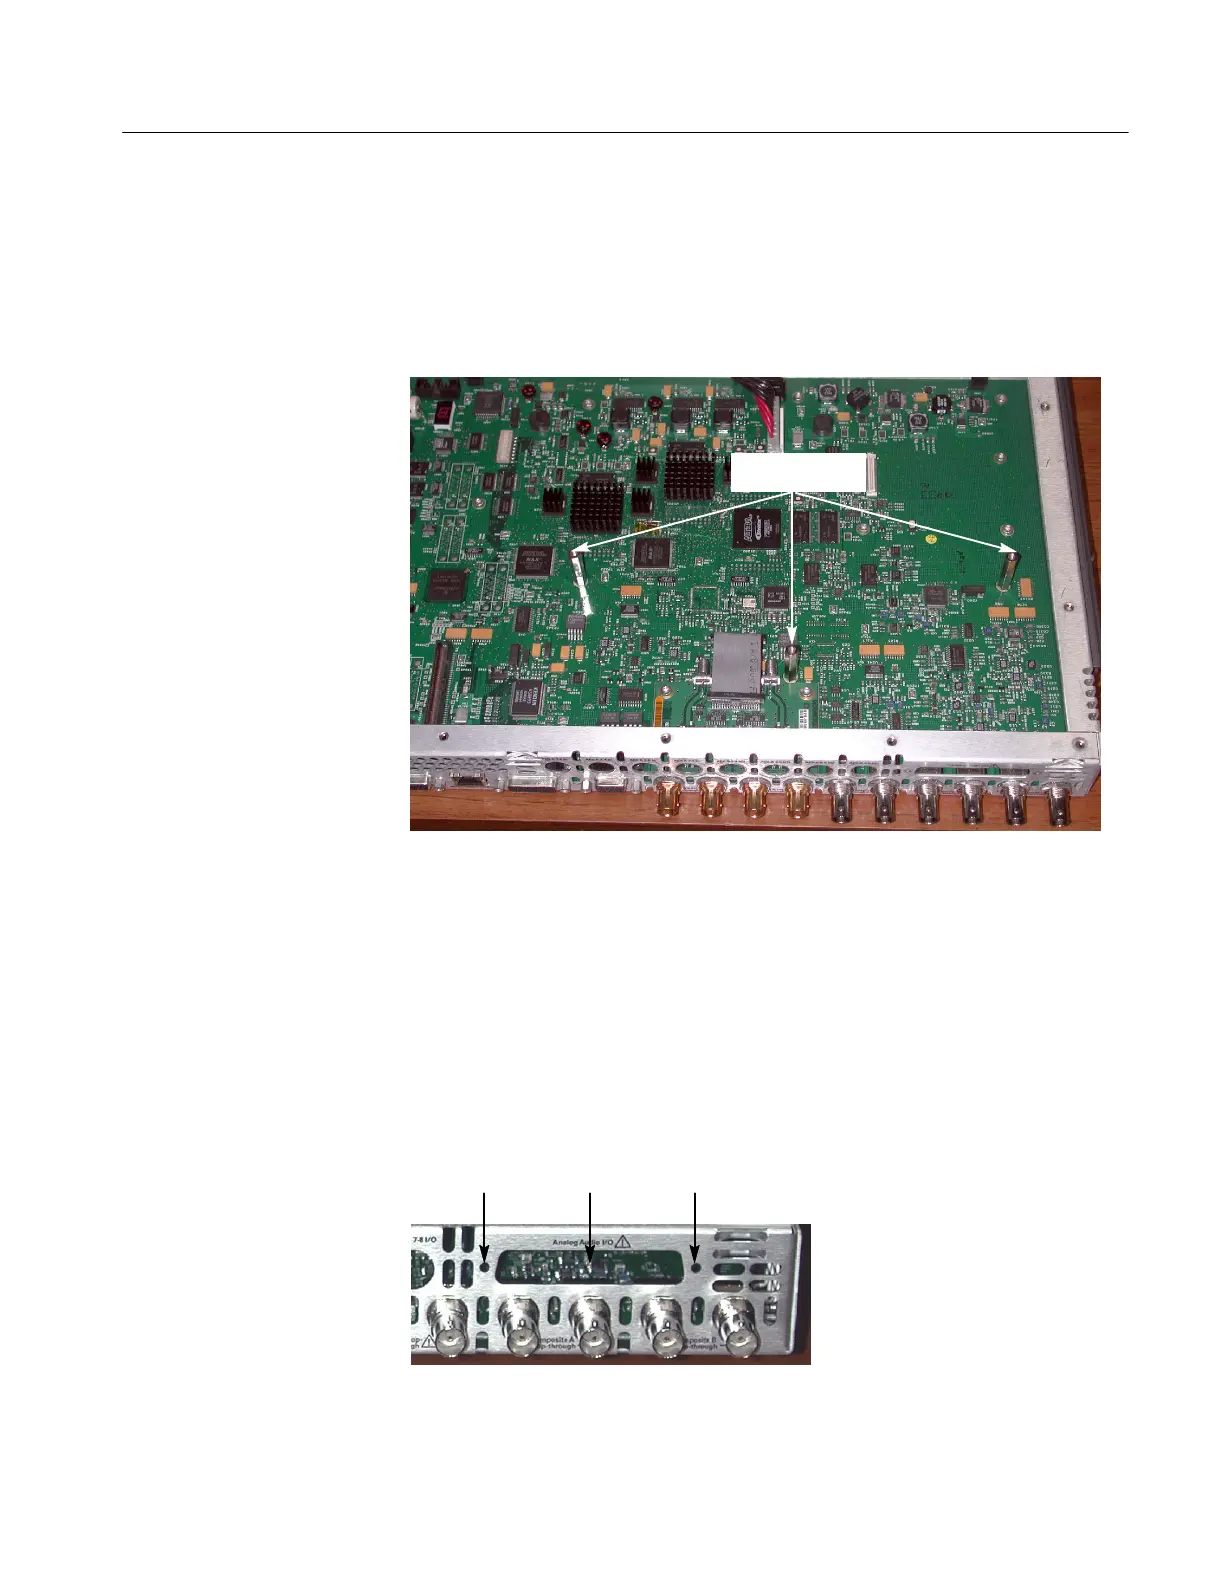
6. Using a 1/4 in. nut driver, remove the three mounting posts from which you
removed the screws in step 2.
Remove these
stand-off posts
Perform the following steps to install the new Audio board and to put it into
service. If installing option WVR6UP-DS, WVR70UP-DS, or WVR7UP-DS,
start with step 2; otherwise, start with step 1:
1. If a panel covers the analog audio input/connector hole at the rear panel,
remove the two screws that secure the panel R emove the panel by pulling it
away from the inside.
Screws and panel shown removed in
preparation for option installation
Install Upgrade
Audio Board