Installation Instructions
WVR6UP, WVR70UP, and WVR7UP Upgrades
15
5. Insert the Audio board supplied with this kit into position, aligning the
mounting holes with the mounting posts and guiding the board connectors
into their holes in the rear panel:
H The mounting holes in the audio board should align with the screw holes
in the mounting posts.
H When sliding the board into place, its rear edge should be captured
between a pair of small alignment features that protrude from the rear
panel into the chassis. The board right corner should be captured
between an identical pair of alignment features at the chassis rear corner.
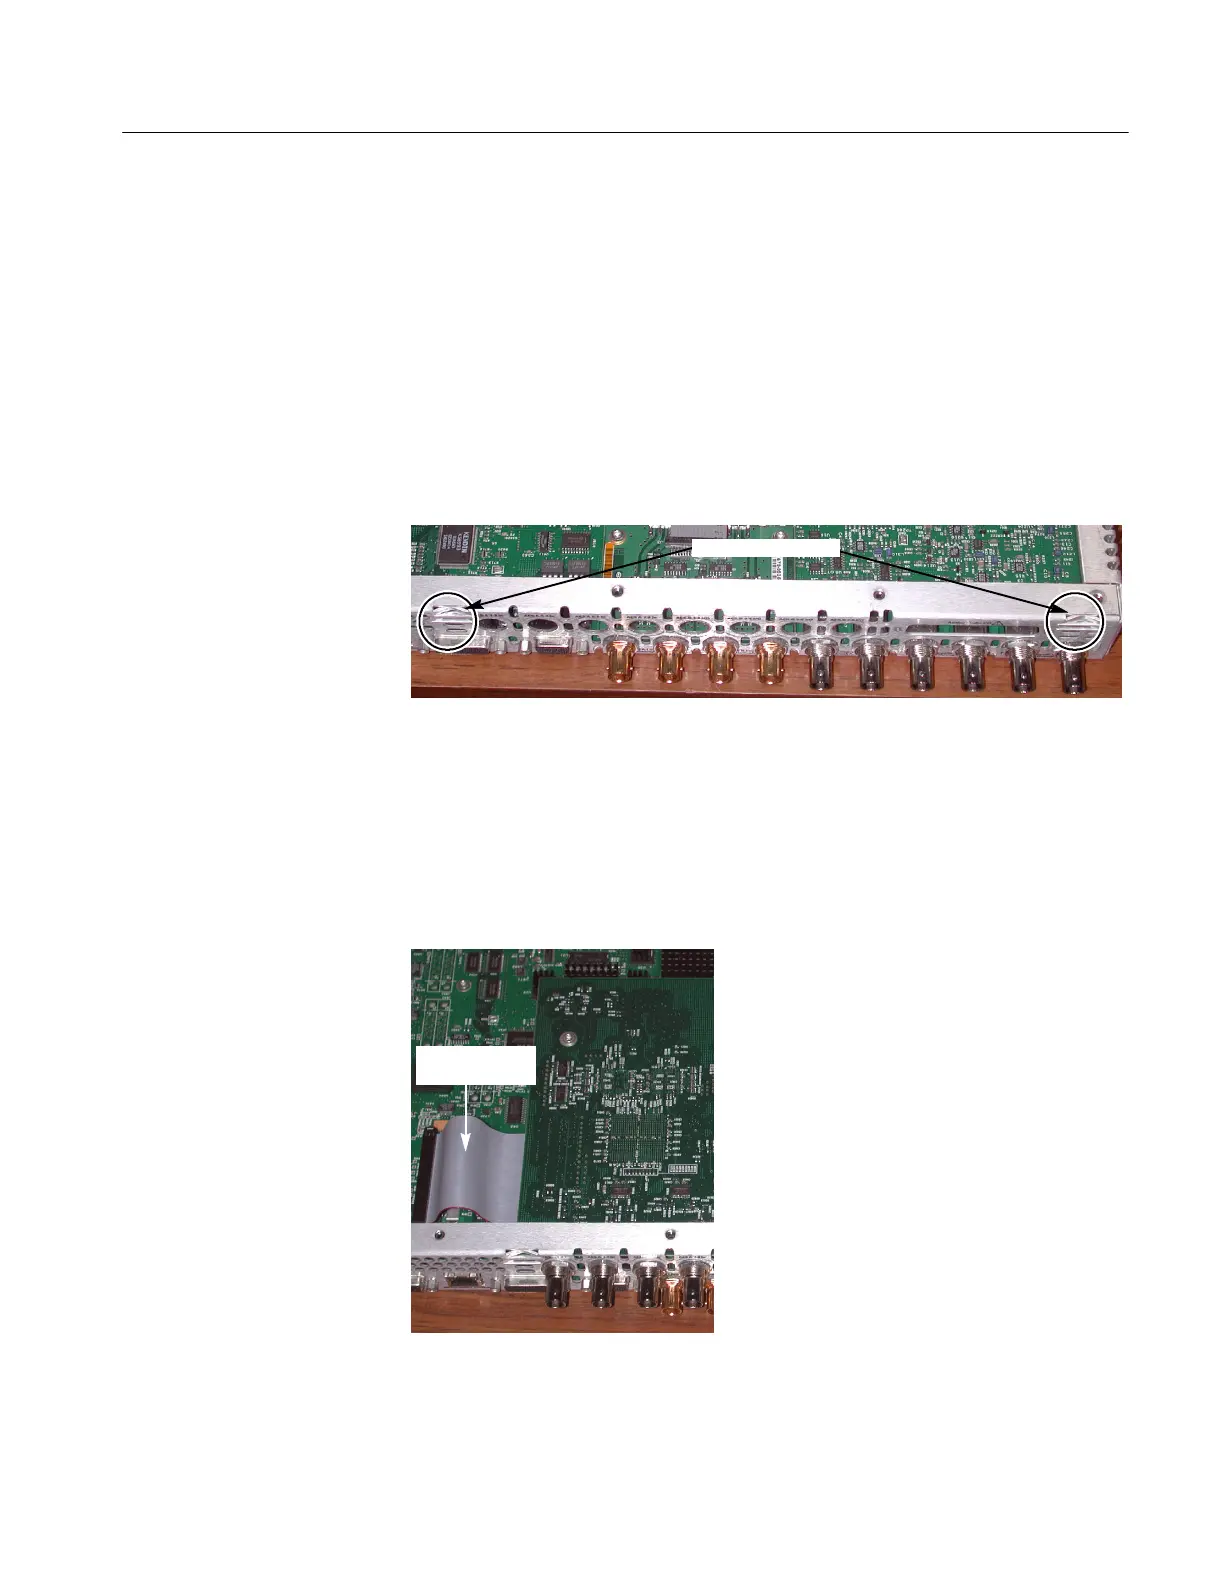
Cabinet protrusions
6. Secure the board to the three mounting posts with the three T-15 screws from
the kit. Tighten firmly, but not excessively.
7. From the kit, install a washer, and then a nut, to each of the BNC connectors
of the new board.
8. Plug the cable from the new Audio board into J750 on the Main board.
Plug audio cable
into J750