GB
FIXING THE GEARMOTOR AND RACK
Decidetheposition of themotor,depending onwhether the installation is right-hand(R) orleft-hand (L).
Allow a minimum gap between the base of the motor and the end of the rack. In right-hand (R) installations, the motor must be
retractedbyatleast 20 mm to allow the magnetic limit switchtobe fitted.
Beforefixingtheplate, make sure that:
- thesurface is level and solid enough for effectivemounting
- thepassage for the electric wiring is onthecorrect side (fig.D)
- thebase is perpendicular to the direction oftravel(fig.D)
- thedistance from the leaf allows thepinion tobecorrectlyalignedwith the rack (fig.D)
- theheight allows the pinion and rackto mate correctly
- thegate can be released smoothly (fig.D)
- the4 nuts provided have been fitted underneath the squareholes.
For new installations where no solid base is available, a CPEVO foundation plate (optional) can be used, sunk into the concrete or
weldedtoexisting structures (fig. E).
Thisreplacestheplate supplied and must be positioned considering the factors already listedabove.
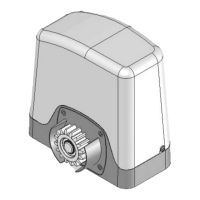
Place the geared motor on the plate andfit the four screws (10, fig.A)in the slotted holes that allow horizontaladjustment ifnecessary
andif necessary use the4 stud bolts (9, figA) tocorrecttheheightand/orlevelling ofthemotor.
Fordetailson fixingthe rack, followthemanufacturer's instructions. Wegenerally recommend:
- therack must have a M4 module andbe specified to supportthe weight ofthegate.
- thejoints must not create jolts during gatetravel.
- fixa piece of rack temporarily withclamps(fig. F) if it isdifficultto achieve an evenpitchat the joints.
- some models of rack can be installed with screws, using extra-long holes; in this case, it is useful to subdivide the margin of
adjustmentbyplacing the screws in the middle of theslots.
Oncealladjustmentsandchecks are complete, screw down the 4 screws (10, fig.A)and fit thecovers (5).
Warning! Weconsider correct mating of the rack and pinion as fundamentallyimportant.
They must be as centrally aligned as possible and above all there must always be a minimum clearance to prevent
abnormalloadson the pinion.Releasethemotor and ensure that the system runs evenly through the entiretravel stroke.
Ifwearonthestructurehas createdsagging which cannot be compensated for easily, the parts should be overhauled.
Once installation has been completed, slacken the bleed screw indicated in figure A detail 15 (mod. EVO800, EVO1200 e
EVO1200R).
Importantsafetynotes:
1. The automation system must be installed to good workmanship standards by qualified staff meeting the legal prerequisites and in
accordancewithmachinerydirective2006/42/ECandtheEN13241-1,EN12453and EN12445 standards.
2. Analysetherisksof theautomationsystem and adopt any appropriate safety and warningmeasures.
3. Installcontrols,suchasthekey-operatedselectorswitch,in such a way that the user is not in a hazardzone.
4. AffixtheCE nameplate or label containing the hazard information andID dataofthe automation.
5. Consignthe instructionsforuse, safety informationandEC declarationof conformity to the final user.
6. Ensurethattheuserhas understoodhow to operatethe automationcorrectlyinautomatic, manualand emergency modes.
7. Afterinstallation,try out theautomationsafety,signalling and release devices several times.
8. Informthe userin writing(forexample,in theoperatinginstructions):
a. ofanyresidualrisks for which no protection is provided, and foreseeable misuse.
b. That the power supply must be disconnected before the gate is released, when performing routine maintenance or during
cleaningofthe automation area.
c. That the automation must beinspectedfrequently for visibledamage, notifying the installer atonceifanyisfound
d. Thatchildren mustnotbe allowed to play in the immediatevicinity of the automation
e. Thattheradio remote controls and other control devices must be keptout of the reach of children.
9.Amaintenanceplanmust beprovided for the system (at least every 6 months) and thework done recorded in a log.
31
MAGNETIC LIMIT SWITCHES (fig. G)
Thesegearmotorscomecomplete withtwo bracketswith magnets(15fig.A) and the relativesensor, fitted abovethe pinion (2 fig.A).
Fitthefixing studbolts and fit the two brackets temporarily to theopposite endsof the rack (fig. G).
Performaseriesofcheckswiththe motorreleased,movingthe gate by hand.
- withthegate closed, themagnetmustbe facingthe sensor
- openthe gate and checkthesamesituation with theopening magnet.
- thegap betweenthemagnetand thesensormustnotexceed10mm(fig.H)
- themagnetic limitswitchmustnot be tripped whenthegate reachesthe mechanical stop; this should occur at least 10 mm earlier.
Do not finally tighten the limit switch brackets; wait for the first operating tests. It may be necessary to correct the positions due to the
motorspeedor gateinertia.
Warning! The two magnetsare fitted on the bracket ina position that enables their recognition by the ECU. Dismantling and
swappingthepositionofeither magnet may impair programmingand/or operation.
Warning! The use of magnetic or electric limit switches is not an alternative to the installation and maintenance of
mechanicallimitstops for thegate. These devicesmust restrict the gate'smaximum travel in allsituations.