English
03
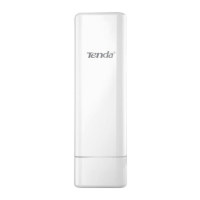
2. Install the CPEs
The CPE is usually deployed in schools, communities,
factories or streets for surveillance. Pole mounting is used for
illustration here.
Choose the elevated, open location for installation.
Thread the two plastic straps through the pole mounting
slots on the bracket of the CPE, and attach the CPE onto
the selected pole. Adjust the CPE’s location and direction,
and tighten the straps to fix the CPE.
Power on the CPE.
Connect the CPEs with the LED1, LED2 and LED3
indicators solid on (AP mode - the transmitting end) to the
switch which is connected to a Network Video Recorder
(NVR).
Connect the CPEs with the LED1, LED2 and LED3
indicators blinking (Client mode – the receiving end) to IP
cameras or a switch connected to IP cameras.
Install the CPE cover.
After successful installation, the connection quality reaches
the best when the LED1, LED2 and LED3 indicators of the
CPEs light solid on or blink.
❶
❷
❸
❹
❺
❻
Switch
NVR
Computer
Monitoring center
CCTV location 1
Example: OS3
CCTV location 2
AP mode
Client mode
Client mode
AP mode
 Loading...