Tennsmith Inc. / 6926 Smithville Hwy. / McMinnville, TN 37110 / 931-934-2211 / Fax 931-934-2220
www.tennsmith.com
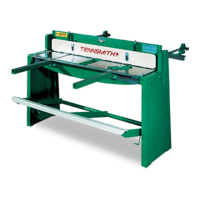
HOLD-DOWN ADJUSTMENT
CAUTION: THIS SHEAR SHOULD NOT BE OPERATED WITHOUT THE HOLDDOWN IN PLACE AND
PROPERLY ALIGNED.
The hold-down (3) is designed to engage the material before the blades yet allow only minimal clearance
between the guard’s feet and the table surface. The gap between the hold-down feet and table surface
should never be above 3/16” of an inch. The gap between the hold-down and the table is controlled by
turning the nut on the hold-down studs (11). Clockwise rotation will increase clearance; counter clockwise
turns will decrease the gap.
The guard should be held snug against the milled pads on the cutter bar and not feel loose. You must be
careful, however, that the hold-down bolts (13) are not so tight as to bind the guard when the cutter bar is in
the down position. Properly aligned, the bolts will snug but still allow rotation of the hold-down screw
washers (14). At the rear of the cutter bar you will find two tapped holes wherein hold-down jam screws (45)
are located. Once you have applied proper tension to the hold-down screws, tighten the jam screws to lock
alignment in place. (Note: The milled pads on the front and rear of the hold-down should be greased
periodically to maintain proper action.
BACK GAUGE ADJUSTMENT
Slide back gauge rods (62) through the adjustment blocks (66) and brackets (71). Mount the rods in the
holes found at the rear of the cutter bar. Move the gauge angle (63) up the rods until it contacts with the
lower blade. Observe the pointers attached to the adjustment blocks and adjust the rods in or out until the
embossed scales read zero on the pointers. Tighten the set screws (44) to lock the rods in place.
To attain a particular setting, loosen the four lock screws (70) and slide the gauge to an approximate
position. Fine tune adjustments are accomplished by locking the screws of the two adjustment brackets
(71) while keeping those of the blocks (66) loose. The adjustment dial (68) can then be used to position the
gauge in or out.
ShopRPMachinne

 Loading...