Do you have a question about the Teradek SERVPRO and is the answer not in the manual?
Controls quick menu actions and exits menu screens.
Selects menu items, changes status screen, and confirms selections.
Resets network settings or performs a complete factory reset.
Connects the device via Wi-Fi, either as an access point or a client.
Connects the device to a network using an Ethernet cable.
Accesses the device's web interface for configuration.
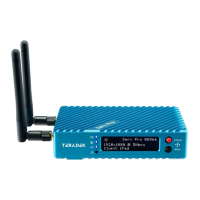
The Teradek Serv Pro is a device designed for professional video monitoring and streaming, offering a quick start guide for its setup and operation. It allows users to stream live HD video feeds to multiple devices simultaneously, making it suitable for on-set monitoring and collaborative workflows.
The Serv Pro unit features a robust blue casing with various input and output ports. On the front panel, it includes an OLED display (F) that shows important information such as the current streaming protocol (RTP/RTSP), resolution (e.g., 1280x720P59), and bitrate (e.g., 2Mbps). Status indicators for video input (B), encoder (C), broadcast (D), and fault/error (E) are also present. Two joysticks provide navigation and control: the Stream Joystick (G) for accessing quick menu actions and exiting menu screens, and the Menu Joystick (H) for selecting menu items, changing status screens, selecting characters, and confirming selections.
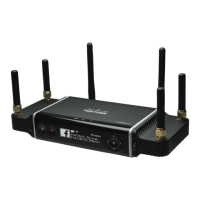
The device offers comprehensive connectivity options. It has RP-SMA connectors (A) for antennas, ensuring reliable wireless communication. For video input, it supports both SD/HD/3G-SDI (I) and HDMI (J) inputs, allowing compatibility with a wide range of professional cameras and video sources. Power is supplied via a 6-28 VDC power input (M), and a power switch (N) controls the device's on/off state. For audio, it includes a Mic/Line stereo input (O). Network connectivity is facilitated by a 10/100/1000 Ethernet port (K), enabling wired network connections.
To get started, the Serv Pro requires connection to a power source using the included A/C adapter. The power switch (N) on the back of the unit must be turned to the ON position. Video input is established by connecting the HDMI or SDI output from a video source to the Serv Pro's input connector (I or J).
The Serv Pro can be connected to a network either through Wi-Fi or Ethernet. For Wi-Fi connectivity, users can navigate to the Network Setup menu and choose between two modes:
The Serv Pro features a built-in web user interface (web UI) for advanced configuration of stream and network settings. This web UI can be accessed from any computer or cellular device connected to the same network as the Serv Pro. To access the web UI:
The web UI provides access to several configurable settings:
The Serv Pro is designed to work seamlessly with VUER, a free application available for iOS (App Store) and Android (Google Play Store) devices. VUER allows users to monitor and analyze up to four live HD video feeds simultaneously. To use VUER:
Teradek regularly releases new firmware versions to improve performance, add new features, and address vulnerabilities. Users are encouraged to visit https://www.teradek.com to update their device with the latest firmware. For additional support, users can visit http://support.teradek.com for tips, information, and updates. Teradek support staff can also be reached via email at support@teradek.com or by phone at 888-941-2111 ext. 2 (Monday-Friday, 6 am to 6 pm PST).
The reset button (L) on the device offers two levels of reset functionality:
The Serv Pro is a comprehensive solution for professional video monitoring, offering robust connectivity, flexible configuration options, and seamless integration with the VUER app for real-time analysis and collaboration.