The device must not be connected to electricity during installaon.
Unlug the device prior to installaon.
1. In case of a radiator connected to the central heang system, close both valves and
remove the heang agent.
2. Insert the heang element (1) into the threaded opening in the tee piece, lockshield
valve integrated with tee piece or directly into the radiator, depending on the
required connecon type.
3. Twist the head of the heang element using a spanner no 24.
4. Posion the element in such a way so that the indent in the head connecon (A) was
directed towards you or sideways.
5. Open the valves, ll the radiator with the heang agent from the installaon and
bleed it.
6. Make sure that the connecon between the radiator and the heang element unit is
ght.
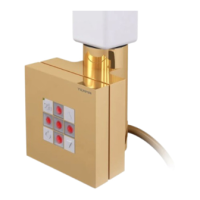
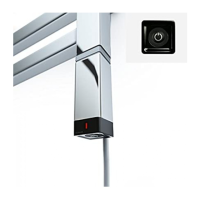
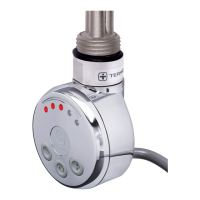
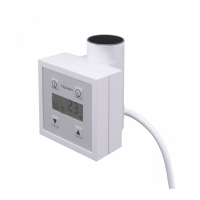
7. Install the controller – t the indents on the head (A) with the indents in the control-
ler (B).
8. Posion the controller casing in a way providing an easy and comfortable access.
If you feel resistance when twisng the controller that means that you have
reached the maximum twisng span in that direcon. Try to twist the controller in the
opposite direcon. Any damage to the device will result in annulment of the warranty.
9. Secure the casing at the back with Allen key.
10. Close one of the valves before using the heang element unit and leave the other one
open (we suggest that you close the thermostac valve). Always make sure that one
of the valves is open prior to the use of heang element unit!!
11. Connect the heang element unit to the socket/installaon. The device is ready for
use.