Make sure to subscribe to the Low
Newsletter to receive information about updates to
documentation, new product releases
Sign up on the TI web pages.
tested/complies with ETSI/R&TTE
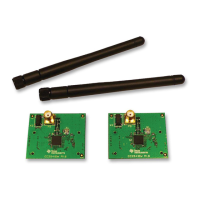
is a ¼ wave dipole antenna
sensitive components. Handle with
care to prevent permanent damage.
CC2540DK. To run the example described in
this Quick Start Guide, you would need
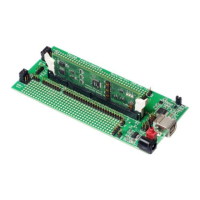
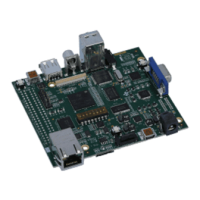
SmartRF05 Boards (Rev 1.8.1 or later)
boards are included in the CC2540DK (and
mation about the SmartRF05EB can
into a battery board (see
Connect the antenna to the SMA connector on
the CC2541 evaluation module (CC2541EM).
Tighten the antenna’s screw firmly on to the SMA
connector. If not properly connected, you might
see reduced RF performance.
firmly on to connectors P5
To minimize risk of injury, avoid
touching components during operation if
There are several ways of applying power to the
For the batteries and USB, there are voltage
regulators on the SmartRF05EB that will set the
board voltage to 3.3 V. The external power
supply should set a voltage that does not exceed
Note that there should only be one
active power source at any one time.
To minimize risk of personal injury or
property damage, never use rechargeable
batteries to power the board.
SmartRF05EB. This jumper is used to set the
power source for the board. Set P11 to “1
you are using battery power. Set P11 to “2
find switch P8 on the top
SmartRF05EB. To power up the boards, flip the
switch from the “OFF” position to “ON”
Do not leave EVM powered when
with the SimpleBLECentral application, while
SimpleBLEPeripheral application. The LCD
screens on the two SmartRF05EBs should
The “0x…” value displayed on each board is
the device address. Every
The SimpleBLEPeripheral application runs
autonomously and does not require any user
interaction. The SimpleBLECentral application,
requires user interaction by means of
tick U1 on the top side of
the SmartRF05EB, immediately below the LCD.
The joystick has five different movements: it can
be moved up, down, left, right, and it can
like a button. Each movement
tions depending on the state
After a few seconds, it should display “Devices
To Select”. This means that the
central device successfully discovered the
peripheral. Press left on joystick U1 to view the
address of the peripheral device. This
should match the address seen on the
established, the central device will
automatically perform service discovery on the
should complete within a few
The two LCD screens should appear as in the
images below, with the cen
having changed from “Advertising” to
Be careful that you don’t double tap U1 which
would terminate the connection immediately,