Odyssey X Installation Manual
INS627-2 5
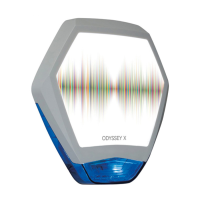
Inserting the Odyssey X3 graphic (available separately, see page 2)
1. Removing the light diffuser
A. Gently flex the two sides of the lid outwards
to release the light diffuser at point A.
B. Push the lens tabs inwards to disengage
the light diffuser.
C. Lift the light diffuser upwards to release.
Please make sure this operation is done in
a clean dry environment. where the diffuser
and lid are not likely to be scratched or
damaged.
2. Insert the Graphic
A. Place the graphic face down in the window
recess as shown.
3. Replace the light diffuser
A. Insert the light diffuser at the top edge
underneath the lugs as shown.
B. Lower the light diffuser ensuring the two
lens tabs are engaged.
C. Press down on light diffuser shown at point
C to click into place.