ARC Settings & Reporting Options
• Enter your Engineers Code
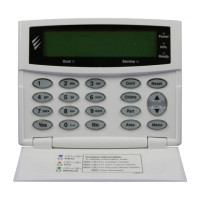
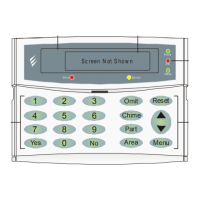
• Press y/ (UDL/Digi Options)then (Program
Digi) y/
• Using the Scroll key select Which ARC you wish to use
• Press n/ and scroll to change the ARC protocol to either
SIAII or Contact ID, both are supported.
• Press y/ twice then n/
• In the Pri. Tel No: screen enter the Push Notification Sever
Address exactly like this: 54.88.92.200/10001 To enter the dot
press the / key twice. To enter the / press the C/
key twice
o 54.88.92.200/10001
• Press y/
• In the Sec. Tel No: screen enter the Push Notification Sever
Address exactly like this: 52.28.12.230/10001 To enter the dot
press the / key twice. To enter the / press the C/
key twice
o 52.28.12.230/10001
• Press y/
• Press n/ and then enter the six digit XXXXXX Account
Number you were given in the APP
• Press y/ then n/ (Dial Attempts) enter a minimum
of 2
• Press y/ twice
• Press n/ and edit the Areas you wish to receive
notifications for.
• Press y/ then n/ and toggle the reporting options
on or off, depending on what you want to receive notifications
of. Use the n/ button to toggle each option on or off.
• Press y/ then n/ and scroll across the screen and
use the n/ button to toggle option 7 Connect Via IP ON
(an I will be shown on the screen)
• If you chose SIAII as your Protocol in previous steps scroll
once more to Option 8 and toggle Send SIA Text to ON (a T
will be shown)
• V3 or later only y/ twice then n/ and select which
Com Port the IP details apply too.
• Press y/
DO NOT EXIT ENGINEERS MODE. YOU MUST SETUP POLLING
FOR THE SYSTEM TO WORK CORRECTLY.
Control Panel Setup for Polling
To setup the Control Panel for Polling do the following:
• Press N/ twice
• Press then y/ twice (Global Options/System
Timers)
• Scroll to Poll IP Every
• Press n/ and then enter a value 15 minutes (015).
The polling time is controlled by the server and may be
changed.
Enable Digi, Dial All Numbers & Test Call
To test the settings, initialize a Push Notification and update the IP
address in the App a test call should be carried out. Please ensure
the Digi is Enabled, Dial All Numbers is enabled for systems with
multiple communication devices installed.
Digi Enabled & Dial All Numbers
If you have more than one communication device connected to the
control panel, Dial All Numbers MUST be enabled; continuing from
the previous steps:
• Press N/ then (Digi Options)
• Press y/ then n/ scroll through the options and
ensure Digi is Enabled (E shown on Screen) and Dial All
Numbers (A shown on screen)are on, Use the n/ button
to toggle each option on or off.
• Press y/
Initialise a Test Call
• Press N/ then y/ (Start Test Call)
• Press to start the test call. All communication devices on
the system will carry out a test call.
Once completed and if successful you will receive a notification from
the Control Panel to the App.
Do not exit engineers mode yet. Please read below
Optional Additional Panel Settings
Due to the nature of WiFi and the fact that devices of all types can
just "drop off" a WiFi network, certain circumstance may cause an
ATS Failure to be displayed to the end user. The panel will
automatically recover itself providing the WiFi network is still
available. However to avoid this potential inconvenience please see
below.
EN50131 System
With an EN50131 installed system, the warning about an ATS
Failure will only be visible to the User when they enter their code
and the fault is still present. In the case of this type of system the
chances of a User actually seeing the fault will be minimal. It is also
a requirement of systems with additional communication devices
that signal to an ARC or other response authority to report these
faults.
Non-EN50131 System
If the system is installed and configured to NOT comply with
EN50131 and has no additional communication devices signaling to
an ARC or response authority, then an ATS failure will be displayed
immediately on the keypad at the time the fault occurs. Again no
action is actually required by the user as the panel will recover of its
own accord. However if the Users WiFi connection has a tendency
to drop devices, this could be a source of frustration. Two options
are available as detailed below.
Setting an ATS Fault delay
• Enter Engineers Mode
• Press then y/ (Global Options)
• Press y/ (System Timers)
• Use and scroll to ATS Fault Delay
• Press n/ , then enter 005 to set a five minute delay
• Press y/
• Exit Engineers Mode

 Loading...

