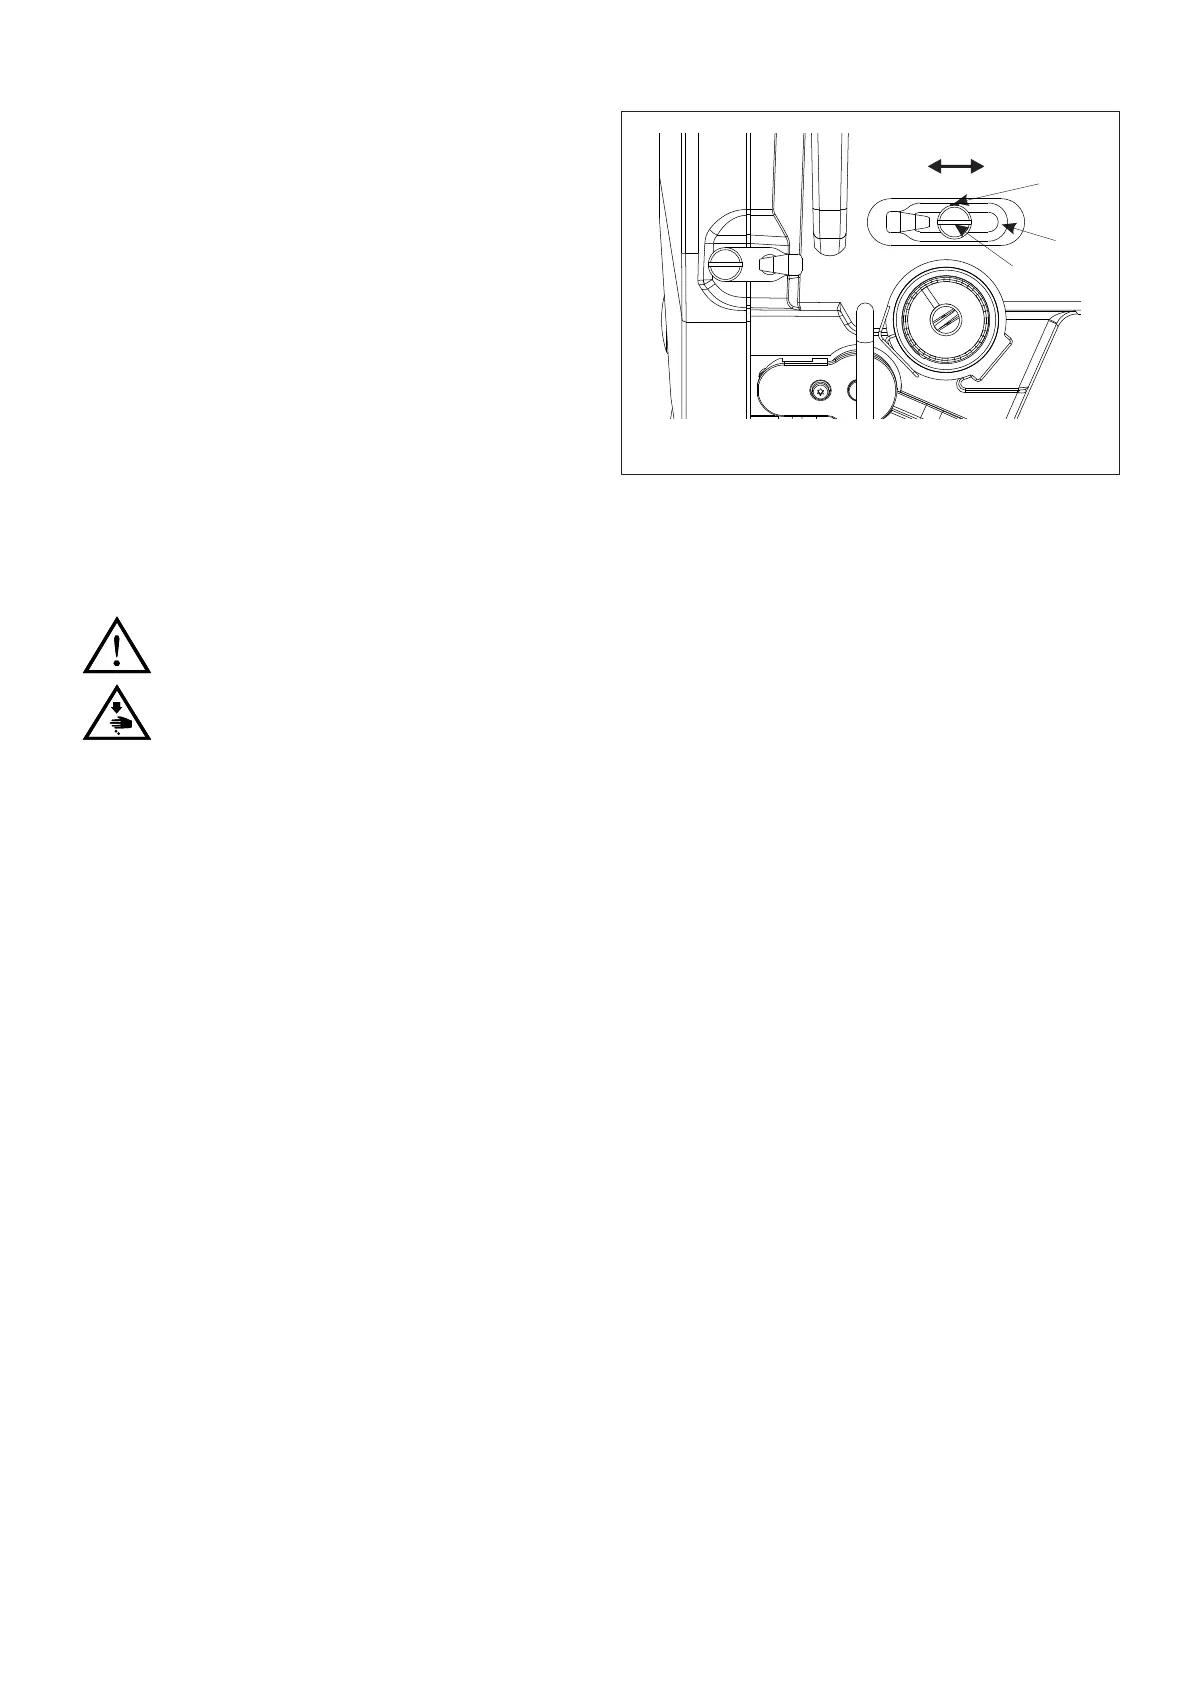
Fig.30
C
①
②
A B
1.U
nscrewing the screw ①.
2.Move the right thread hook ② to adjust : the
thread amount of thread take-up lever will
incr
ease if turned it towards left (A direction),
while turning it to the right (direction B) and
the thread amount of thread take-up lever
will decrease accordingly.(The standard
position is obtained when graduation line C
on right thread hook is aligned to screw
center.)
3.Remember to tight the screw ①
after
adjusting.
Caution:
1.To prevent the unexpected startup of sewing machine, trim off the power supply before
the operation is conducted.
2.For heavy duty , move the right thread hook ② to left to add amount of thread.
3.For light material , move the right thread hook ②
to right to reduce amount of the
thread.
Adjusting the Take-up Spring (Fig. 31)
24
1.Adjusting the tension of take-up spring
1) Unscrew screw ②, and take out thread clamp ⑤(assembly).
2) Unscrew screw ④ in thread clamp ⑤.
3) Rotating the screw ③ in the thread clamp to adjust, The tension of the thread take-up spring will
become larger when turning toward
the clockwise(A), otherwise smaller when tow
arding anti-
clockwise (B).
2. Screw down screw ④ when adjustment isover, fit thread clamp ⑤ (assembly) into the machine,and
screw down screw ②.
Judgment basis for adjustment adequacy of take-up spring:Confirm that the tension of take-up spring
is properly adjusted, draw out the needle thread in direction B. If place B of needle thread is drawn
before take-up spring
reaches its lowest position, reduce the tension of take-up spring.
 Loading...