Fig.32
③
B
C
A
D
B
C
A
D
①
DB×1
DP×5
DA×1
①
①
②
25
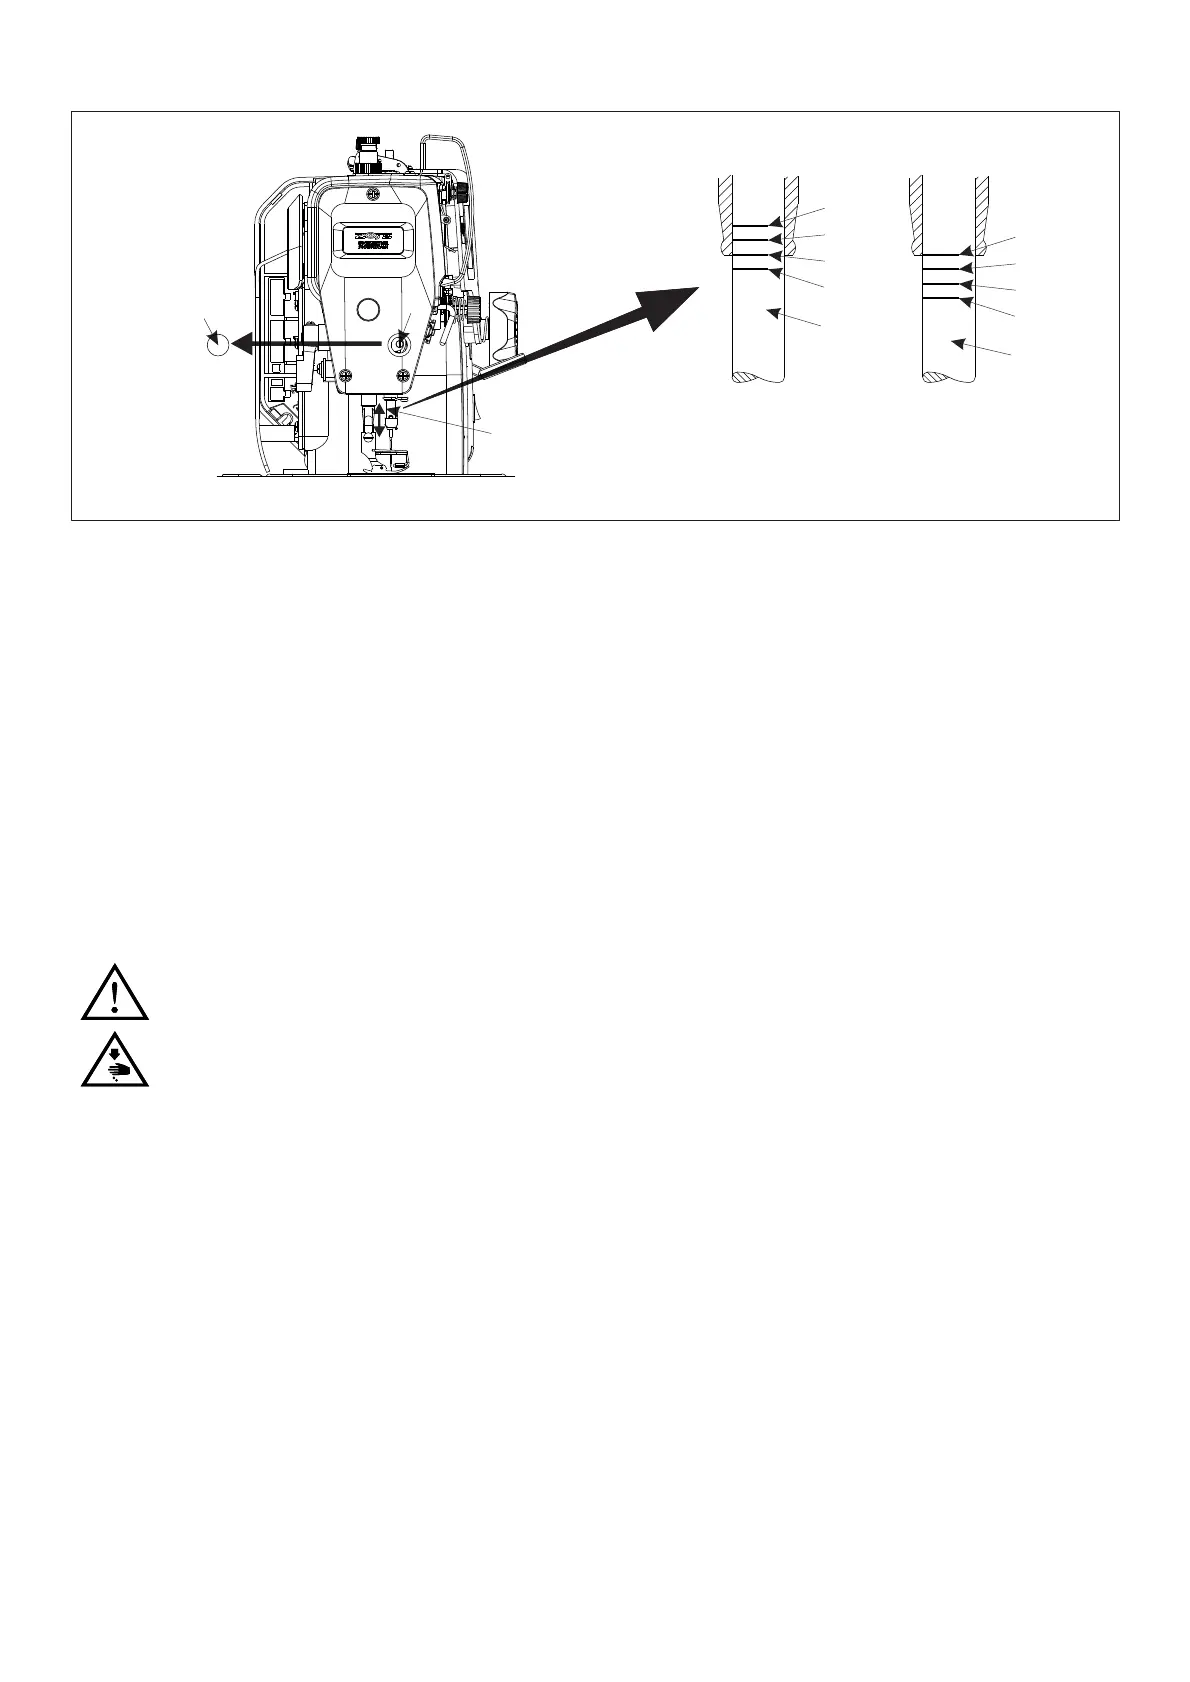
Adjust t he Height of t he Needle B ar(Fig. 3 2)
1.Turn the machine pulley to set the needle bar ① to its lowest position.
2.Remove the rubber cap ② from the face plate.
3.Unscrewing the connecting screw
③ of needle bar, through moving the needle bar
① up and
down to adjust, when using needle DB X1 and DPX5, the mark A on the needle bar
①
should be
match to the bottom of needle bar lower bushing; When using DAX1, the mark C on needle bar
①
should match to the bottom of needle bar lower bushing.
4. Tighten the screw ③ in compression rod guide frame and assembly the rubber plug
② after
adjusting.
Caution:
1.To prevent the unexpected startup
of sewing machine, trim off the power
supply before the operation is conducted
26
Adjust the Synchronization of t
he needl
.
e and hook(Fig. 33)
1. Unscrewing the two positioning screw ①
of hook.
2. Rotating the hand wheel to make needle bar ②
lift from the lowest place, when using needle
DBX1 and DPX5, the mark B on needle bar② should match to the bottom of lower needle bar
② bushing, when using needle DAX1, the mark D on needle bar ② should match to the
bottom of lower needle bar ② bushing.
3. Moving the hook to match the hook point ③
with center of needle ④. Meantime, make the
space between the hook point ③ and needle ④ 0~0.05mm.
4. Tightening two positioning screw ①
of hook.
 Loading...