2322
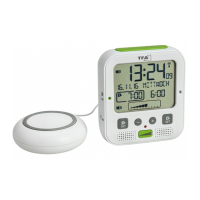
BOOM – High performance radio-controlled alarm clock with vibration alarm
9.3.1 Volume setting
• Press the LEVEL button until appears.
• Press and hold the LEVEL button for three seconds to enter the setting mode.
• Press the – or + button to adjust the alarm tone volume in 5 steps.
• Confirm the setting with the LEVEL button.
• When the alarm time is reached, an alarm tone sounds. The interval and volume will increase
gradually up to the set level.
9.3.2 Pitch / frequency setting
• Press the LEVEL button until appears.
• Press and hold the LEVEL button for three seconds to enter the setting mode.
• Press – or + button to adjust the frequency of the alarm tone in 10 steps.
• Confirm the setting with the LEVEL button.
9.3.3 Brightness setting
• Press the LEVEL button until appears.
• Press and hold the LEVEL button for three seconds to enter the setting mode.
• Press – or + button to adjust the brightness in 5 steps. This setting controls the day backlight as
well as the flashing light during wake-up.
• Confirm the setting with the LEVEL button.
• When the alarm time is reached, a light flashes. The interval will increase gradually.
9.4 Demo mode of the alarm function
• Press and hold the SET 1 or SET 2 button in normal mode for at least three seconds, to enter the
demo mode.
• As long as you hold the SET 1 or SET 2 button, the respective alarm settings will be presented.
Note: The alarm must be active to preview the setting.
10. Placing the alarm clock
• Place the alarm clock on a flat surface.
• The two additional adhesive pads can be used to optimize the viewing angle. For this, stick the
two adhesive pads into the recesses underneath the clock.
11. Care and maintenance
• Clean the device with a soft damp cloth. Do not use solvents or scouring agents.
• Remove the batteries if the device will not be used for an extended period of time.
• Keep the device in a dry place.
11.1 Battery replacement
• Change the batteries when the battery symbol appears on the display.
• Open the battery compartment and insert two new AA 1.5 V batteries, polarity as illustrated.
• Close the battery compartment again.
BOOM – High performance radio-controlled alarm clock with vibration alarm
12. Troubleshooting
Problem Solution
No display Operation with power adapter:
➜ Connect the device to the power adapter
➜ Check the power adapter
Battery operation:
➜ Ensure the batteries' polarity are correct
➜ Change the batteries
No DCF reception ➜ Activate (ON) the DCF reception in the setting mode.
➜ Press the – button for three seconds to start the reception
manually
➜ Choose another place for your product
➜ Wait for an attempt reception during the night
➜ Check if there is any source of interference.
➜ Restart the instrument according to the manual
➜ Set the clock manually
No backlight ➜ Set the LIGHT switch to or (see: 8. Backlight)
➜ Press the SNOOZE/LIGHT button to activate the backlight
➜ Clock is in the DCF signal reception mode
No vibration ➜ Connect the vibration unit
➜ Connect the device to the power adapter
➜ Slide the ALARM switch to or
Incorrect indication ➜ Use a pin to press the RESET button at the back
Battery operation:
➜ Change the batteries
If your device fails to work despite these measures, contact the retailer where you purchased the
product.
13. Waste disposal
This product has been manufactured using high-grade materials and components which can be
recycled and reused.
Never dispose of empty batteries and rechargeable batteries in ordinary household
waste.
As a consumer, you are required by law to take them to your retail store or to an
appropriate collection site depending on national or local regulations in order to pro-
tect the environment.
The symbols for the contained heavy metals are:
Cd = cadmium, Hg = mercury, Pb = lead
TFA_No. 60.2538_Anleitung 27.11.2018 15:34 Uhr Seite 12