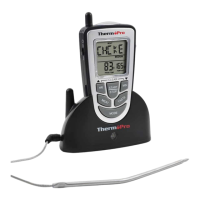
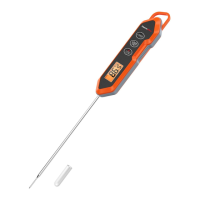
Battery Compartment – holds 2 AAA batteries.
Sensor Socket plug in for stainless steel probe sensor –
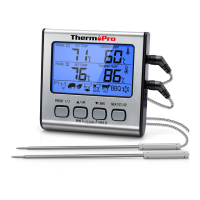
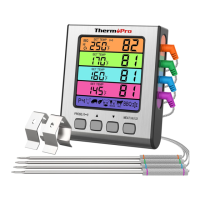
Buttons
– Press and hold for 2 seconds to turn the transmitter on or off.
Transmitter Features
-3-
Buttons
-2-
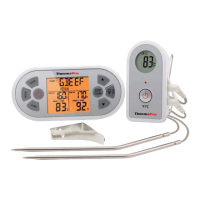
LCD
Thermometer mode
Sensor Socket
TX indicator LED
Battery Compartment
Transmitter Power Button
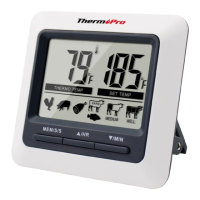
1. MODE – Press to select thermometer or timer mode. Press and hold for 2 seconds to
enter Synchronization/Pairing mode.
2. HR – In timer mode, press once to set hour. Press and hold for 2 seconds, the hours
will increase by 10 hours per second. In thermometer mode, press once to increase
the temperature value. Press and hold it for 2 seconds, the temperature value will
increase by 10 degrees per second.
3. F/ C/ – Press and hold for 2 seconds to turn the receiver ON or OFF. In thermometer
mode, press once to select temperature readings in Celsius or Fahrenheit.
º º
4. MIN – In timer mode, press to set to minutes. Press and hold for 2 seconds, the
minutes will increase by 10 minutes per second. In thermometer mode, press once
to decrease the temperature value. Press and hold for 2 seconds, the temperature
value will decrease by 10 degrees per second.
5. MEAT – In thermometer mode, press to select meat type, PROG (program), GBEEF
(gro und beef), GPOU L (gr ound poultry), BEEF, VEAL , CHCKE (chi cken) , PORK,
POULT (poultry), LAMB & FISH. In Timer mode, press it to switch between hour/minute
timer to a minute/second timer and back.
6. START STOP– In timer mode, press to start or stop the timer.
7. TASTE – In thermom eter mode, press to sele ct the meat t aste level, RARE , M ED
RARE, MEDIUM, MED WELL and WELL DO NE.
8. Light ON/OFF: Switch to turn on or off the light.
Installing batteries
Open the battery compartment of the receiver and insert two “AAA” batteries with correct
polarity. Open the battery compartment of the transmitter and insert two “AAA” batteries
with correct polarity.
Turn On/Off Unit
Press and hold F/ C/ button on the receiver for 2~3 seconds to turn it ON or OFF.º º
Press and hold button on the transmitter for 2~3 seconds to turn it ON or OFF. When
the transmitter is turned on, the indicator light will flash every 10 seconds. When it is
turned off, the indicator light will stop flashing.
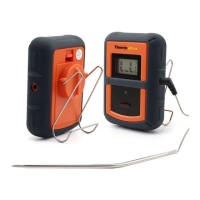
Synchronize/Pair Transmitter and Receiver
The transmitter and receiver need to be synchronized or paired before using. There are
two ways to do so:
Option 1:
a. Insert the stainless steel probe into the plug in of the transmitter.
b. Open the battery compartment of transmitter and insert two “AAA” batteries. The
transmitter will automatically keep sending the temperature reading to the receiver
for synchronization/pairing.