Manual 0-2962 3-3 INSTALLATION
3. Secure the Through - Hole protector with the retain-
ing nut removed earlier.
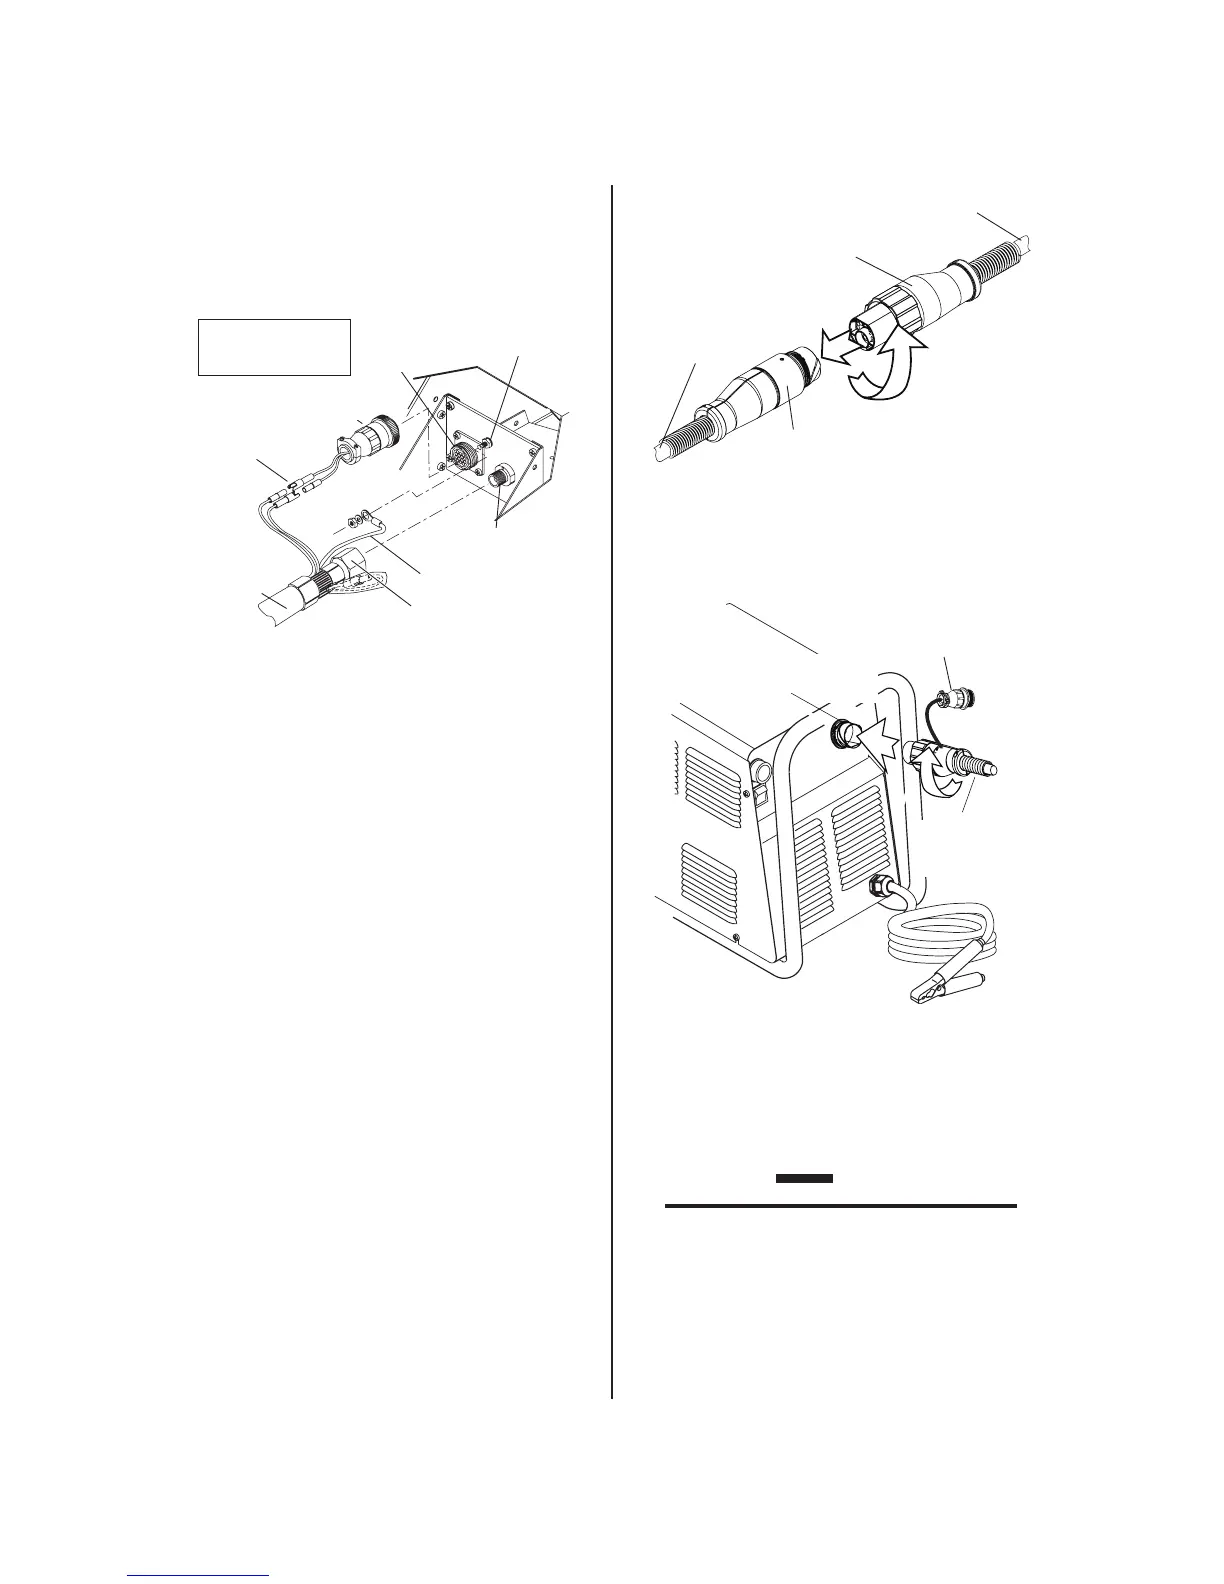
4. Connect the torch leads or ATC Adapter Negative
/ Plasma Lead to the bulkhead connection inside
the Power Supply as shown.
Bulkhead Connections - ATC Adapter or Hand Torch
Leads with O2B Fittings
5. The Leads or ATC Adapter Assembly includes two
wires joined with mating connectors and covered
with an insulating sleeve. These wires must remain
joined and insulated. Connect the remaining torch
leads connectors to the mating connectors on the
Power Supply Adapter.
6. Remove the top nut and washer from the Pilot Stud.
7. Connect the pilot lead terminal to the stud and
secure with the nut and washer removed in the
above Step.
8. Tighten the Through - Hole protector onto the Torch
Leads or ATC Adapter Leads Assembly.
9. For torches with the ATC Connector, align the
torch leads male connector with the ATC female
receptacle. Push the male connector into the
female receptacle. The connectors should push
together with a very small amount of pressure.
Secure the connection by turning the locking nut
clockwise until it stops. DO NOT use the locking
nut to pull the connection together. Do not use
tools to secure the connection.
Torch Connection - Torch Leads with ATC Male
Connector, Power Supply with Panel-Mounted ATC
Receptacle
10. Check the torch for proper consumable parts.
CAUTION
The torch parts must correspond with the type
of operation. Refer to Section 4.04, Torch Parts
Selection.

 Loading...