EasyManua.ls Logo

Thermaltake TH120 ARGB Sync - User Manual

Thermaltake TH120 ARGB Sync
2 pages
Print Icon
To Next Page IconTo Next Page
Loading...
Parts List
A x 1 B x 1
C x 1
D x 1
G x 4
H x 2
I x 4 J x 4 L x 4
N x 1
M x 1
E x 1 F x 1
LGA 1700/1200/115x
O x 1
3
B
1700/1200/1156/1155/1151/1150
C
E
1
2
1700
1200/115X
A
G
L
M
CB
or
1700
1200/115X
0
TH 12 ARGB Sync
Scan Here
Installation Guide
AMD Installation Guide
1
3
2
A
G
H
D
D
M
A
Tighten screw to the halfway.
G
Tighten screw again to ensure
your waterblock is secure enough.
G
G
Intel Installation Guide
210 mm
297 mm
10 5GX X
2
(g/m )
CHECK DESIGN
CL - W285 - PL12 S W-B
TH 1 20 ARG B S ync
22 /02/1 2
A
稿
Peipei
(22/02/12)
Leon
(22/02/12)

Other manuals for Thermaltake TH120 ARGB Sync

Question and Answer IconNeed help?

Do you have a question about the Thermaltake TH120 ARGB Sync and is the answer not in the manual?

Summary

Parts List

Intel Installation Guide

Mounting Brackets for Intel

Shows installing mounting brackets on the motherboard for Intel LGA 1700, 1200/115X sockets.

Apply Thermal Paste and Mount Cooler

Applying thermal paste and attaching the water block to the CPU for Intel installations.

Connect Cables for Intel

Connecting the necessary cables to the motherboard and cooler for Intel systems.

AMD Installation Guide

Attach Mounting Brackets for AMD

Attaching the specific mounting brackets to the motherboard for AMD installations.

Apply Thermal Paste and Mount Cooler for AMD

Applying thermal paste and attaching the water block to the CPU for AMD systems.

Connect Cables for AMD

Connecting the necessary cables to the motherboard and cooler for AMD systems.

General Connection Diagram

Connect Fan to Motherboard

Shows connecting the CPU fan to the CPU FAN PORT on the motherboard.

Connect Pump to Motherboard

Shows connecting the pump header to the CPU FAN PORT on the motherboard.

ARGB Controller Installation Guide

ARGB Light Mode Control

Explains how to switch between 7 LED light modes like Rainbow, Full Light, Flow, etc.

ARGB Color Mode Control

Details color mode adjustments for different light modes, including spectrum and auto rotation.

ARGB Light Speed Control

Describes how to switch between 4 light speed settings: Slow, Normal, Fast, Extreme.

MB SYNC Installation Guide

ASUS;ASRock;BIOSTAR MB SYNC

Guide for connecting fans to ASUS/ASRock/BIOSTAR motherboards using Aura Addressable headers.

MSI MB SYNC

Guide for connecting fans to MSI motherboards using JRGB-strip headers.

GIGABYTE MB SYNC

Guide for connecting fans to GIGABYTE motherboards using AOURS RGB Fusion headers.

Overview

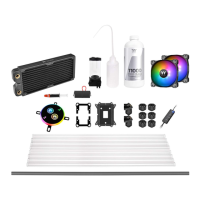
This document provides installation and usage instructions for the Thermaltake TH120 ARGB Sync, a liquid cooling solution designed for computer processors. The cooler is compatible with both Intel and AMD platforms, offering versatile application across various PC builds.

Function Description

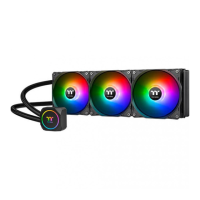
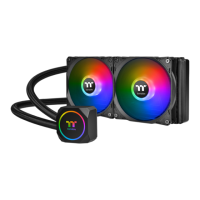
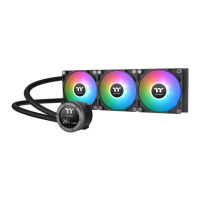
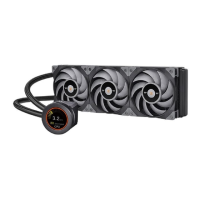
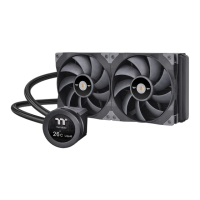
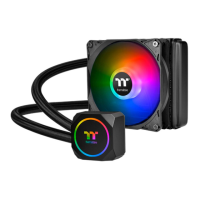
The Thermaltake TH120 ARGB Sync is an all-in-one (AIO) liquid CPU cooler. Its primary function is to dissipate heat generated by the CPU, maintaining optimal operating temperatures and preventing thermal throttling. This is achieved through a closed-loop system that circulates coolant between a waterblock, which sits directly on the CPU, and a radiator equipped with a fan. The radiator expels heat into the surrounding environment.

A key feature of this cooler is its Addressable RGB (ARGB) lighting system. This allows users to customize the aesthetic of their PC build with a wide range of lighting effects and colors, synchronizing them with other ARGB components in their system. The ARGB functionality is managed either through a dedicated controller or by connecting directly to the motherboard's ARGB header, offering flexibility in control.

Usage Features

Installation:

The installation process is detailed for both Intel and AMD platforms, ensuring compatibility with a broad range of motherboards and CPU sockets.

  • Intel Installation:

    • Parts: The Intel installation requires specific components including a backplate (B), mounting brackets (C, D), screws (F, G, H), and standoffs (I, J, K, L). Different standoffs are provided for various Intel sockets: LGA 1700, LGA 1200/115x.
    • Backplate Preparation: For LGA 1700, the backplate (B) is positioned behind the motherboard with the "LGA1700" marking facing up. For LGA 1200/115x, the backplate is positioned with the "1200/115X" marking facing up.
    • Standoffs: Four standoffs (I, J, K, L) are screwed into the backplate from the front side of the motherboard. The specific standoffs used depend on the CPU socket.
    • Mounting Brackets: The Intel mounting bracket (C or D) is attached to the waterblock.
    • Waterblock Placement: The waterblock is carefully placed onto the CPU, aligning with the standoffs.
    • Securing the Waterblock: Four screws (G) are used to secure the waterblock to the standoffs. The instructions emphasize tightening these screws halfway initially, then tightening them again to ensure the waterblock is secure.
    • Radiator and Fan Installation: The radiator is mounted to a fan slot in the PC case, and the fan is attached to the radiator. The fan's airflow direction should be considered for optimal cooling.
    • Cable Connections: The fan cable is connected to the CPU FAN port on the motherboard.
  • AMD Installation:

    • Parts: AMD installation utilizes the existing AMD backplate and specific AMD mounting brackets (E), screws (G), and standoffs (D, H).
    • Standoffs: Four standoffs (D) are screwed into the existing AMD backplate.
    • Mounting Brackets: The AMD mounting bracket (E) is attached to the waterblock.
    • Waterblock Placement: The waterblock is carefully placed onto the CPU, aligning with the standoffs.
    • Securing the Waterblock: Four screws (G) are used to secure the waterblock to the standoffs. Similar to Intel, the instructions advise tightening these screws halfway first, then tightening them again for a secure fit.
    • Radiator and Fan Installation: The radiator is mounted to a fan slot in the PC case, and the fan is attached to the radiator.
    • Cable Connections: The fan cable is connected to the CPU FAN port on the motherboard.

ARGB Controller Installation and Usage:

The TH120 ARGB Sync features an ARGB controller for managing the lighting effects.

  • Connection: The fan's ARGB cable is connected to the ARGB controller. The controller itself is powered via a SATA connector from the PC's power supply.
  • Controller Functions: The controller has three buttons:
    • MODE: Switches between 7 LED modes: Rainbow, Full Light, RGB Spectrum, Off, Flow, Radar, Pulse, and Blink.
    • COLOR:
      • When in Full Lighted, Pulse, and Blink modes, it switches between 8 LED colors: Red, Yellow, Green, Teal, Blue, White, Purple, and Rainbow.
      • When in Ripple mode, it switches between 7 LED colors: Red, Yellow, Green, Teal, Blue, White, and Purple.
      • When in RGB Spectrum mode, a single click memorizes and locks the current color; another click unlocks the 256 colors auto-rotation.
      • When in Wave and Flow modes, the LED color cannot be adjusted.
    • SPEED: Switches between 4 light speeds: Slow, Normal, Fast, and Extreme.

MB SYNC Installation (Motherboard Synchronization):

For users who prefer to control ARGB lighting through their motherboard's software, the TH120 ARGB Sync supports synchronization with various motherboard brands.

  • Caution: It is crucial to power off the PC and check the positive and negative ends of the connector before connecting the cable to the motherboard. Connecting the wrong end can damage the fans.
  • ASUS/ASRock/BIOSTAR: Connects to the Aura Addressable Strip Header(s) (5V D G).
  • MSI: Connects to the JRGB-strip Header(S) (5V D G).
  • GIGABYTE: Connects to the AOURS RGB Fusion with Digital LEDs (VD G).
  • Connection: The fan's ARGB cable is connected directly to the appropriate ARGB header on the motherboard. This bypasses the external ARGB controller, allowing lighting control through the motherboard's software.

Maintenance Features

The manual does not explicitly detail maintenance features such as cleaning instructions or coolant replacement. However, as an AIO liquid cooler, it is generally considered a low-maintenance solution compared to custom liquid cooling loops.

  • Closed-Loop System: The sealed nature of the AIO unit means that users typically do not need to refill or replace the coolant.
  • Dust Management: Regular cleaning of the radiator fins and fan blades with compressed air is recommended to prevent dust buildup, which can impede airflow and reduce cooling performance.
  • Fan Longevity: The fans are designed for long-term operation, but monitoring for unusual noises or reduced performance can indicate a need for replacement.
  • Waterblock Contact: Ensuring the waterblock maintains good contact with the CPU, as emphasized during installation, is crucial for efficient heat transfer. Re-tightening the mounting screws periodically (with caution) might be considered if cooling performance degrades over time, though this is rarely necessary for properly installed units.

In summary, the Thermaltake TH120 ARGB Sync is a user-friendly and aesthetically pleasing liquid cooling solution that prioritizes ease of installation and customizable ARGB lighting, making it suitable for a wide range of PC enthusiasts.

Thermaltake TH120 ARGB Sync Specifications

General IconGeneral
Radiator MaterialAluminum
Tube Length400 mm
Fan Dimensions120 x 120 x 25 mm
Fan Speed1500 RPM
Fan Air Flow59.28 CFM
Fan Connector4-pin PWM
Pump Speed3300 RPM
Pump Rated Voltage12 V
Pump Rated Current0.38 A
Pump Power Consumption4.56 W
Warranty2 years
Fan Noise Level28.2 dBA
CompatibilityIntel LGA 1700/1200/1156/1155/1151/1150, AMD AM5/AM4
RGB Sync5V Addressable RGB Header

Related product manuals