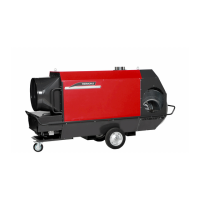
20 40.019.003 - rev 09 - 2018
IMA
ENGLISH
20 40.019.003 - rev. 06 - 2011 IMA
English
5.2 General
When you store the heater for a long period:
1. Let the heater burn for 3 minutes. This
protects the pump against corrosion.
2. Keep the burner head free from dust and
sediment.
A dirty burner head causes bad combustion
that makes soot and carbon and damage to
the burner chamber.
3. Close the valve for the fuel supply.
4. Disconnect the electric power.
5.3 Adjustment air inlet and electrodes
(Fig. 9)
A Distance nozzle - electrode
B Distance nozzle - swivel disc
C Height nozzle centre - electrode
D Distance between electrodes
5.4 Electrodes (Fig. 10)
Check the electrodes:
1. Remove the rain cover (A) of the heater
(Fig. 5).
2. Remove the cover of the burner.
3. Remove the plug from the connector (I).
4. Loosen the screws (A).
5. Remove the burner base plate (B).
6. Clean and readjust the electrodes (F).
The electrodes must be free of dirt, grease,
fuel, etc.
If the points of the electrodes are burned too
much, and adjustment is impossible, replace
the electrodes.
7. Loosen the screw (D).
8. Readjust the electrodes.
Install the burner head in the reverse order.
Replace the electrodes:
1. Do the points 1 to 6 of “Check the
electrodes”.
2. Remove the electrode cables (C).
3. Replace the electrodes.
4. Adjust the electrodes (Fig. 9).
Install the burner head in the reverse order.
5.5 Nozzle (Fig. 10)
Check the nozzle:
1. Remove the rain cover (A) of the heater
(Fig. 5).
2. Remove the cover of the burner.
3. Remove the connector (I).
4. Loosen the screws (A).
5. Remove the burner base plate (B).
6. Check the nozzle (H).
If the nozzle is black because of soot or coke,
replace the nozzle.
Install the burner head in the reverse order.
Replace the nozzle:
1. Do the points 1 to 6 of “Check the nozzle”.
2. Remove the electrode cables (C).
3. Loosen the screw (E) half a turn.
4. Remove the complete holder with swivel disc
and ignition pins.
5. Replace the nozzle. Use the correct type!
6. Install the complete holder with swivel disc
and ignition pins.
7. Readjust the electrodes (Fig. 9).
Install the burner head in the reverse order.
5.6 Photocell (Fig. 11)
Check the photocell:
1. Remove the rain cover (A) of the heater
(Fig. 5).
2. Remove the cover of the burner.
3. Pull the photocell (A) out of the base plate
(B).
4. Clean the photocell if the glass is black.
If the glass is cracked, the photocell must be
replaced by the dealer.
Install the photocell in the reverse order.
5.7 Air pressure at swivel disc (Fig. 12)
1. Remove the rain cover (A) of the heater
(Fig. 5).
2. Remove the cover of the burner.
3. Adjust screw (A) of the air inlet according to
the table. Use a hexagonal key.
Higher scale value (B): reduced pressure
behind the swivel disc: upper output range.
Lower scale value (B): increased pressure
behind the swivel disc: lower performance
range.
4. Place the covers again.
Hot
Do not touch the flue and air outlet!
Wait until the flue and the air are cooled
down before maintenance.
Warning
Disconnect the electric power during
maintenance!
Warning
Do not touch the filter of the nozzle. This
will damage the nozzle.