27
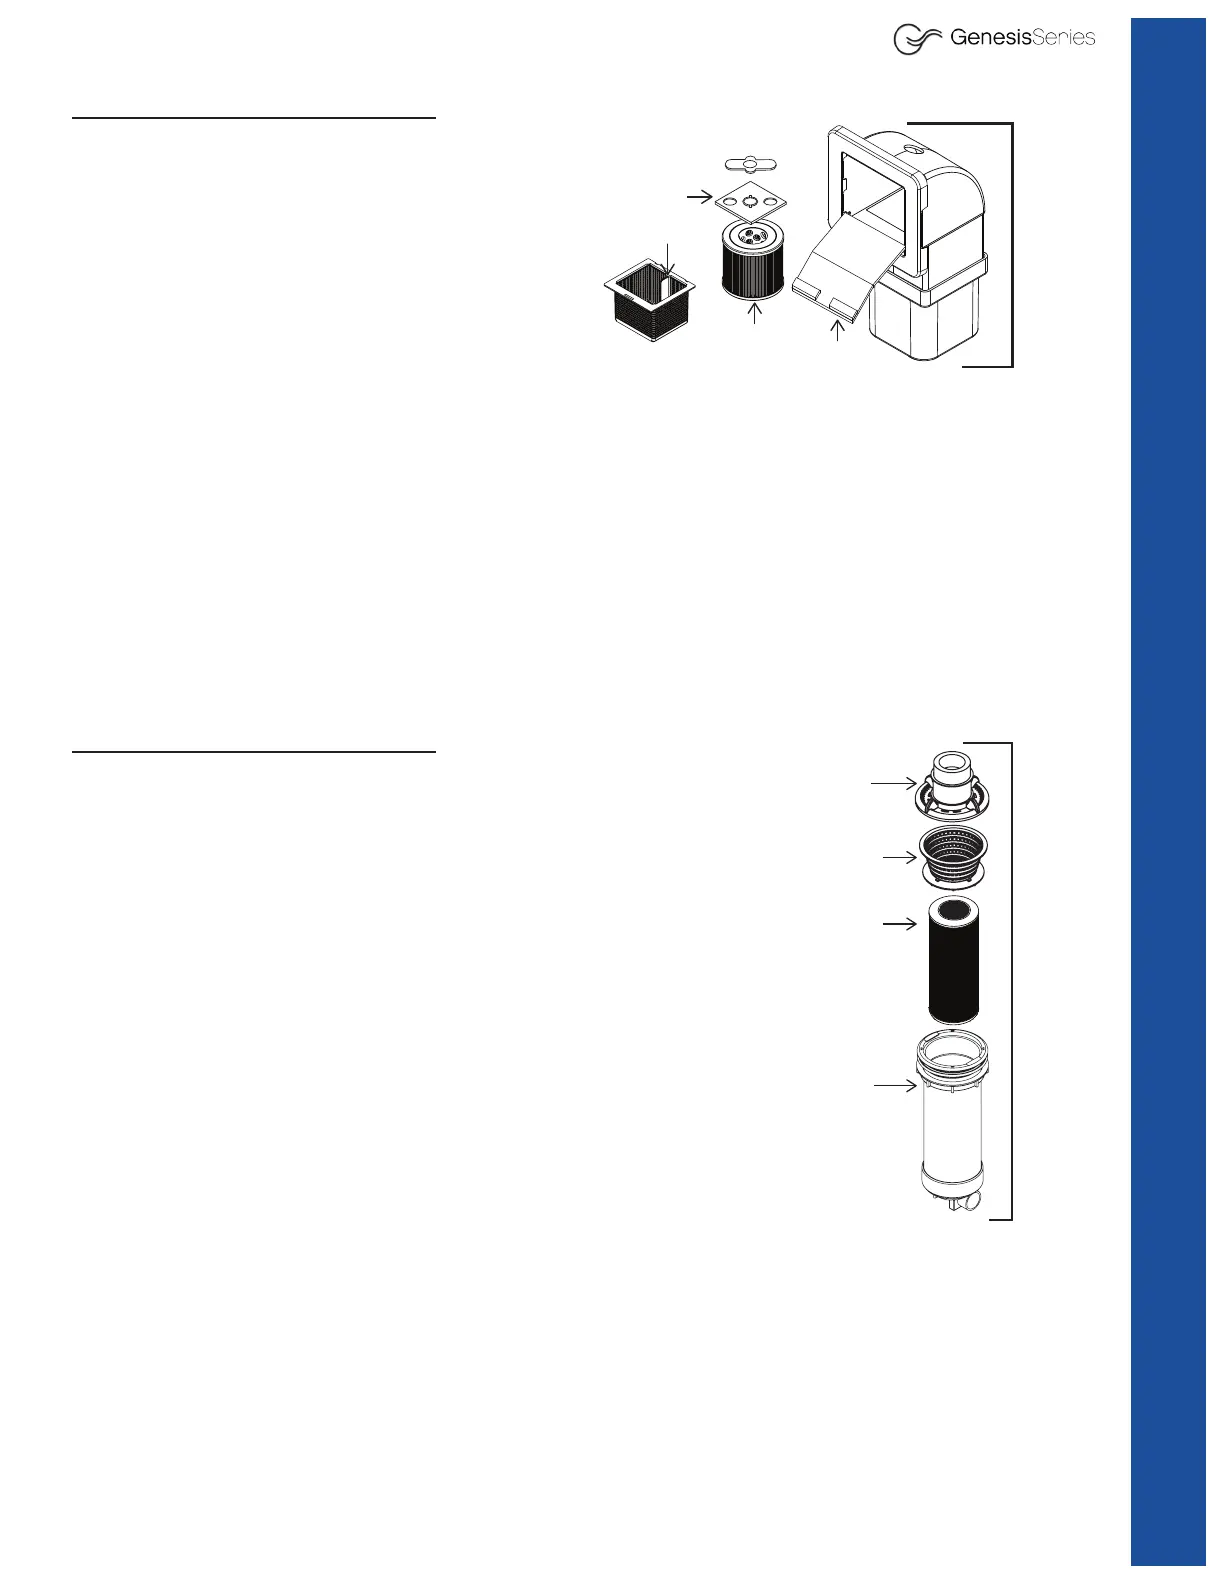
A. Mini Front Access Filter Cleaning Procedure - Gemini Series
(Do not use a pressure washer):
1. TURN POWER TO SPA OFF!
2. Remove skimmer basket by grabbing the
handle and pulling upwards toward the
opening. Clean out and hose off debris.
3. Remove entire diverter plate* and hose off.
4. Remove the lter cartridge by grabbing the
top of lter and pulling up.
5. Clean lter cartridge by soaking it in a
bucket with water and 8 oz. of Thermo Spas
Filter Clean. Mix solution by moving lter
cartridge up and down several times. For best results allow the lter to soak for 12-24 hours.
After soaking, remove the lter and rinse out any remaining debris. After rinsing allow lters
to air dry.
6. Allow the lter cartridge to dry completely before reinstalling. To install, hold down the
oating weir, insert cartridge through the opening and drop it into the lter housing. Install the
diverter place by placing it over the lter and pressing down. Grab the skimmer basket by
the handle and reinstall by inserting it through the oating weir.
*Note: Diverter is installed as one piece. The diverter plate can be adjusted to increase or de-
crease skimming action. By rotating the lower diverter plate and increasing the hole size you will
increasing skimming action.
B. Top Mount Filter Cleaning Procedure - Atlantis and Chesapeake Series
(Do not use a pressure washer):
1. TURN POWER TO SPA OFF!
2. Remove round weir by turning assembly and pulling it upward.
3. Once the round weir is removed, this will expose the skimmer
basket that sits in the lter canister. Pull the basket up to
remove.
4. Remove lter cartridge by grasping top of lter and pulling
upward.
5. Clean lter cartridge by rst lling a bucket with water, adding
8 oz. of ThermoSpas Filter Clean. Mix solution by moving lter
cartridge up and down several times. For best results, allow
lter to soak for 12 to 24 hours (never less than 3).
6. After soaking, remove lter and rinse out any remaining debris.
You can do this using a garden hose with high-pressure nozzle.
After rinsing, allow lter to air dry.
Note: If you are experiencing calcium deposits on your lter, (a
white, chalk-like substance), you may need to soak your cartridge in
“Filter Clean” for an extended period of time. Calcium deposits are
an indication of very hard water. For instructions on what to do if your water is unusually hard,
please refer to the Chemical Care Guide that comes with your hot tub. If you are still experienc-
ing problems, contact the ThermoSpas Customer Care Department at 800.876.0158.
7. To install cartridge, make sure weir/basket assembly has been removed, then simply insert
lter into cartridge housing. Finally, replace weir/basket assembly by loading it into the top of
the cartridge housing, remembering to twist until the at edges are locked together.
Housing
Assembly
Upper
Diverter
Lower
Diverter
Filter
Cartridge
Skimmer
Handle
Floating
Filter
Cartridge
Skimmer
Basket
Filter
Canister
Round
Weir
Complete
Housing
Assembly
Changing/Cleaning Filters
 Loading...