Electric Golf Buggy – E4000 & E4000S
E&OE © 2020 Thomson 11
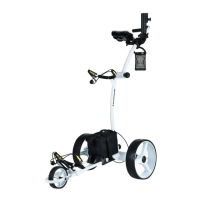
Operating your Golf Buggy
1. To turn the golf buggy ON, hold down the ON/OFF button for about 2 seconds. The battery charge
LED should light up. A battery indicator with green or red colour LEDs on the handle shows the battery
charge at any time.
2. While holding on to the handle, press the Timer button to set your distance. The golf buggy will start
moving forward.
3. To stop or slow down the golf buggy, press the ON/OFF buttons.
Charging the Battery
1. Charge the battery by plugging-in the charger into the battery first, then plug the charger into the
mains electrical supply. Ensure that the battery gets charged after each round of golf. Charging is
complete when the charger light changes colour. Battery charging takes anywhere between 5-12
hours.
2. Once the battery is fully-charged, disconnect the battery from the charger, then the charger from the
mains electrical supply. There are two types of indicator lights. The changes in LED colours for
these different charging statuses are as follows:
a. The LED will turn green when connecting the battery and changes to red once connected to an
outlet, indicating that the battery is being charged. The LED will revert to green once the battery
is fully charged.
b. The LED light will start as a steady green. If the battery requires charging or while charging the
battery, the LED light will revert to a flashing green. When the battery is fully charged, the LED
will stop flashing and revert to a steady green.