Si Biased Detector
Page 9 Rev F, December 8, 2014
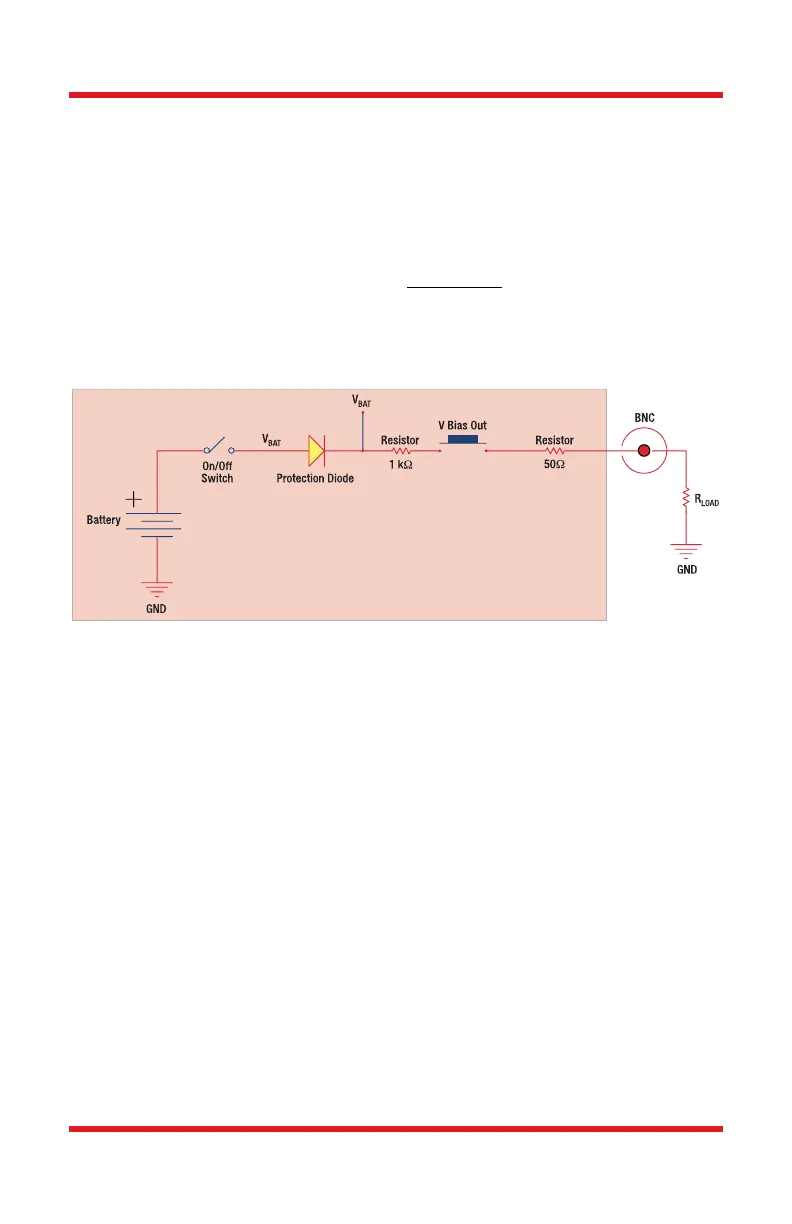
The output bias voltage will be dependent on the load resistor as described
below. The A23 battery voltage characteristics show that the charge level is
almost depleted as the voltage drops below 10 V. For this calculation we assume
9.6 V since V
BAT
= low battery voltage – one diode drop (0.6 V) = ~9 V. The
detector will continue to operate until the battery charge is completely drained,
however these numbers provide a reference point at which the battery should be
replaced.
=
∗
+
:
=9,
=50,
=1050
=
4.11. Battery Replacement
Thorlabs delivers each DET with an A23 12 V battery installed. This battery is
readily available at most retail stores, as well as through Thorlabs. The battery
supplied will deliver about 40 hours with a 1 mA load, roughly equivalent to a
continuous 1.5 mW light source at peak wavelength. The supply current when
the unit is on and no light is applied is very small and should not significantly
degrade the battery.
Locate the battery cap directly above the output BNC. Unthread the cap and
remove the battery. Install the new battery into the cap, negative side in, and
thread back into the DET. Be careful not to cross thread the cap into the housing.
The DET includes a protection diode to prevent damage if the battery is installed
backwards. The battery direction is located on the housing.