4
Charging Instructions
CHARGING INSTRUCTIONS
SUITABLE FOR 12 VOLT VEHICLES
Connecting the charger to a battery in a vehicle:
The vehicle battery does not need to be disconnected or removed from the
vehicle to use this charger as long as the following instructions are followed:
Ensure the ignition and all of the accessories in the vehicle are switched off as
this will maximise the charge that your battery receives as well as minimising
any chance of damage occurring to the vehicle onboard electronics.
If accessories in the vehicle are left on and their power consumption exceeds
the output of the battery charger your battery can still discharge with the charger
connected and operating.
1. Inspect the electrolyte levels in the battery and top up if required.
2. Connect the red positive (+) lead of the battery charger to the
positive (+) post of the battery.
3. Connect the negative (-) lead of the battery charger to negative (-) post
of the battery.
4. Plug the battery charger into the mains power supply and switch
on power.
5. If you are charging a Calcium battery hold down the selector switch
for 5 seconds until the green LED lights up. The charge map for
Calcium batteries is now being used.
IMPORTANT: DO NOT USE THE CALCIUM FUNCTION ON ANY OTHER
TYPE OF BATTERY AS THIS COULD DAMAGE YOUR BATTERY.
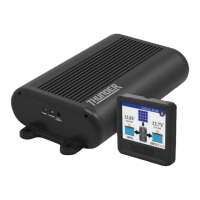
6. The battery is fully charged when the THUNDER logo is fully lit and the
percentage reads 100%. This is the maintenance stage of the charger,
and it can be left connected in this stage indefinitely without damage to
the battery, making it ideal for winter maintenance or periods where the
vehicle is not going to be used for some time.
DISCONNECTING THE CHARGER FROM A BATTERY:
1. To avoid sparking, turn off and unplug the charger from the mains power
supply before making or breaking connection to the battery.
2. Remove the black negative (-) then the red positive (+) of the battery
charger from the battery or unplug the terminal connector lead.
3. Re-inspect the electrolyte levels in the battery and top up if required
(non maintenance free and non sealed battery types only).
REVERSE POLARITY PROTECTION:
When the battery charger has been connected to the battery in a reversed
polarity, the reverse warning indicator (orange LED display) will continually flash.
The charger will not supply any output power until a correct polarity connection
is made.
If the battery the charger is connected to is faulty the battery error indicator
(red led on display) will continually flash.