7
TigerKing Operating Instructions and Parts Manual
TK12000, TK20000, TK30000, TK50000, TK70000
TigerKing Portable Oil-Fired Heaters
Operation (Continued)
VENTILATION
Risk of indoor air
pollution. Use heater
only in well ventilated areas.
Provide a fresh air opening of at least
three (3) square feet (2,800 sq. cm) for
each 30,000 kcal/Hr. rating. Provide
extra fresh air if more heaters are
being used.
Example: A TK50000 heater requires one
of the following :
1. A two-car garage door raised six
inches (15.24 cm).
2. A single-car garage door raised nine
inches (22.86 cm).
3. Two, thirty inch (76.20 cm) windows
raised fifteen inches (38.1 cm).
TO START HEATER
1. Fill fuel tank with kerosene or No. 1
fuel oil.
2. Attach fuel cap.
3. Plug power cord into three prong,
grounded extension cord. Extension
cord must be at least six feet long.
- Extension Cord Wire Size Requirements:
- 6 to 10 feet (1.8 to 3 meters) long,
use 18 AWG conductor.
- 11 to 100 feet (3.4 to 30.53 meters)
long, use 16 AWG conductor.
- 101 to 200 feet (30.8 to 61 meters)
long, use 14 AWG conductor.
4. Turn THERMOSTAT CONTROL KNOB
to desired setting and push power
switch to “ON” position. Power
indicator lamp will light and heater
will start.
If heater does not start, the ther-
mostat setting may be too low.
Turn THERMOSTAT CONTROL KNOB
to higher position to start heater. If
heater still does not start, turn power
switch to OFF and then to ON posi-
tion. See Troubleshooting Chart on
Page 16,17.
NOTE: The major electrical components
of this heater are protected by a safety
fuse mounted to the PCB board. If your
heater fails to start, check this fuse first
and replace as necessary.
You should
also check your power source to insure
that proper voltage and frequency are
being supplied to the heater.
TO SHUT DOWN HEATER
Turn power switch to “OFF” and unplug
power cord.
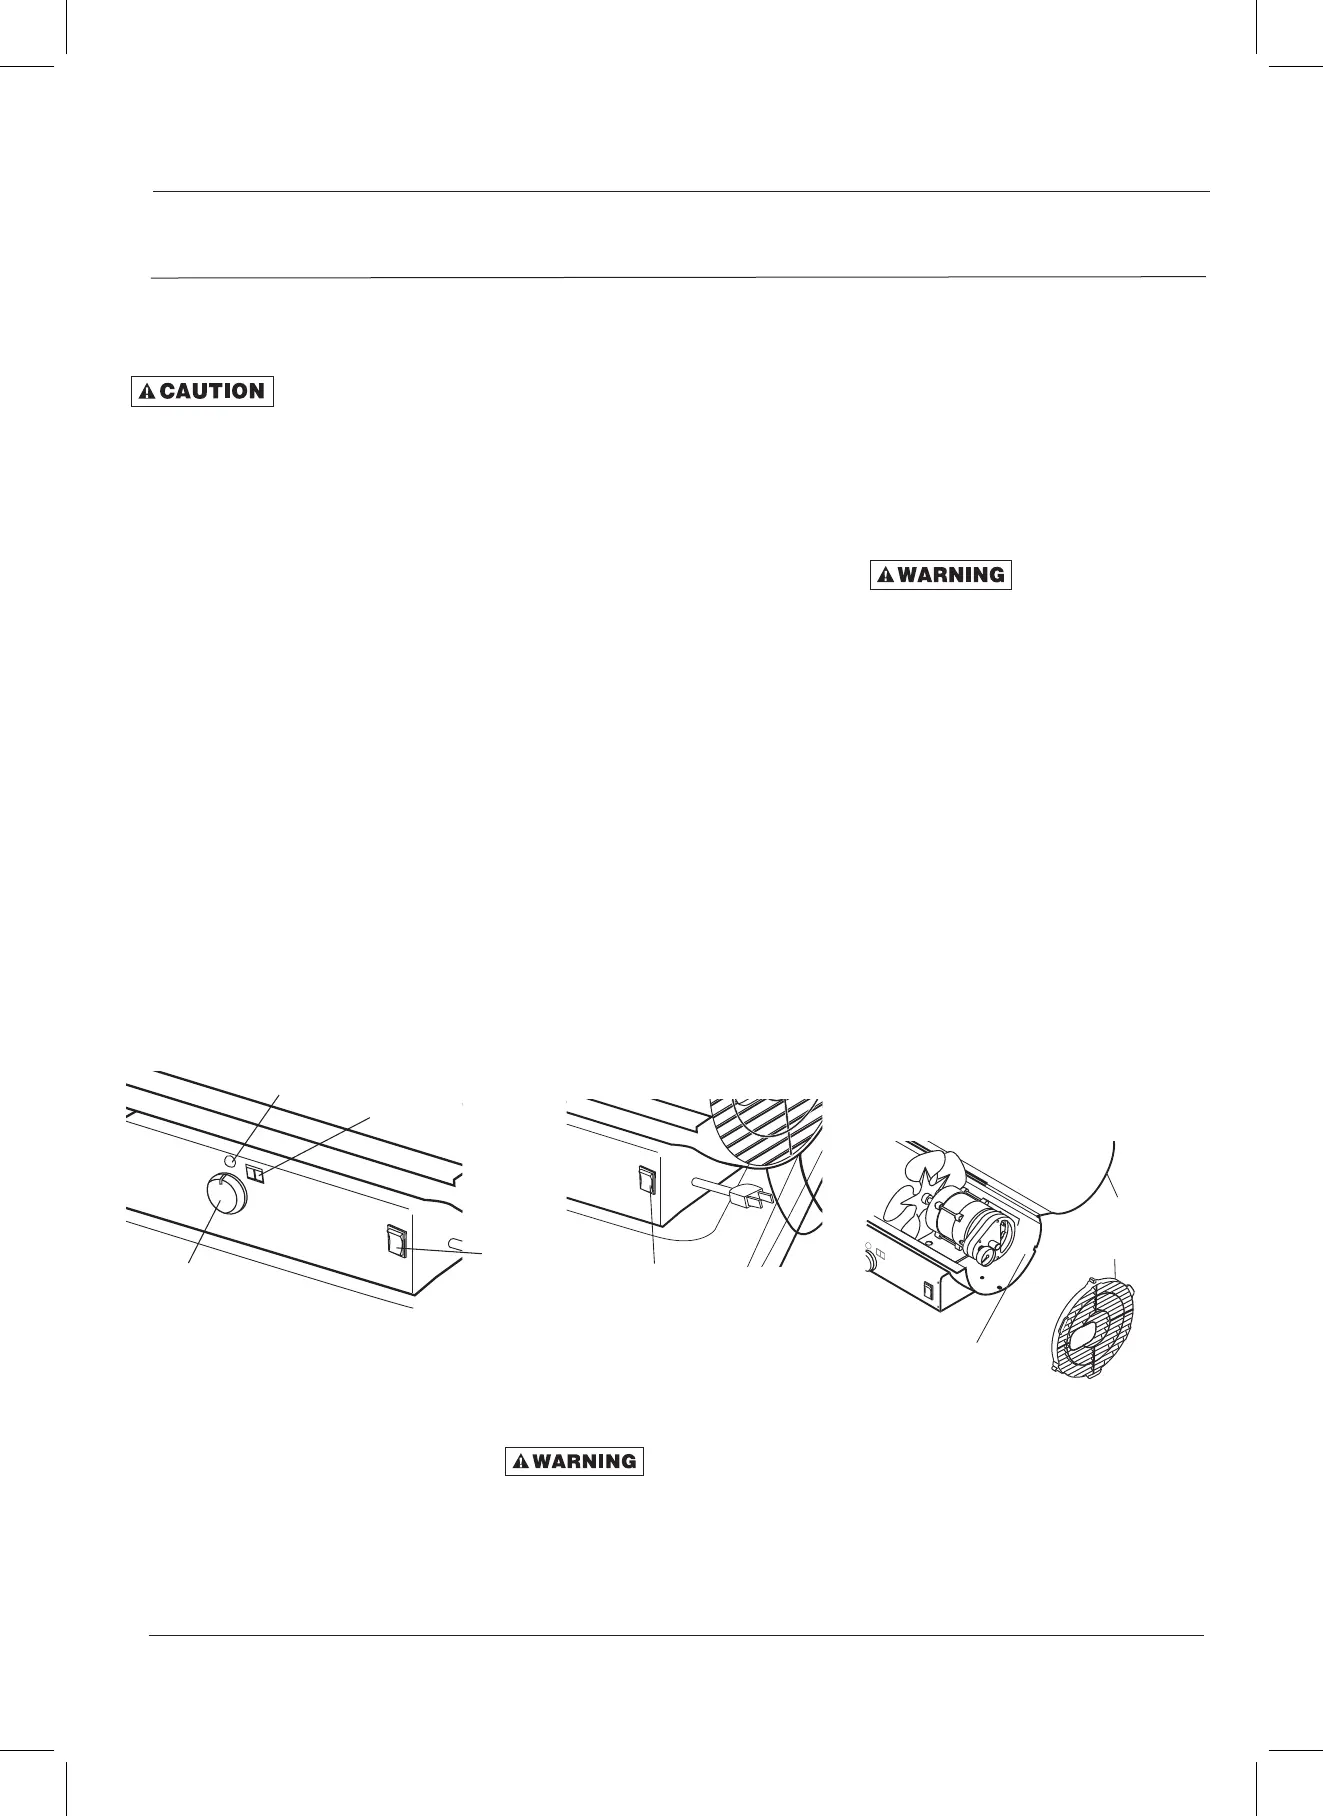
Power
Reset
Switch
Lamp
Thermostat
Control Knob
Room Temp.Display
Power Reset Switch
Figure 11 – Controls for All Models
TO RESTART HEATER
1. Wait 10 seconds after stopping heater.
2. Repeat steps under, “TO START
HEATER.”
ELECTRICAL OUTLET
Shock Hazard!
- Never plug in an appliance with more
than a 5amp rating into this outlet.
- Always keep outlet covered when
not in use.
- 220V 15amp max(non fused).
IMPORTANT: Reinstall plug fully into
hole in tank; otherwise it will not seal
completely.
- Make sure storage place is free of dust
and corrosive fumes.
- Store the heater in the original box
with the original packing material and
keep USER’S MANUAL with heater.
Maintenance
Never service heater
while it is plugged in
or while hot!
USE ORIGINAL EQUIPMENT REPLACE-
MENT PARTS. Use of third-party or
other alternate components will void
warranty and may cause unsafe
operating conditions.
FUEL TANK
Flush every 200 hours of operation or as
needed (See Storage, page 7).
AIR INTAKE FILTER
WASH AND DRY WITH SOAP AND
WATER EVERY 500 HOURS OF
OPERATION, OR AS NEEDED.
- Remove screws along side of heater
using medium Phillips screwdriver.
- Lift off upper shell.
- Remove fan guard.
- Wash or replace air intake filter.
- Reinstall fan guard and upper shell.
F
n
r
Air In
k
Fil
U
er Shel
 Loading...