9
TigerKing Operating Instructions and Parts Manual
TK12000, TK20000, TK30000, TK50000, TK70000
TigerKing Portable Oil-Fired Heaters
- Remove upper shell (See Air Intake
Filter, page 8).
- Remove fan (See Fan Blades).
- Remove ignitor wire from spark plug.
- Remove spark plug from burner head
using medium Phillips screwdriver.
- Clean and regap spark plug electrodes
to .140” (3.5 mm) gap.
- Reinstall spark plug into burner head.
- Attach ignitor wire to spark plug.
- Reinstall fan and upper shell.
PHOTOCELL
CLEAN PHOTOCELL ANNUALLY OR AS
NEEDED.
(For Models TK20000 only)
- Remove upper shell (See Air Intake
Filter, page 8).
- Remove fan (See Fan Blades).
- Remove photocell from its mounting
bracket.
- Clean photocell lens with cotton swab.
TO REPLACE: Remove side cover near
power switch.
- Disconnect wires from circuit board
and remove photocell.
- Install new photocell and attach wires
to circuit board.
- Reinstall fan and upper shell.
(For Models TK30000, TK50000 only)
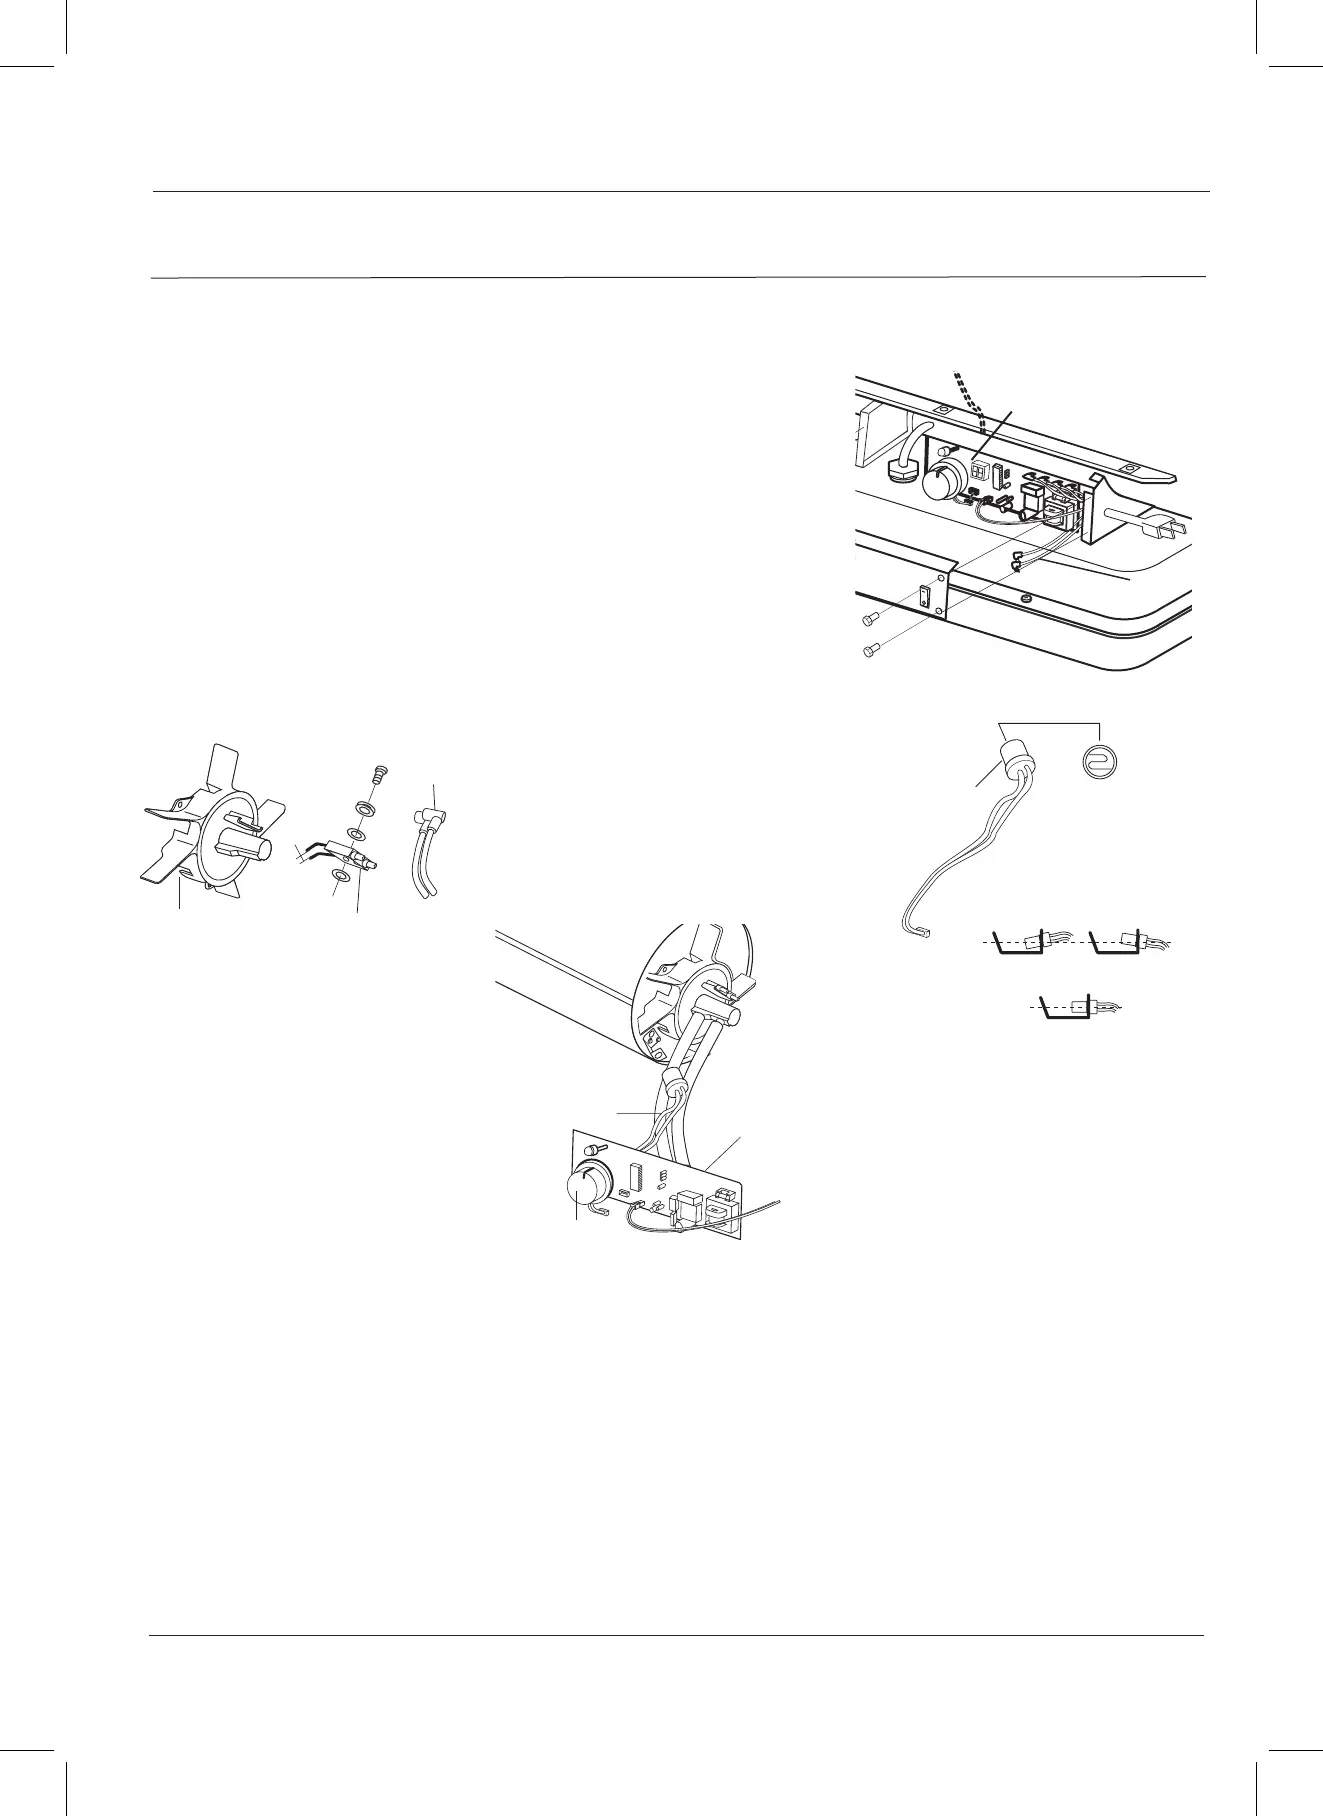
Ignitor
Wire
Burner Head
Gap
Spark Plug
Figure 18 – Spark Plug Replacement
Maintenance (Continued)
- Remove upper shell (See Air Intake
Filter, page 8).
- Remove fan (See Fan Blades).
- Remove photocell from its mounting
bracket.
- Clean photocell lens with cotton swab.
TO REPLACE: Remove side cover near
power switch.
- Disconnect wires from power switch
and remove side cover.
- Disconnect wires from circuit board
and remove photocell.
- Install new photocell and attach wires
to circuit board.
- Replace switch wires to power switch
and side cover.
- Replace fan and upper shell.
FUEL FILTER
CLEAN OR REPLACE TWICE PER
HEATING SEASON OR AS NEEDED.
(For Models TK20000 only)
- Remove side cover screws using
medium Phillips screwdriver.
- Remove side cover.
- Pull fuel line off fuel filter neck.
- Turn fuel filter counterclockwise
90 degrees, pull, and remove.
- Wash fuel filter with clean fuel and
PHOTO CELL
3VE49A Only
WIRE
CIRCUIT BOARD
Figure 19 – Photocell Replacement for
Photocell
Photocell
lens
Install Photocell
1) Incorrect
Figure 20 – Photocell Replacement for
2) Correct
Switch
Wires
circuit board