89
Installing Stair Riser Light
Installing Under-Rail Light
Stair Riser Light
Housing
Stair Riser Light
Cover
Stair
Riser
#6 x 1”
Wood
Screw
Set
Screw
1
2
3
4
5
6
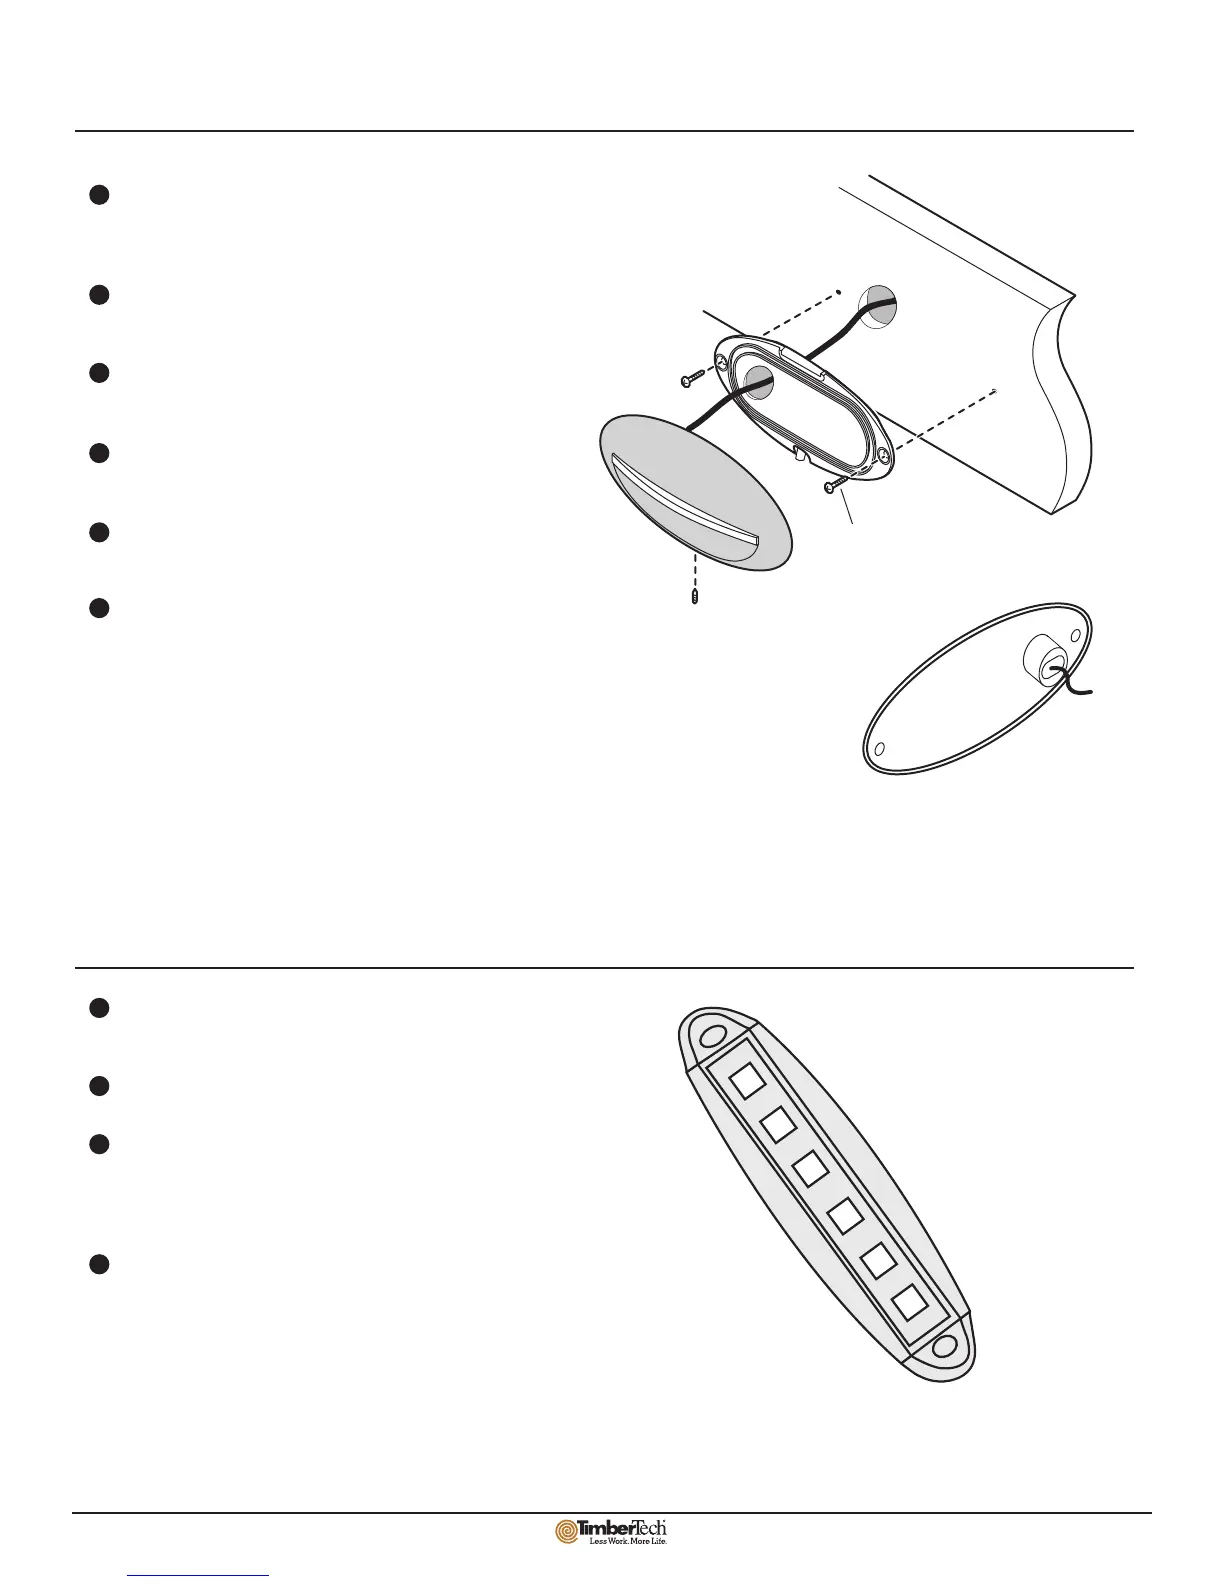
Locate and mark vertical and horizontal centerlines for Stair Riser
Light location. Level the back plate and secure using #6 x 1” wood
screws.
Use the back plate as a template to locate the center of the 1-1/2“
hole for the “bump out“.
Cut a 1-1/2” diameter hole at the center point using a 1-1/2”
spade bit.
Trim excess wire length and make wire connection to main circuit
wire using wire nuts provided.
Align the lighting “bump out” with the 1-1/2” hole and assure
alignment between the Stair Riser light and the back plate.
Secure housing to back plate using the set screw with a 2.5mm
Allen wrench.
1
2
3
4
Choose the location for the Under-Rail Light so it is centered in
the balusters.
Drill a 3/8” hole to feed the wire through the H Channel.
Feed the wire and mount the light to the recessed H Channel
making sure the light is tilted in (light comes with a 15˚ tilt which
is usually facing the deck). Use the center alignment beam for a
guide for the 2 screws. Use 8-3/4“ screw size.
Trim excess wire length and make wire connection to main circuit
wire using nuts provided.