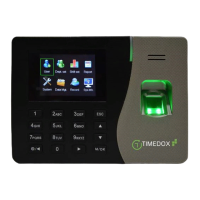
Setting Date and Time
1. Press to power up the Time-
clock.
2. Press-and-hold to display the
main menu
3. Select System and then select
Date/Time.
4. Set the date and time, using the
keypad and arrows.
5. Press
to save settings.
6. Press ESC to return to the main
screen.
7. Verify that the date and time are
correct.
Adding and Enrolling Employees
1. Press-and-hold to display the
main menu.
2. Select User and then select Add
User.
3. Define the following the settings:
Timedox Tip; *Employee’s names will be added to the
spreadsheet where reports are generated, so there is
no need to add them at the clock
4. Choose one of the following options:
FP
(Fingerprint)
Verify that the protection sticker has been removed.
Place and lift desired finger three times, as instructed.
PWD
(Password)
Enter a 4-8 digit PIN.
Card/Fob Wave the card over the Time-clock top-right across the double line. (Silver Plus
5. Press ESC until the main screen is displayed.
6. To test the settings, use your chosen method to clock-in:
FP Place the registered finger on the sensor, covering the entire surface.
PWD Using the number keypad, enter your ID number and then your PWD.
Card//Fob Slowly wave the proximity card once over the fingerprint sensor surface.
7. For each employee, repeat steps 4-6.
Note: Timedox automatically registers the first punch as IN and the following one as OUT.
You’re All Set! Now just roll with the punches.
ID ID
Name ID (See below)