3,5)ORRGOLJKW
FRQWUROFLUFXLW
//1
3,5)ORRGOLJKW
FRQWUROFLUFXLW
//
/
1
1
6ODYH)ORRGOLJKWV
7
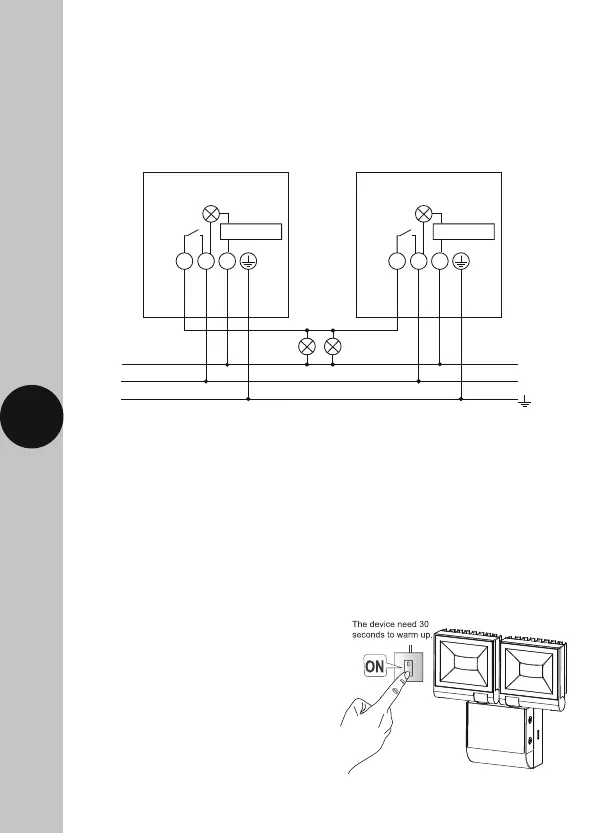
Parallel Switching
• A maximum of 4x LED200PIR twin floodlights can be wired in parallel
to enable any detector to turn ON all the lights connected.
• Please refer to the following diagram which shows and example
of 2x LED200PIR twin floodlights connected in parallel,
with 2 slave floodlights at the same time:
7. Setting Up
Walk Test Procedure (Test Mode)
• Make sure the PIR sensor is set to Test Mode i.e. the TIME ON Adjustment
to the minimum (fully anti-clockwise), and the Lux Level set the Sun symbol
(fully clockwise). We recommend using the knob adjuster included in the
accessory pack to adjust the Time and Lux settings, however a thin flat head
screwdriver or a 2.5mm Allen key could also be used.
• Turn the power to the unit ON.
See image 8.
The lamp will immediately illuminate
as the unit goes through its “warm-up”
period. After approximately 30 seconds
the lamp will extinguish. This indicates
the unit is wired correctly and the unit
is in Test Mode.
• Try to remain outside the detection area
during the warm-up period.
8