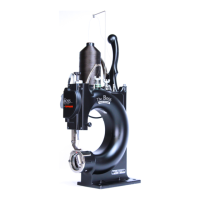
4
• Lower the needle foot
by pulling the stitch
handle until the
needle set screw
is visible.
• Loosen needle set
screw with furnished
allen wrench to allow
needle to be inserted
into needle bar hole.
• Insert needle
shank first,
fully into
needle bar
hole with
scarf spot
facing the
needle
set screw.
• With needle fully
inserted and
scarf spot facing
the needle set screw,
tighten set screw
firmly with the
allen wrench.
NEEDLE
FOOT
NEEDLE
BAR
NEEDLE BAR HOLE
NEEDLE
SHANK
Needle
Scarf
Spot
Towards
Set Screw
NEEDLE
SET SCREW
ALLEN
WRENCH
ACCESS
POINT
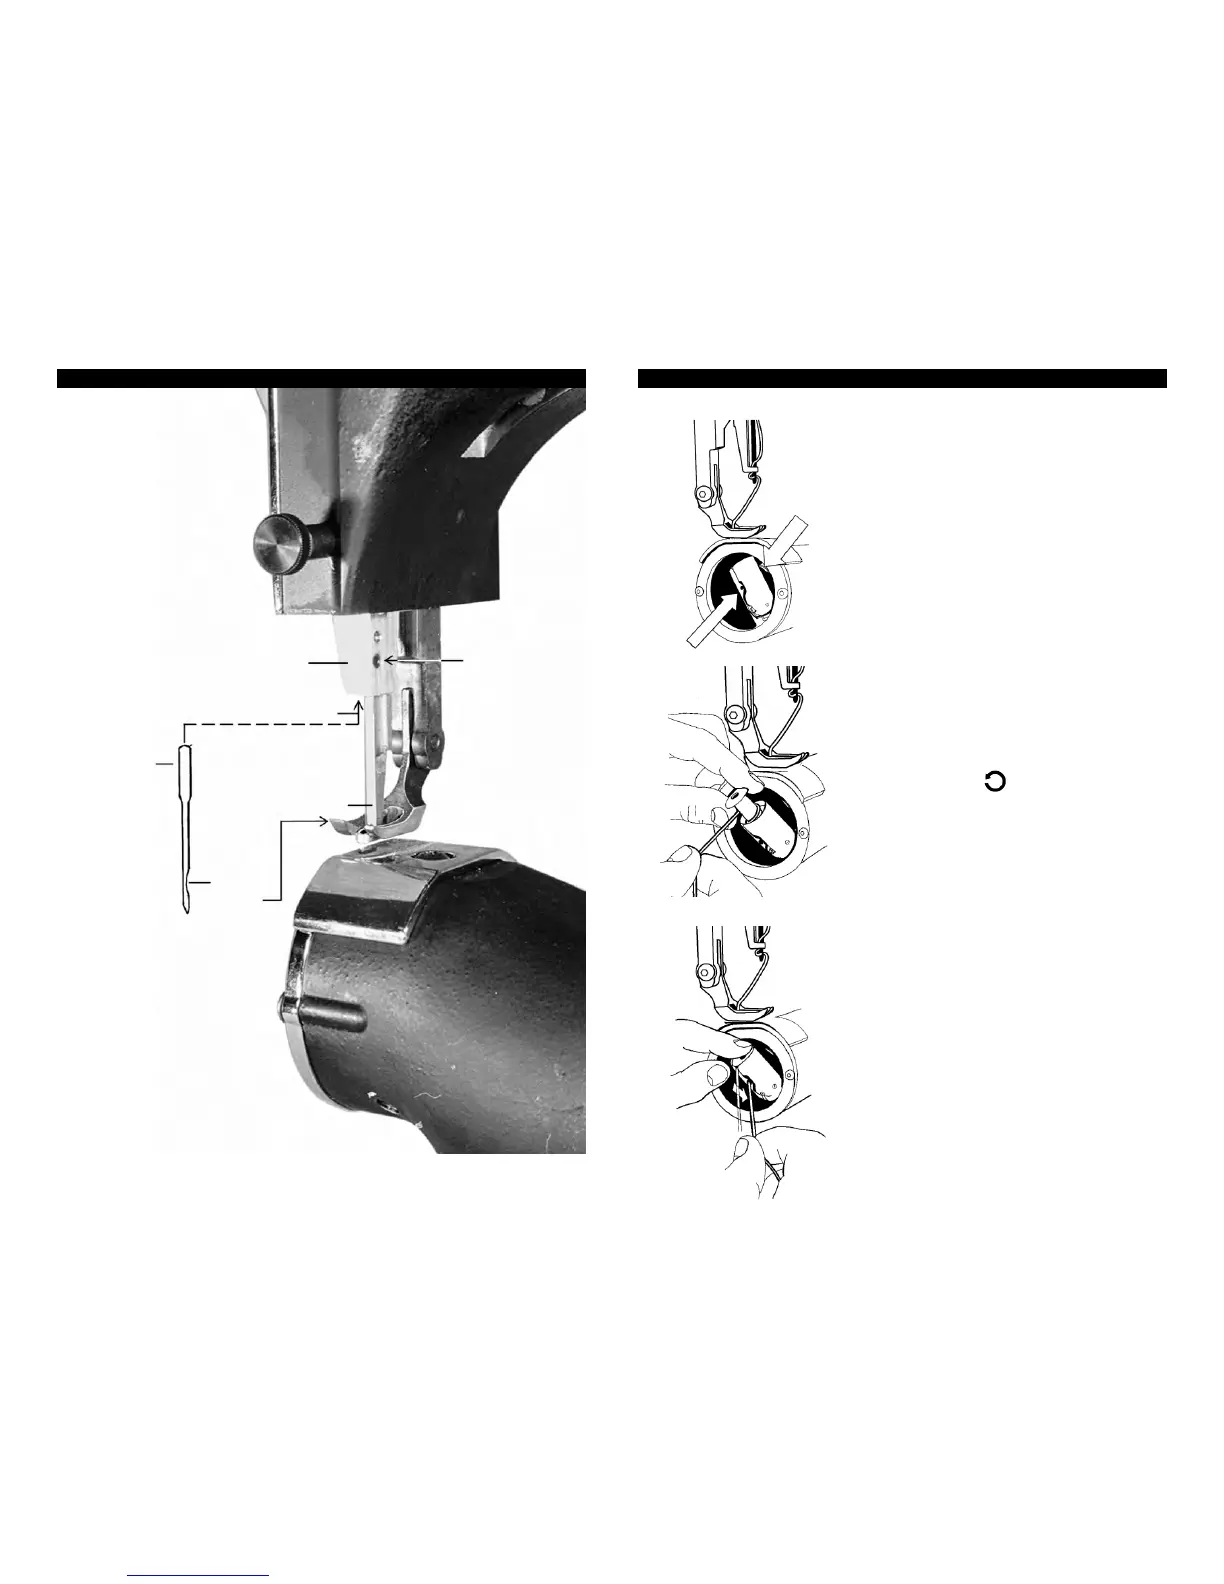
5
• Locate the bobbin shuttle in the end
of the cylinder bed. Press the shuttle
release latch to release the bobbin
cylinder (point A).
• Remove the empty bobbin spool
and wind with thread.
Do not fill bobbin to the point that is
has to be forced into bobbin shuttle!
• Insert wound bobbin with
6 - 8 inches of thread kept out
counterclockwise
as pictured.
• Hold bobbin in place to keep it from
turning. Now pull thread down the
tension spring slit (B) until thread
reaches thread slot in the shuttle.
• Secure shuttle by snapping the bobbin
cylinder back into place. There should
be 6 - 8 inches of thread hanging out
of the Bobbin Shuttle at the end of the
cylinder bed at this point.
(Bobbin Thread Tension Adjustment
Instructions on page 12)
A
Bobbin Shuttle
INSTALLING THE NEEDLE INSTALLING BOBBIN IN BOBBIN SHUTTLE